

In this Post, you will find How to make paper quilling Flower Pot Pocket Card. This card contains a note on which you can write your wishes and this note is in the pocket pot. This DIY greeting card is the best gift for your Love once in the form of birthday cards, Christmas cards, holiday cards, anniversary cards, Christmas greeting cards, Mother’s day card, Father’s day card, etc.
DIY Paper Quilling Flower Pot Pocket Card
For making this card you will need following materials:
- 3mm and 5m quilling strips
- quilling tool
- circle guide
- bulldog clip
- shape edge scissors
- glue
- curved tweezers
- semi pearl beads
- cardstock
- border punch
- heart punch
- Decorative Tape
Creating Large Blue Flowers:
Step 1:
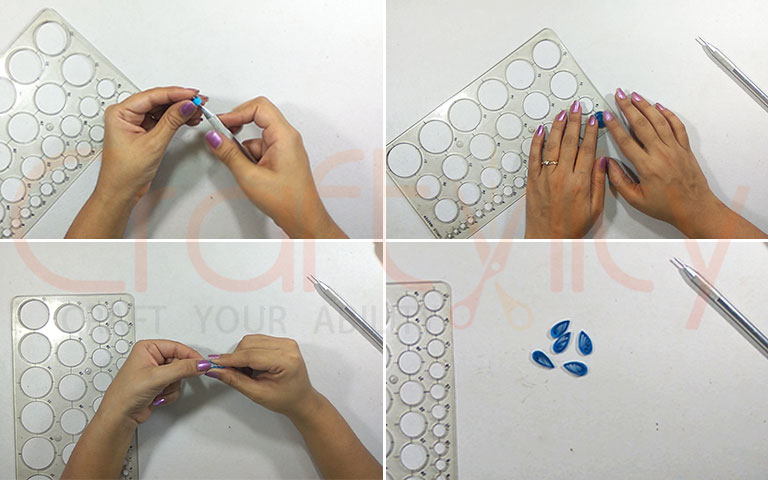
For creating the large flower, take 3mm blue strip of 17 inches and roll it with the quilling tool. Take the coil out from the tool without applying glue to it and place the coil in 17th circle of circle guide and allow it to unroll. Once the coil is unrolled take the coil out from the circle guide and now apply glue to its end and secure it. Create teardrop shape by pinching the coil from one end. Thus we need more 4 teardrop shapes to create 1 petal.
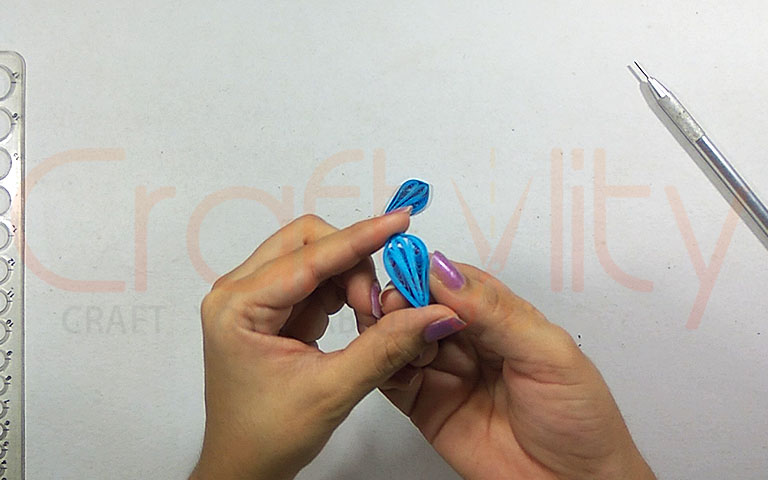
Step 2:
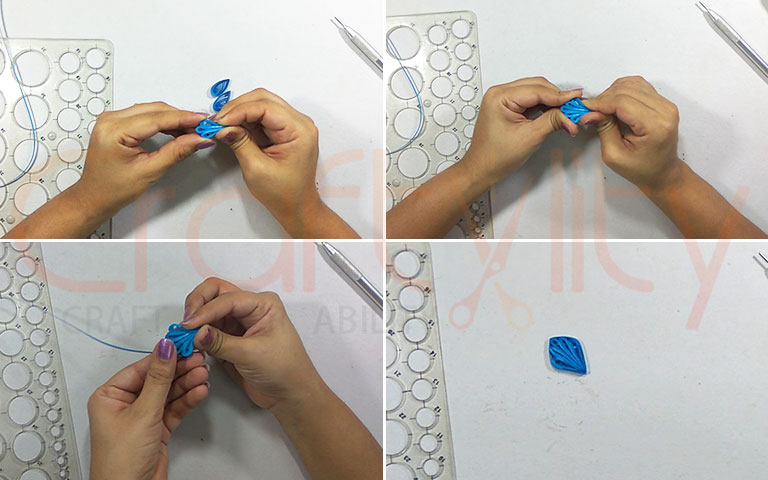
Take all 5 teardrop shape and start gluing them together. Note that center petal is the highest and rest all petals are in descending manner. Refer to above image.
Step 3:
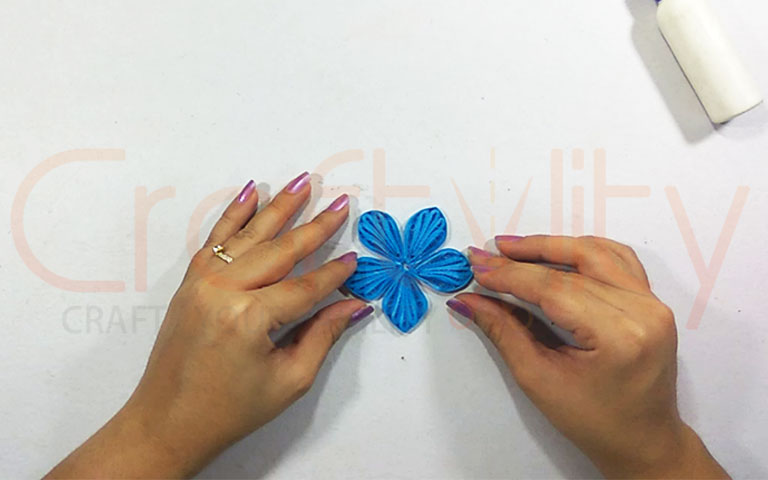
Thus create more 5 such petals and glue all the petals together to create one flower.
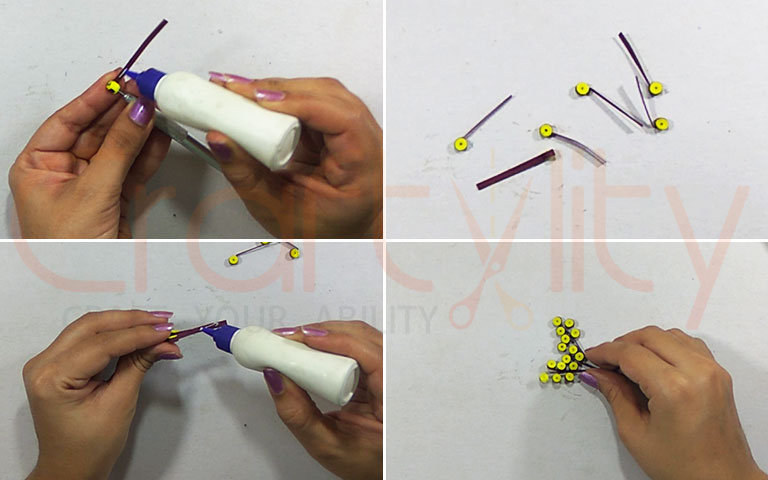
Step 4:
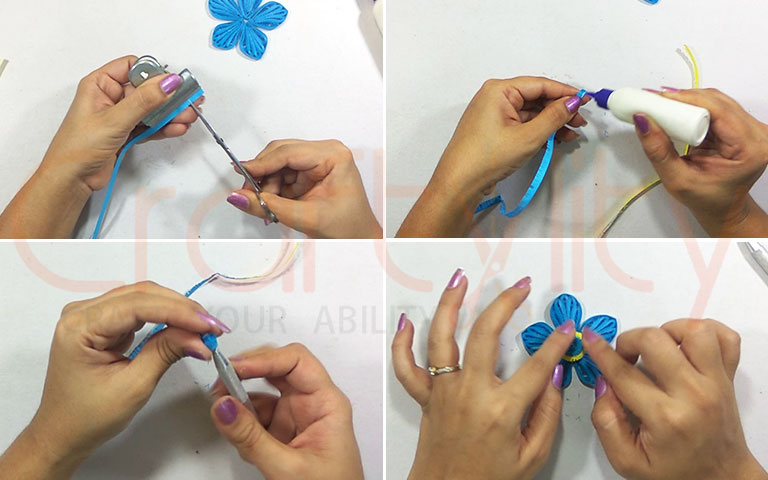
In this step, we will create the flower and that is a fringed flower. For creating this flower we need to take 5mm blue strip of 17 inches and yellow strip of 8 inches. Take a blue strip and fold it from a center and hold the strip with the paperclip (Bulldog clip) and start cutting with sharp edge scissors make sure that the gap between two cuts should not exceed more than 2mm. Similar cut yellow strip. Glue both the stips together and start rolling it with blue strip till the end of the yellow tip. Apply glue at the end of the strip and take it out from a tool. Glue this flower in the center of big blue flower created in previous steps.
Step 5:
Also, Create two small buds by sticking 3 teardrop shapes together.
Creating Pink Flowers:
Step 6:
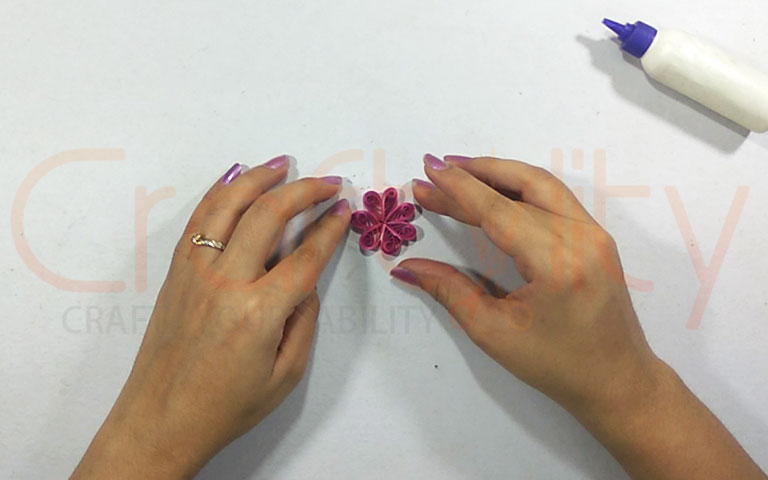
For creating second types of flower, take 5mm pink strip of 8 inches. As done in the previous step create a coil and leave the coil in the 13th circle and allow it to unroll. Take the unrolled coil out from the circle guide and secure its end by applying glue. Create Teardrop shape by pinching it from one end. Create 6 such teardrop shape and glue all the shapes together to form the second flower. Make 3 such pink flowers.
Creating Red Flowers:
Step 7:
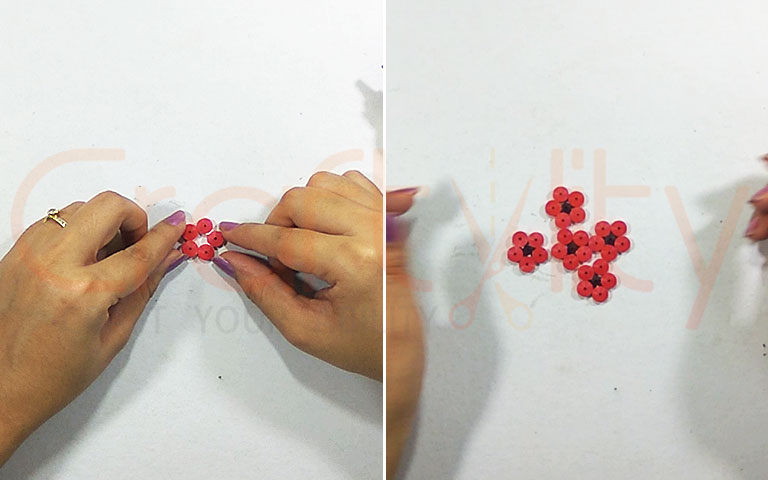
So let’s create the third flower and for this take 3mm red strip of 17 inches and create the tight coil. Create 5 such tight coils and glue them together. Take 3mm brown strip of 5 inches and create tight coil this is center part of a flower so glue this in the center of a red flower. Create 5 such flowers.
Creating Leaves:
Step 8:

For creating the leaves, take 3mm green strip of 17 inches long and create eye shape by creating loose coil and pinch it from both the sides. Create 3 different sizes of leaves by changing the length of strips and also different size othe f loose coil.
Step 9:
Take 3mm yellow strip of 9 inches and the brown strip of 2 inches and glue both the ends of the strip together. Start rolling it from the yellow Strip as I want yellow color in the center. Roll until the end of the yellow strip and one round of brown strip, leave rest brown strip as this will be used for sticking all the elements together.
Creating Card:
Step 10:
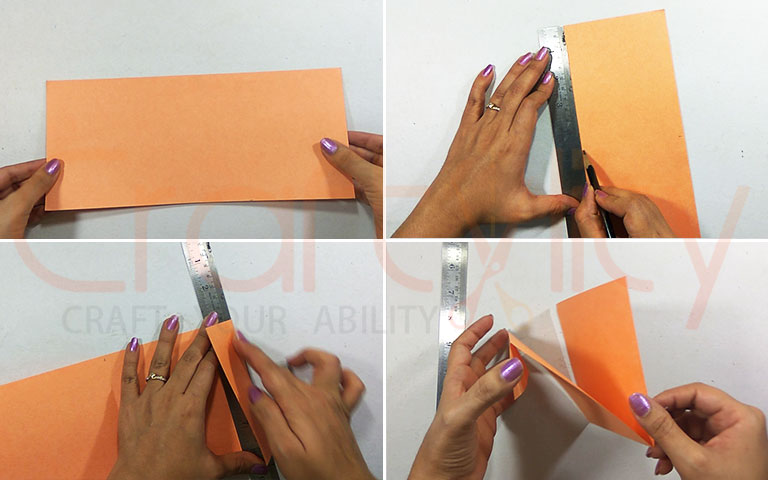
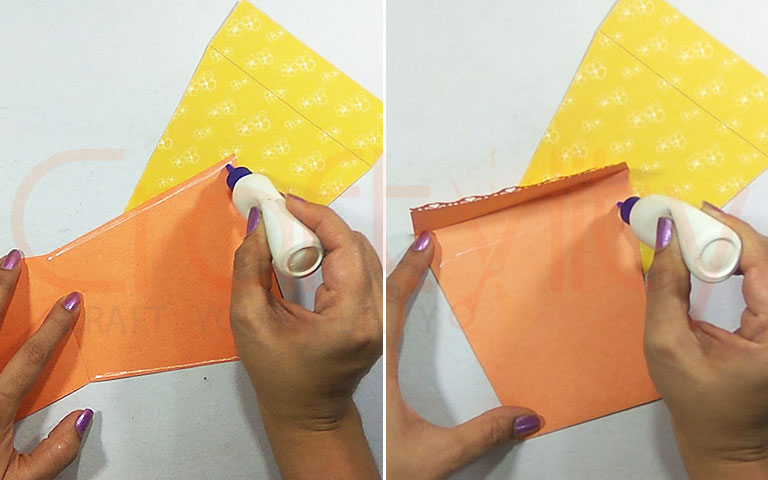
Now it’s time to create our card base, Take orange (you can take any colour of your choice) card stock of 24cms by 12cms and mark 12th and 24th cms on both the sides. Fold the marks in “Z” Shape as shown in above image.
Step 11:
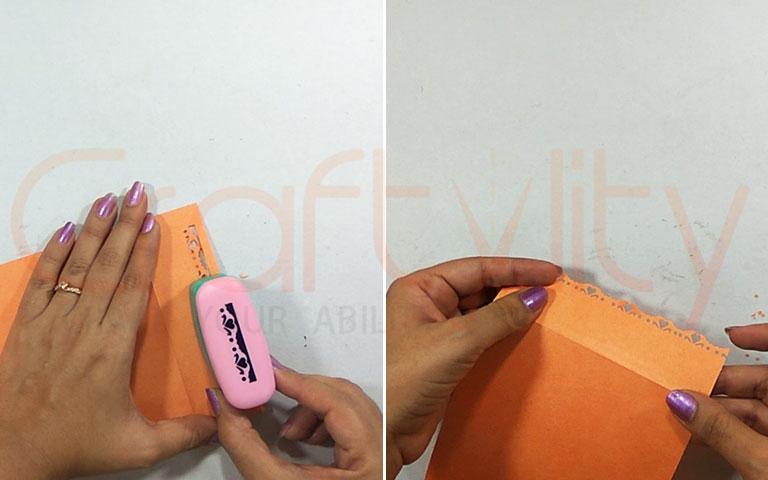
Take Border punch and punch the borders as done in above image.
Step 12:
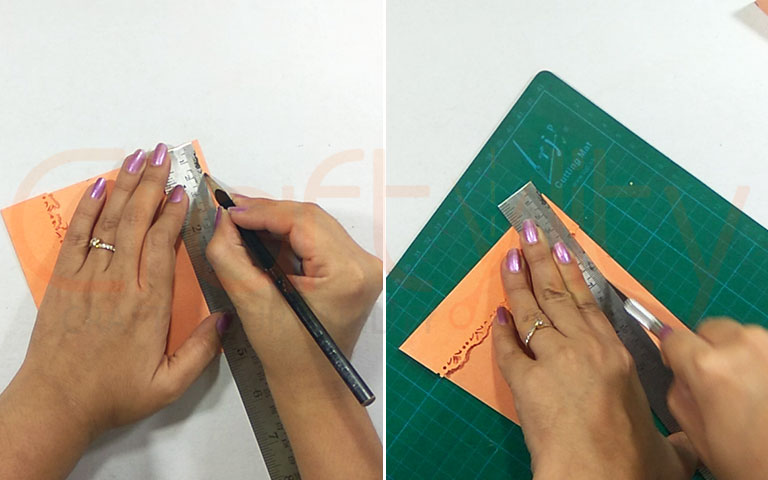
Mark 2cms on both sides and cut it with a cutter.
Step 13:
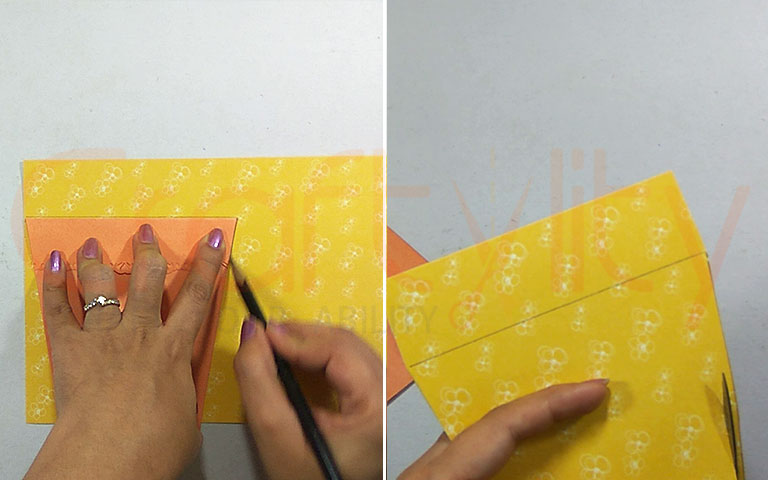
Trace this orange card on another cardstock and cut it. Cut this cardstock 1cms smaller than an orange card. Also keep 2cms to 3cms blank space as shown in above image.
Step 14:
Apply Glue on both the border of the sides and stick it. Also, Stick the top portion of the orange card.
Step 15:
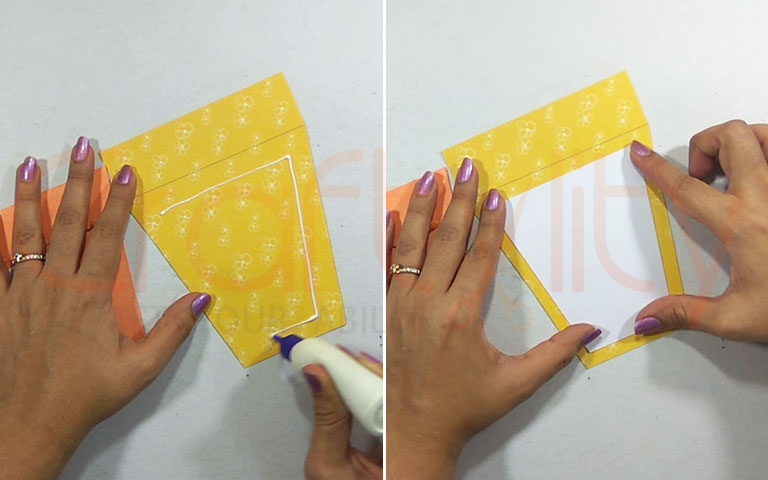
Cut White or any light colored cardstock and stick it on yellow cardstock as shown in above image.
Step 16:
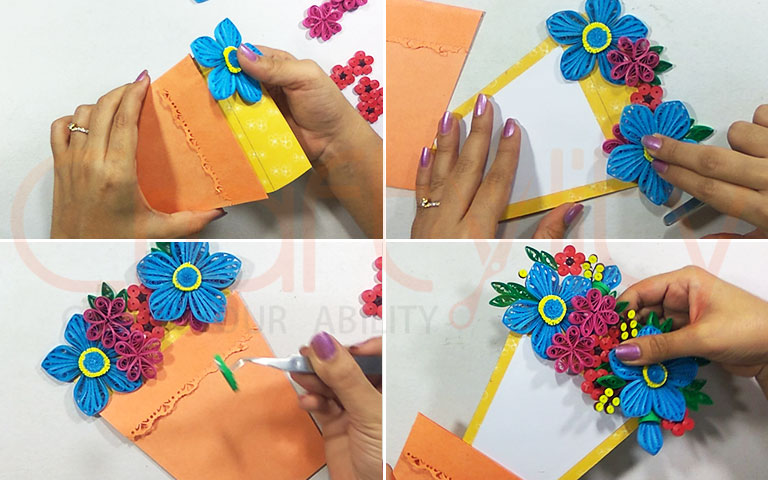
It’s time to glue all the flowers and leaves on the card. Stick them on black space which we had kept in yellow cardstock. Don’t Glue anything to the pot as at the end we need to take the yellow cardstock out from the pot.
Thus our Paper Quilling Flower pot pocket card is ready, hope you liked it. If you have any query creating this card then leave your questions in a comment section.
Happy Crafting!!!