

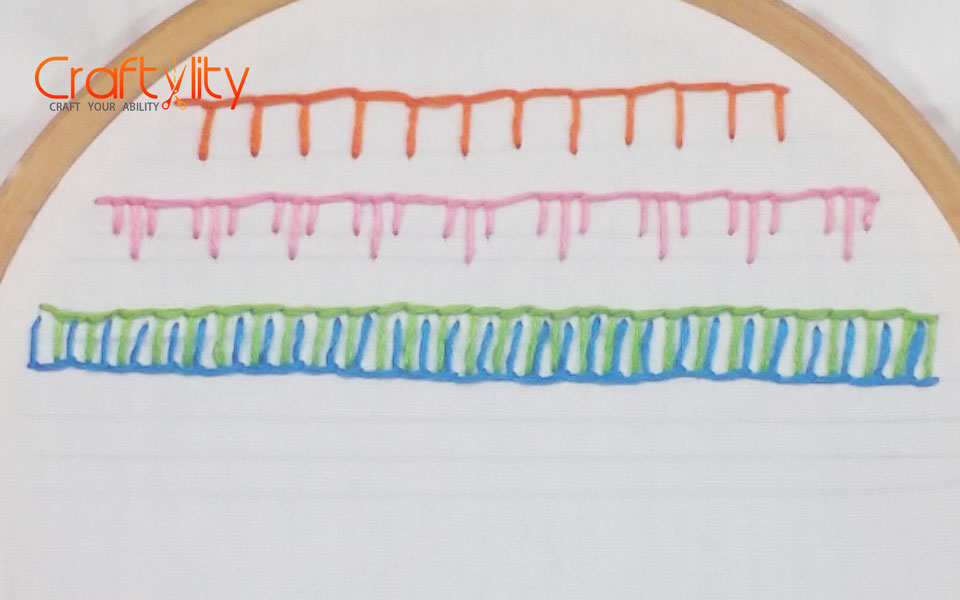
In this post you will find step by step instructions on How to Stitch Blanket stitch in 10 different ways:
Also Checkout our Recommended Products for Embroidery.
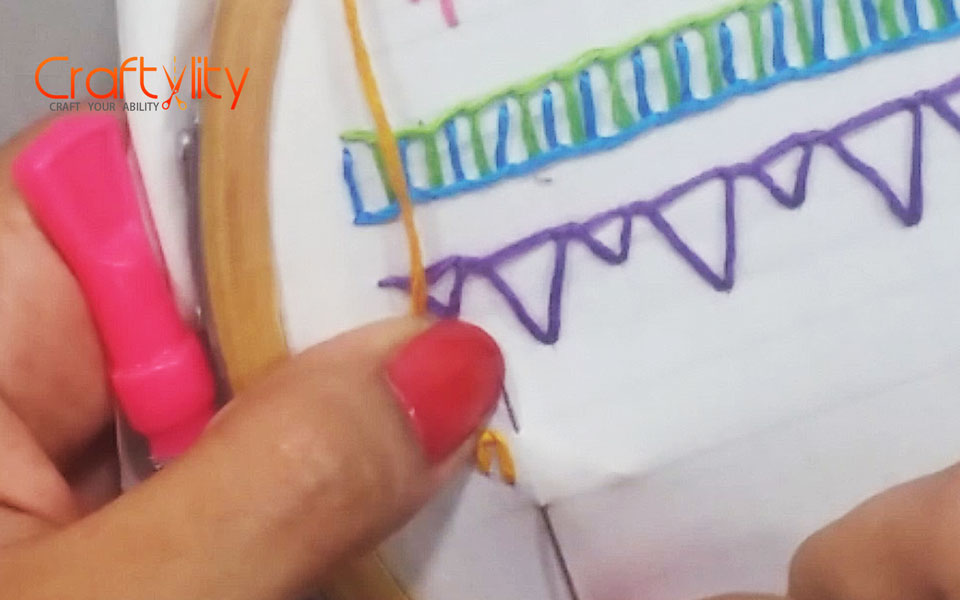
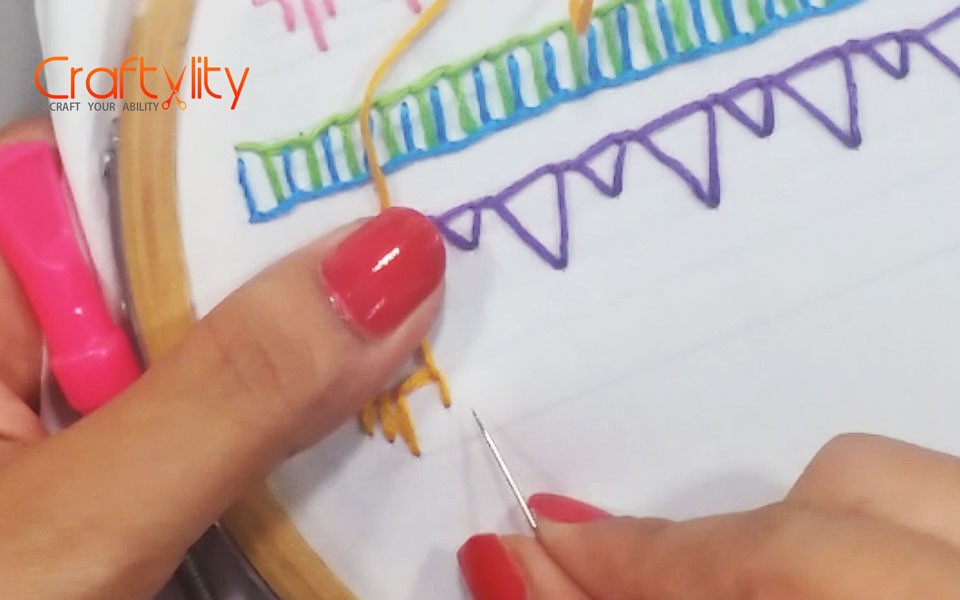
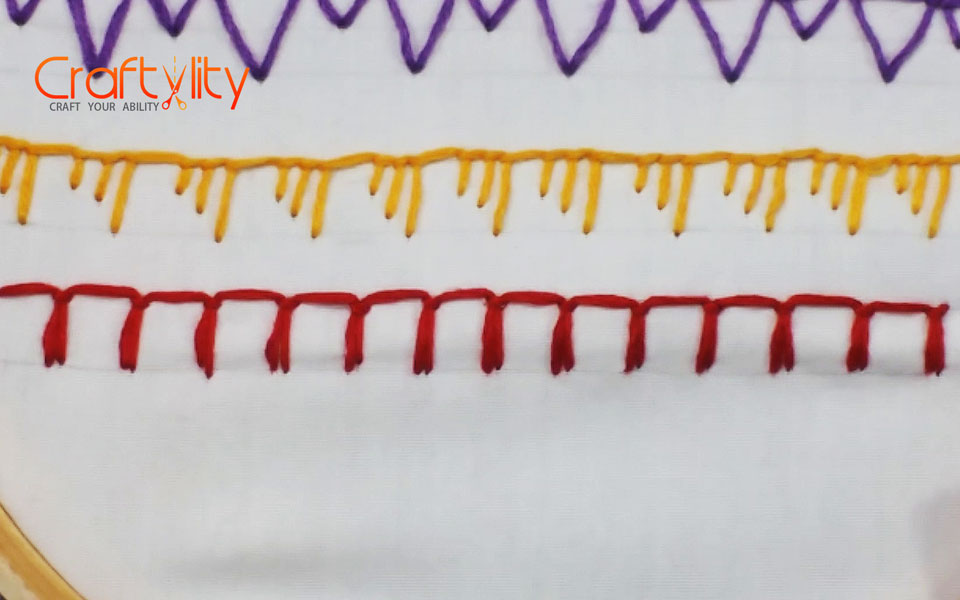
Blanket Stitch Variation 1:
For this stitch, you need to build 2 parallel lines.
Step 1:

Bring the needle out through the fabric at point “A“.
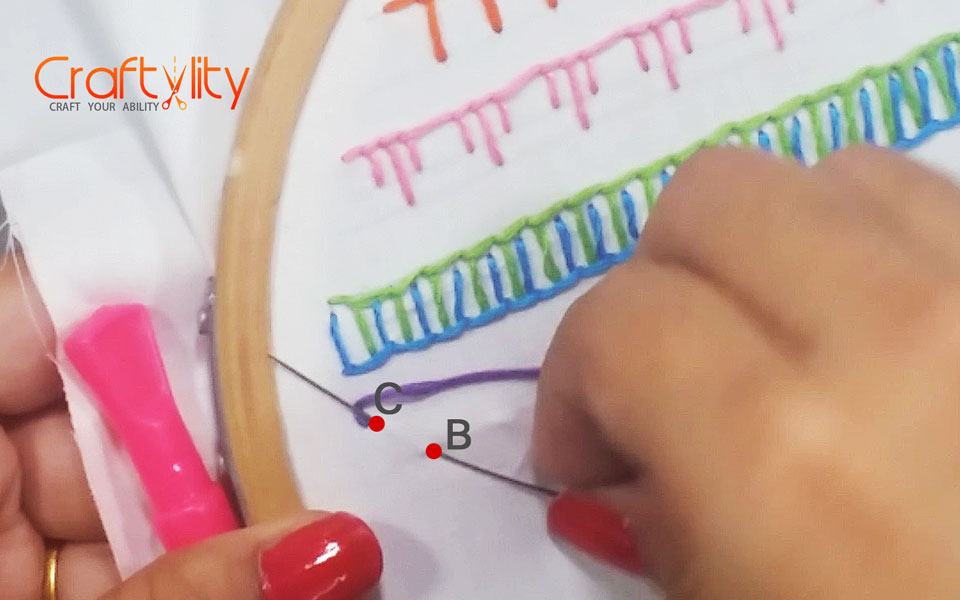
Step 2:
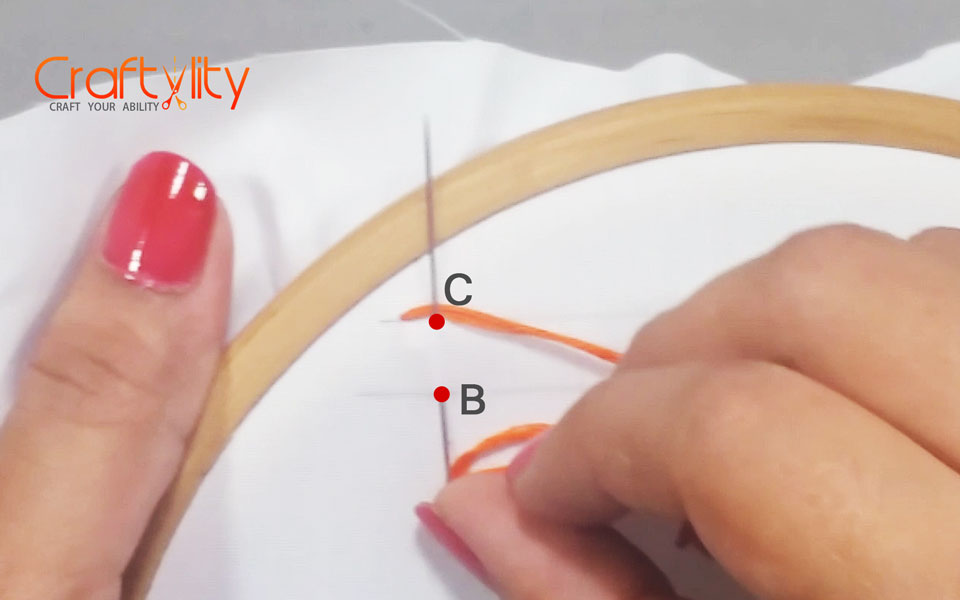
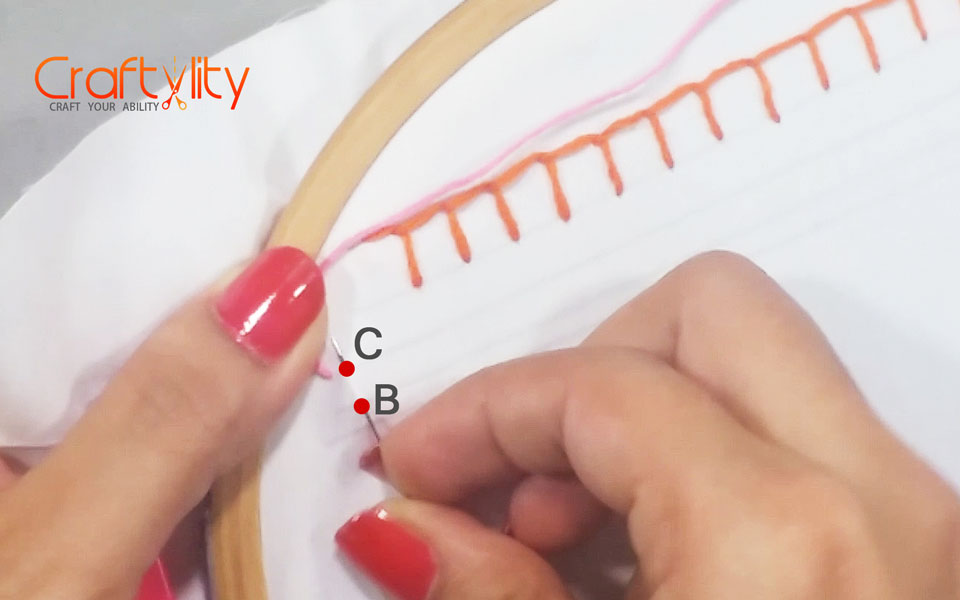
Take the needle in the fabric through point “B” and bring it out through point “C“. Bring the thread below the needle as shown in above image.
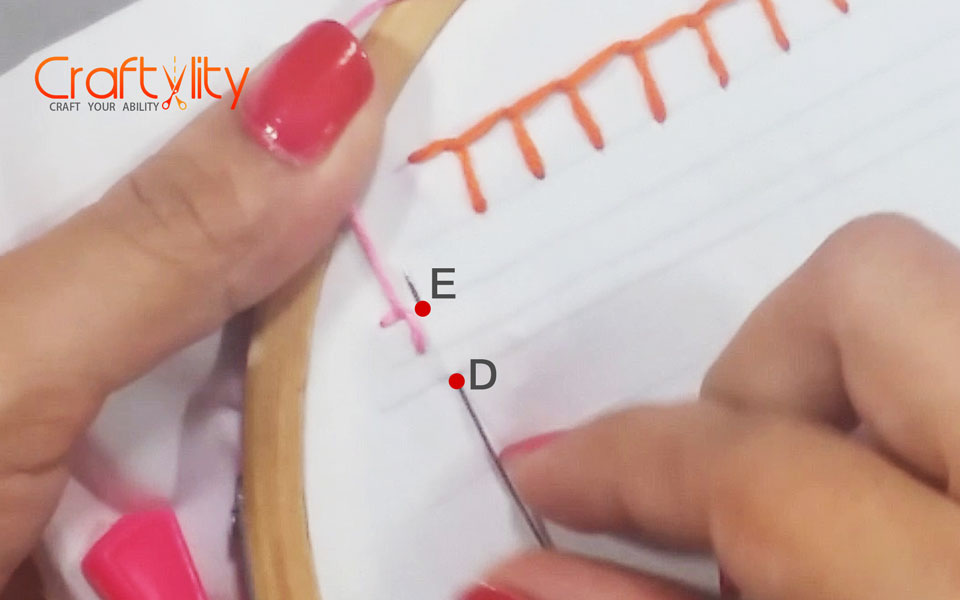
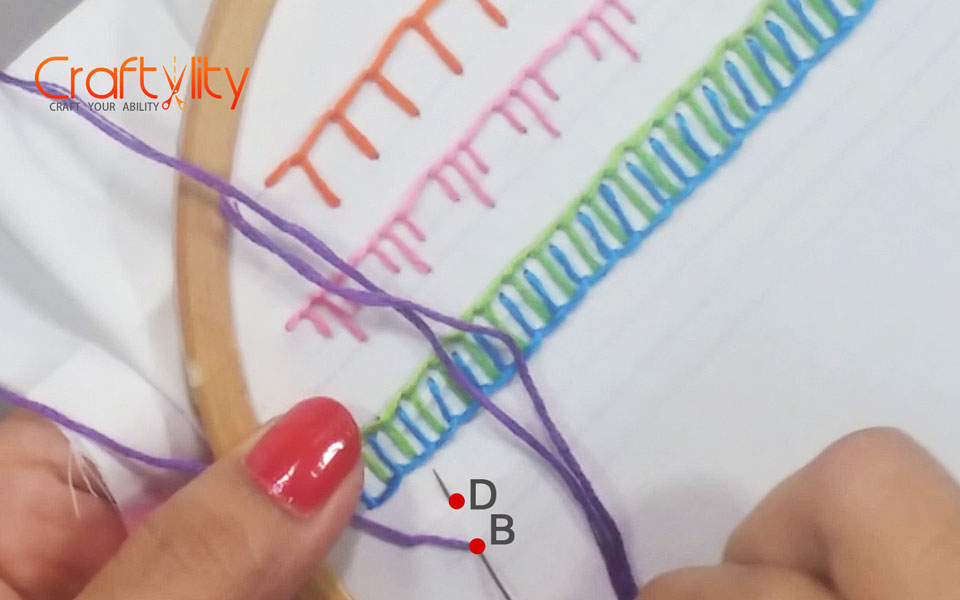
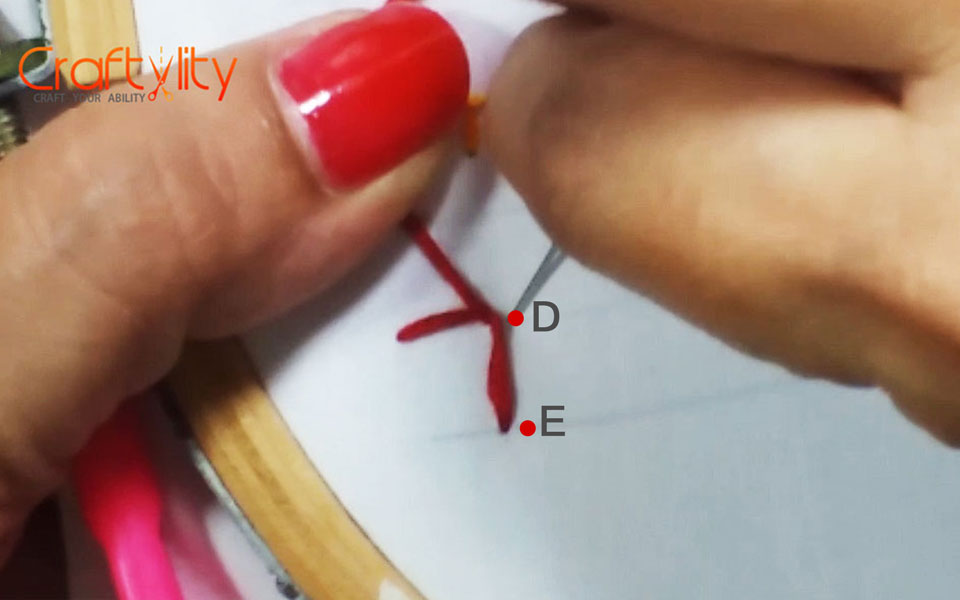
Step 3:
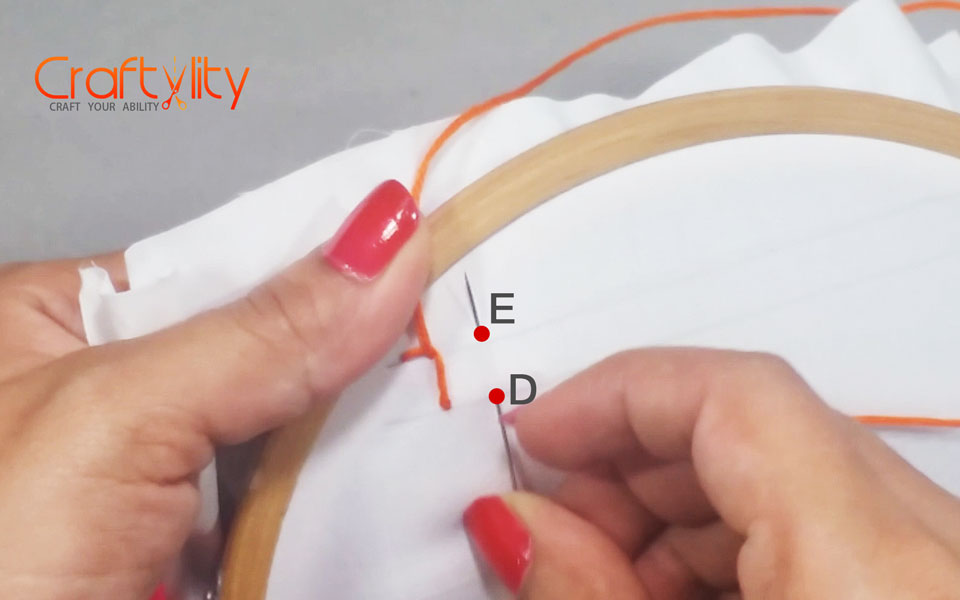
Again Take the needle in the fabric at point “D” and bring it out through point “E“. Bring the thread below the needle as shown in the above image. The distance between each loop and also the height of every loop should be the same.
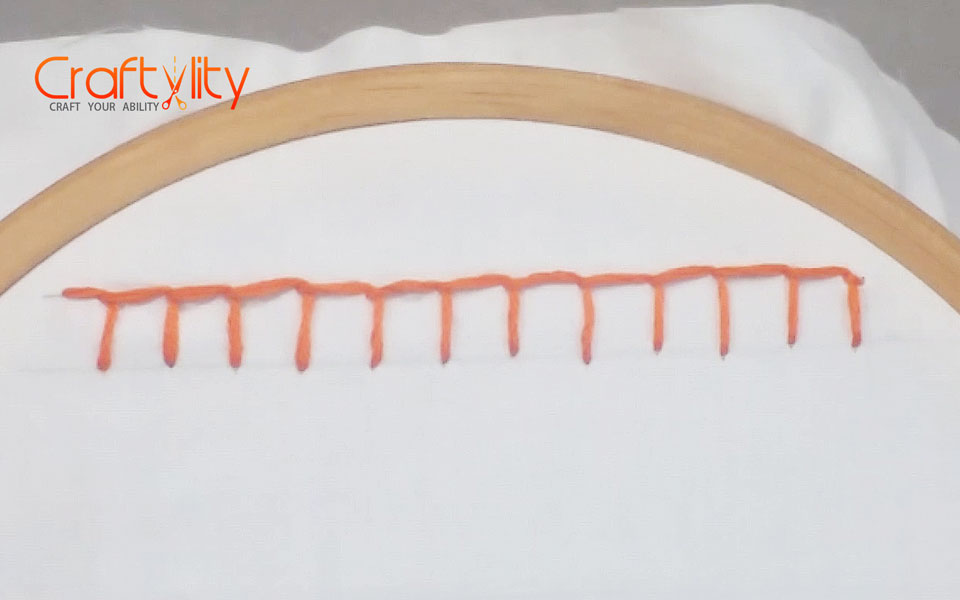
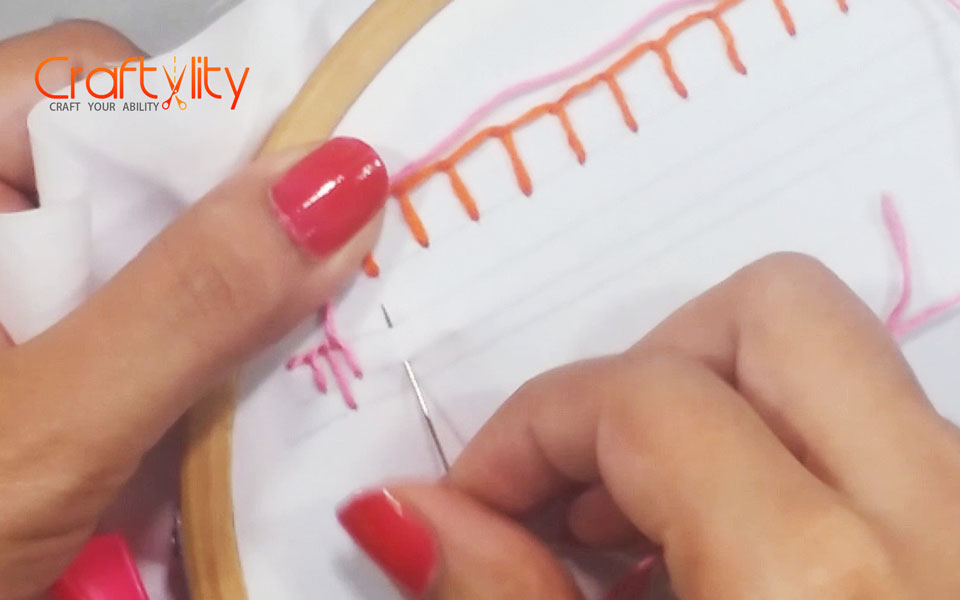
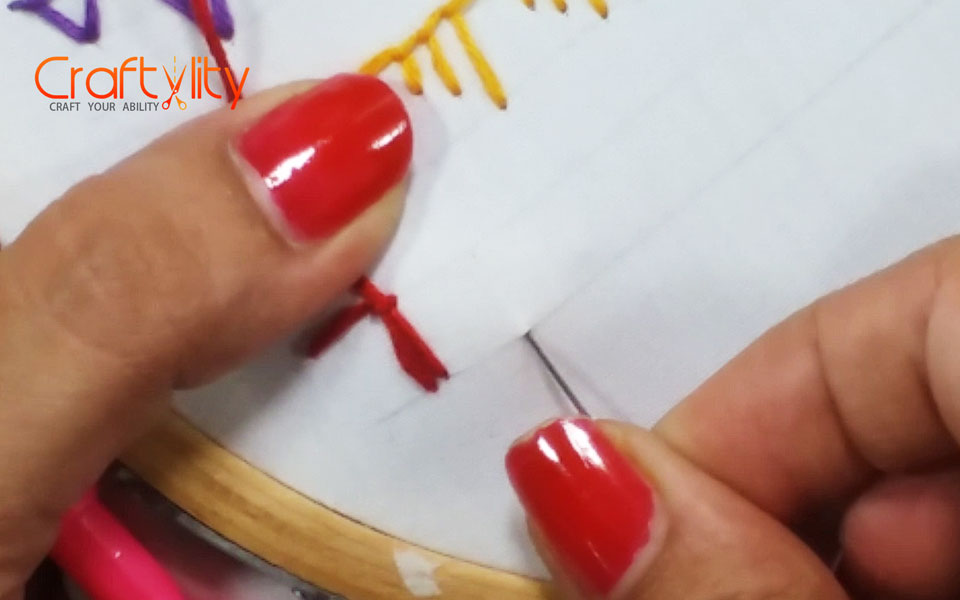
Repeat the same procedure until the end of the line.
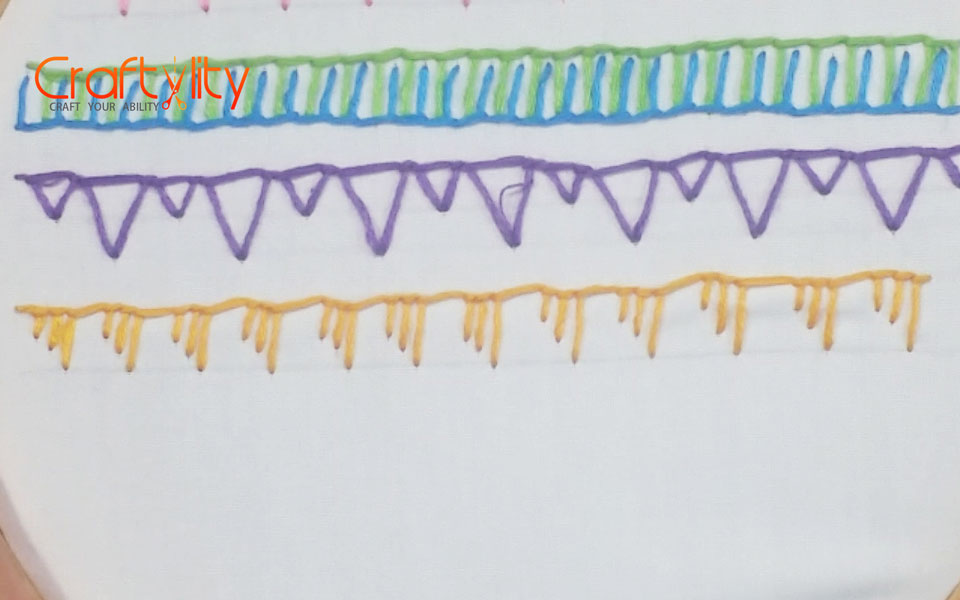
Blanket Stitch Variation 2:
For this stitch, you need to draw 3 uneven parallel lines as shown in the below image. In this stitch, we will create 3 uneven stitches in a set of 3.
Step 1:

Bring the needle out through the fabric at point “A“. Take the needle in the fabric and bring it out. Bring the thread below the needle as shown in the above image.
Step 2:
Take the needle in the fabric through point “B” and take it out from point “C“. This will be a first small regular stitch.
Step 3:
Again Construct the Stitch but this time the length of the stitch would be greater.
Step 4:

The length of the third stitch would be the same as the first stitch.
Step 5:
Leave some space between 2 sets as shown in the above image.

Repeat the same procedure until the end of the line.
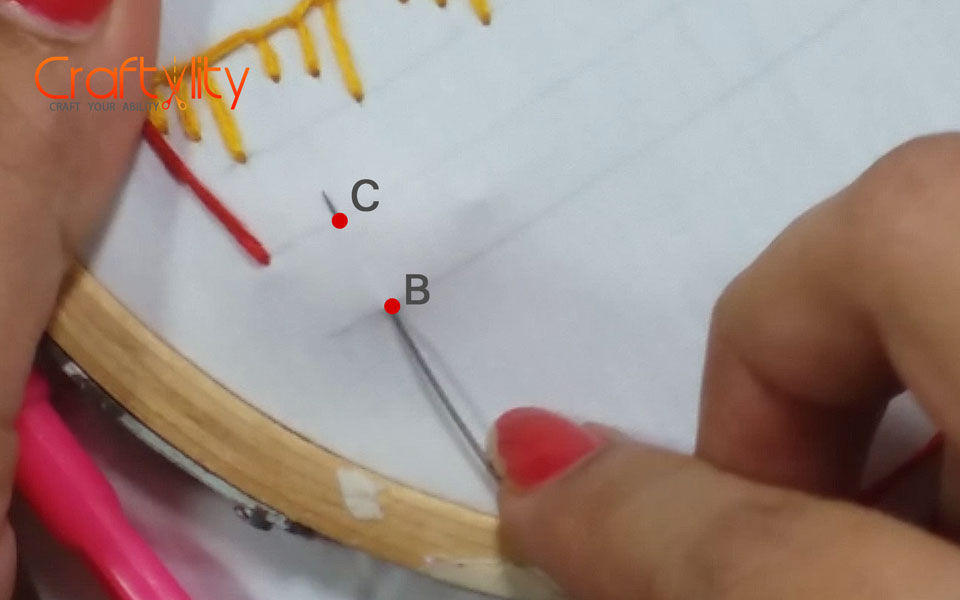
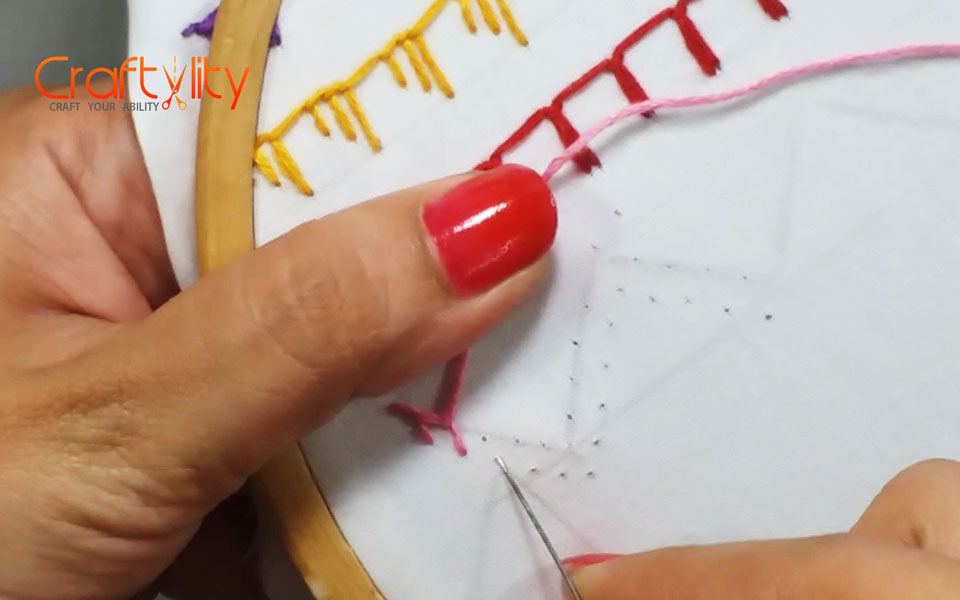
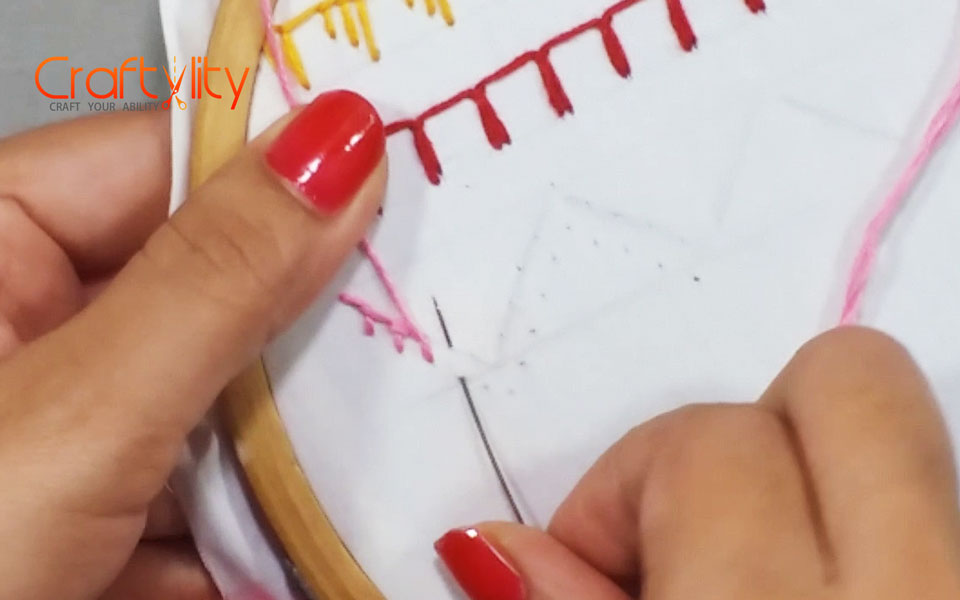
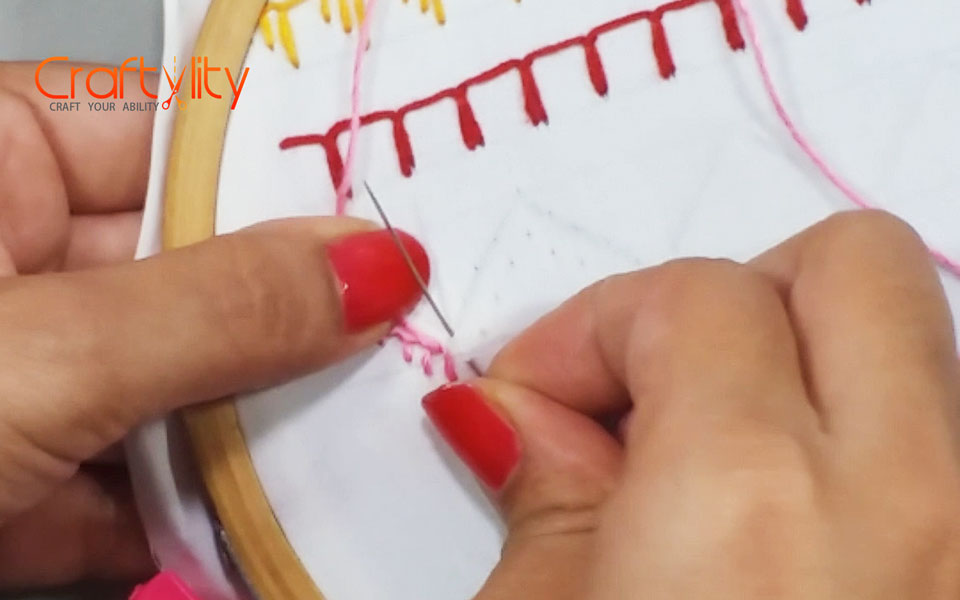
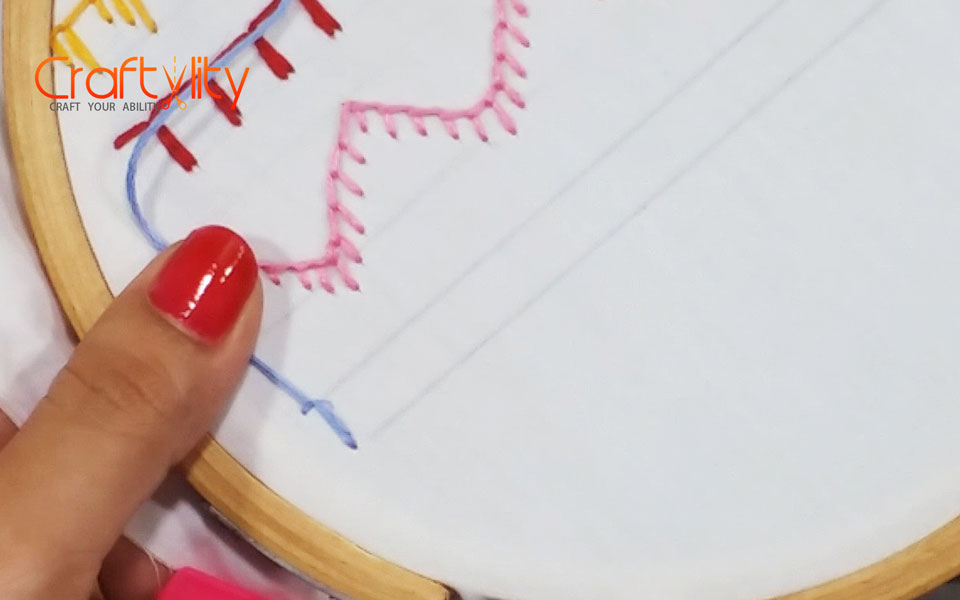
Blanket Stitch Variation 3:
Step 1: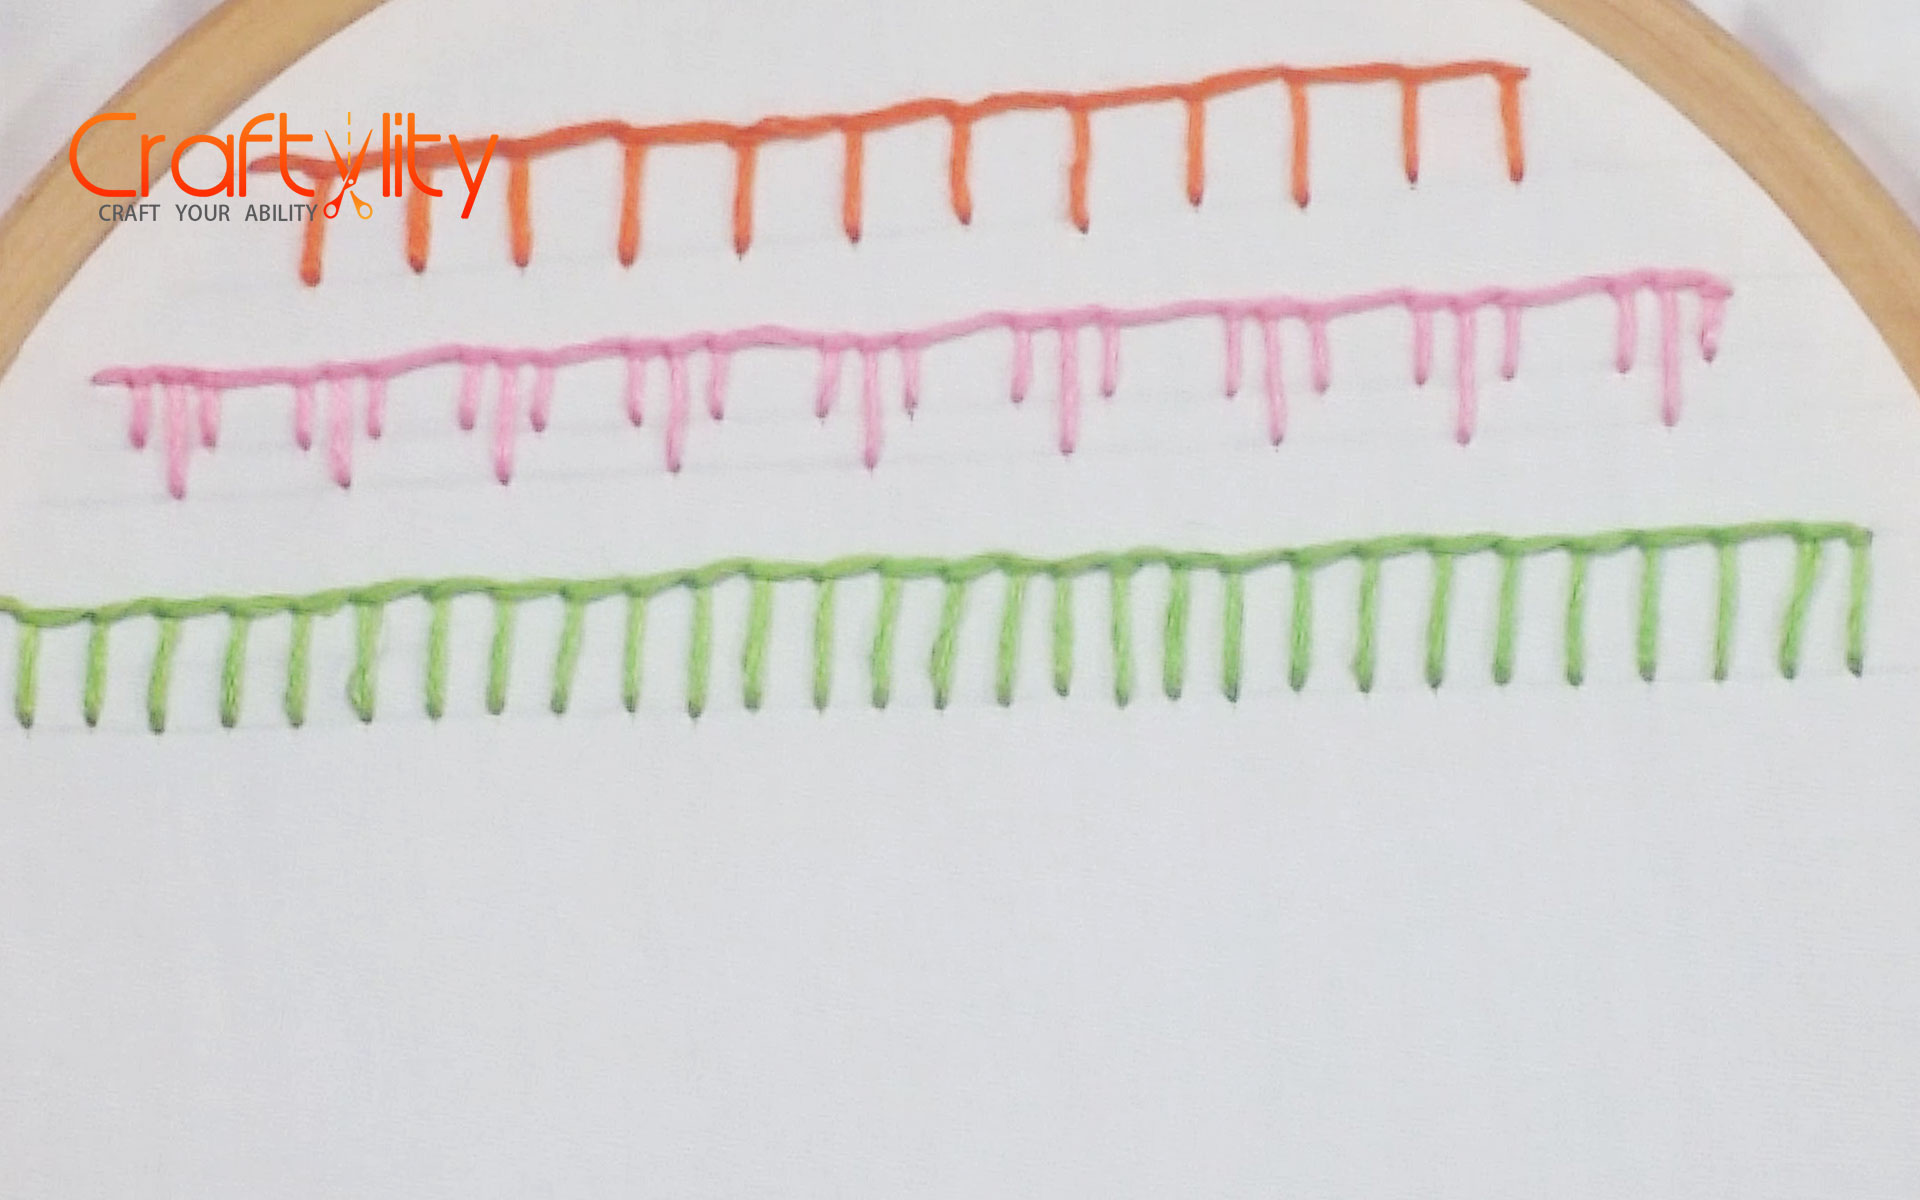
Construct the foundation row of the regular blanket stitch.
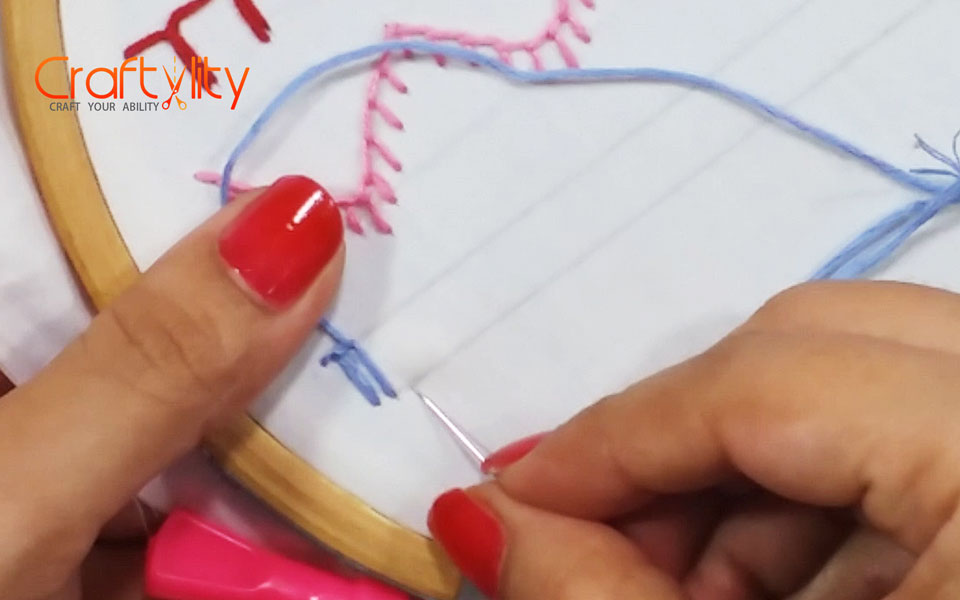
Step 2:
Turn the hoop by 180 degrees. Start with regular blanket stitches with contrasting colors floss.
Step 3:

Repeat the same procedure until the end of the line.
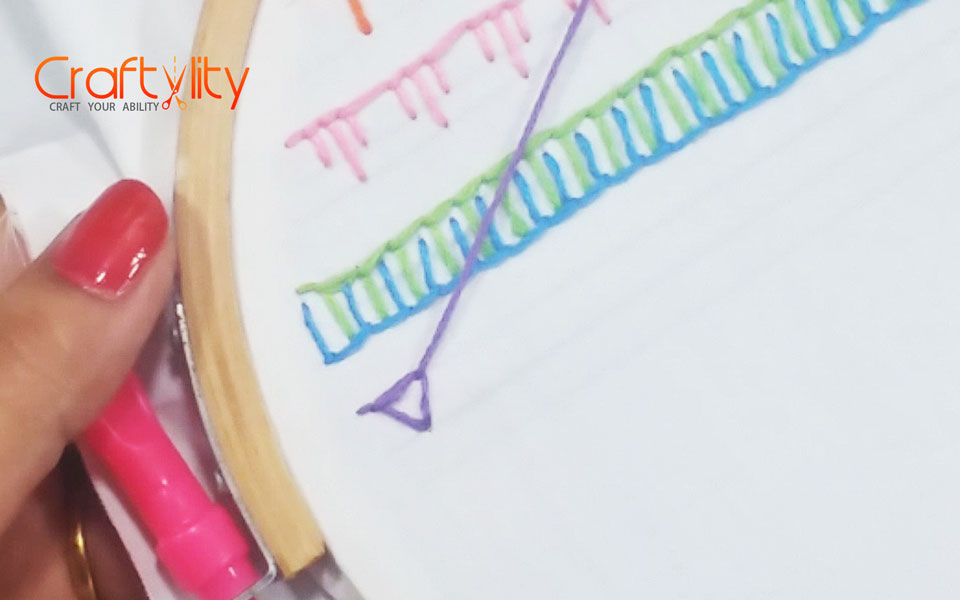
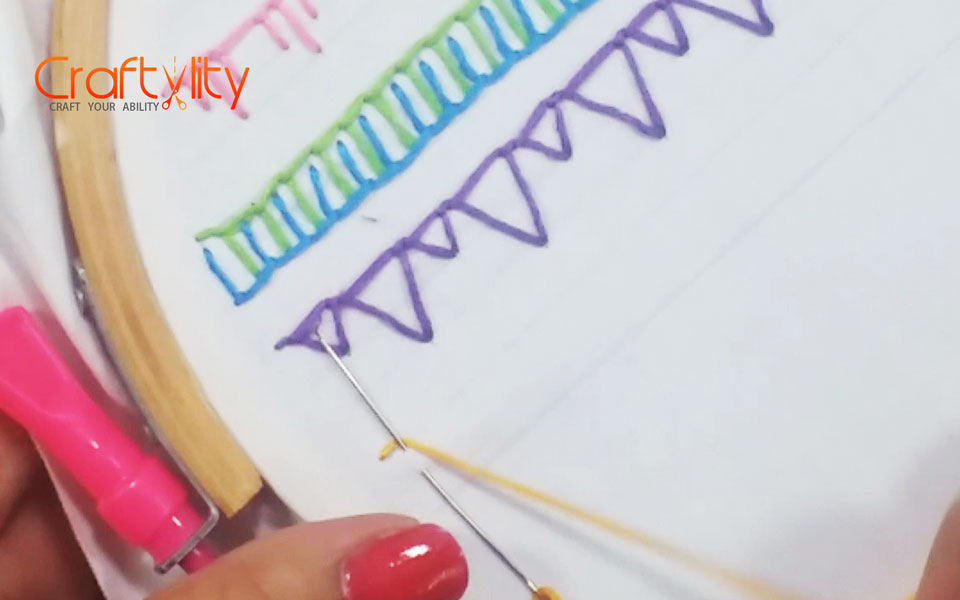
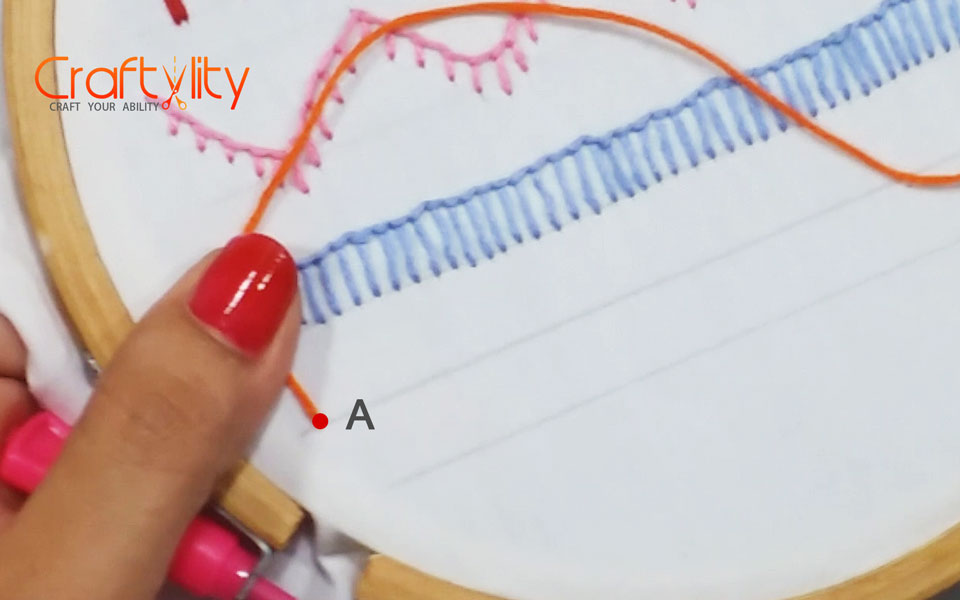
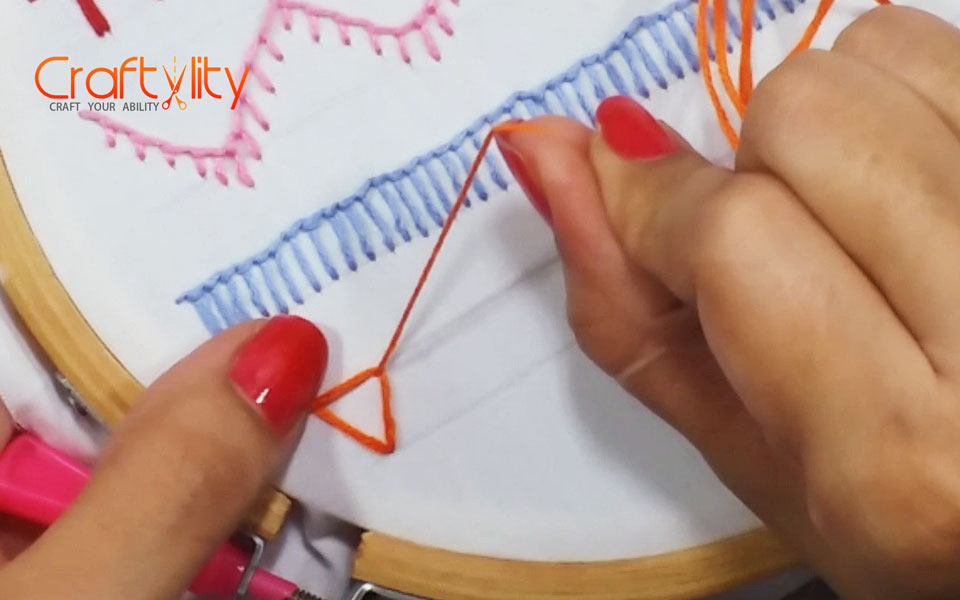
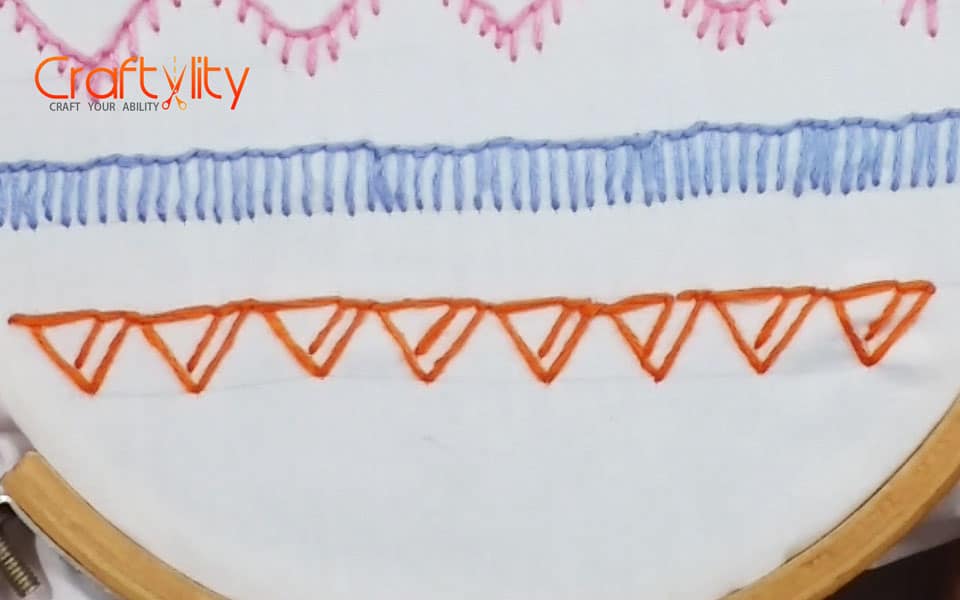
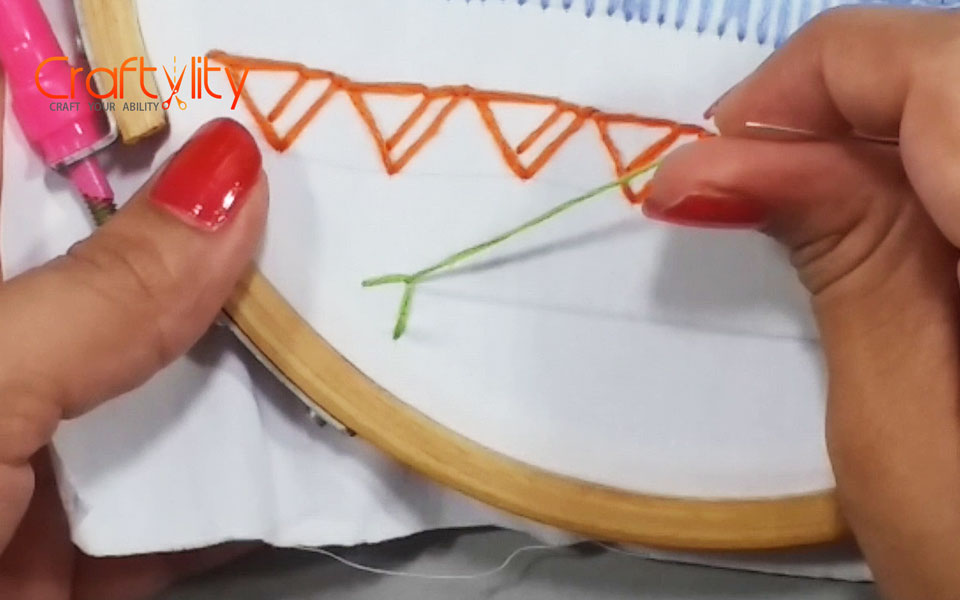
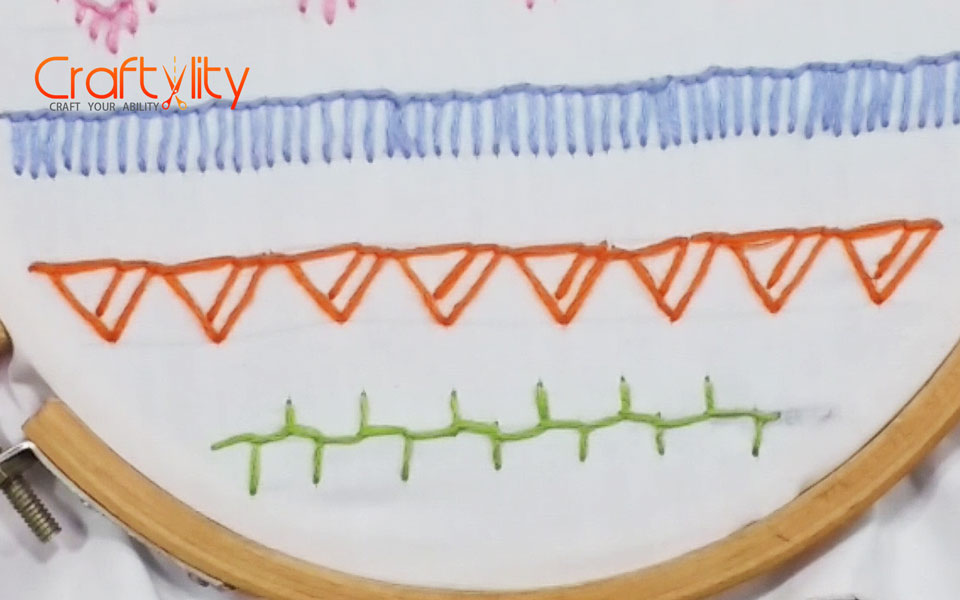
Blanket Stitch Variation 4:
For this stitch, draw 3 parallel lines. The distance between each line would be the same. We will construct a triangle blanket stitch of alternate sizes.
Step 1: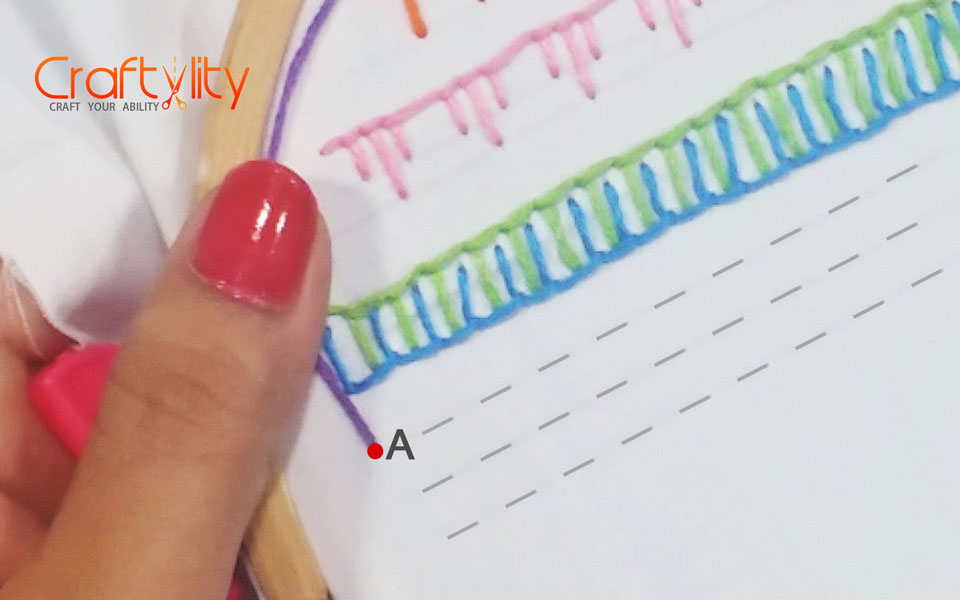
Take the needle out from the fabric at point “A” which lies on the tip of the first line.
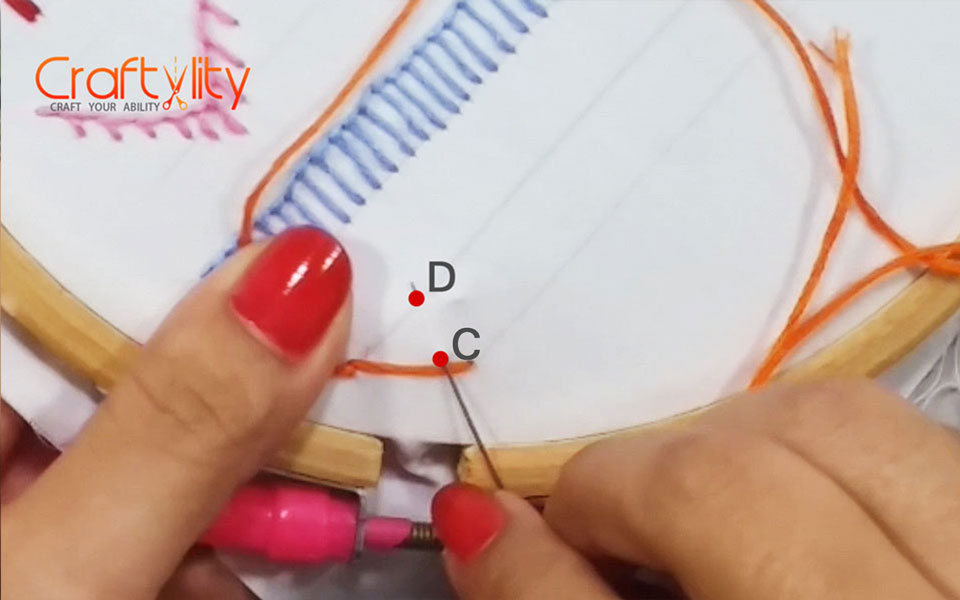
Step 2:
Take the floss on the right side, again take the needle in through point “B” and take it out through point “C”.
Step 3:
Take the needle through the point “B” and out through point “D”.
Step 4:
This is the first small triangle of the row.
Step 5:
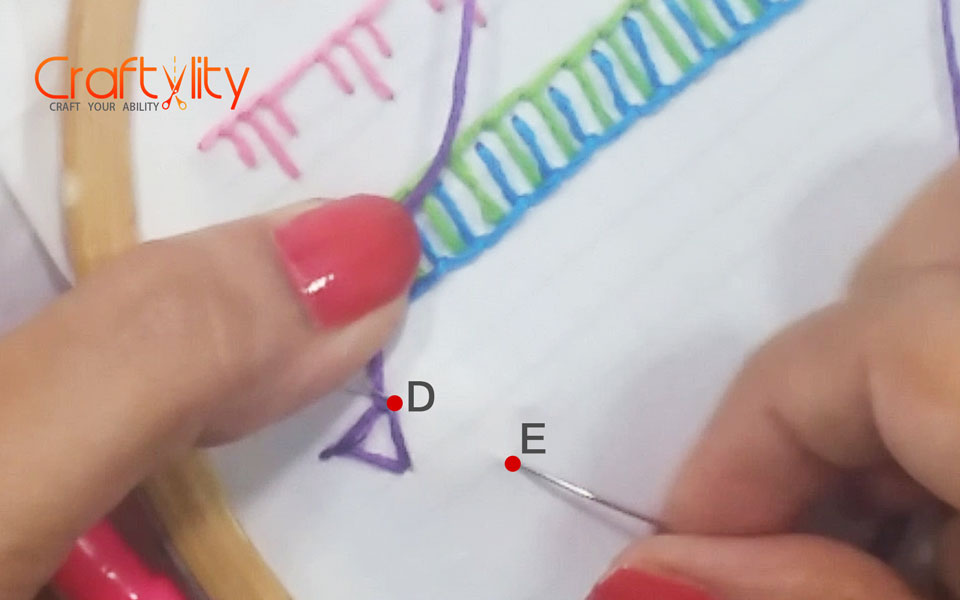
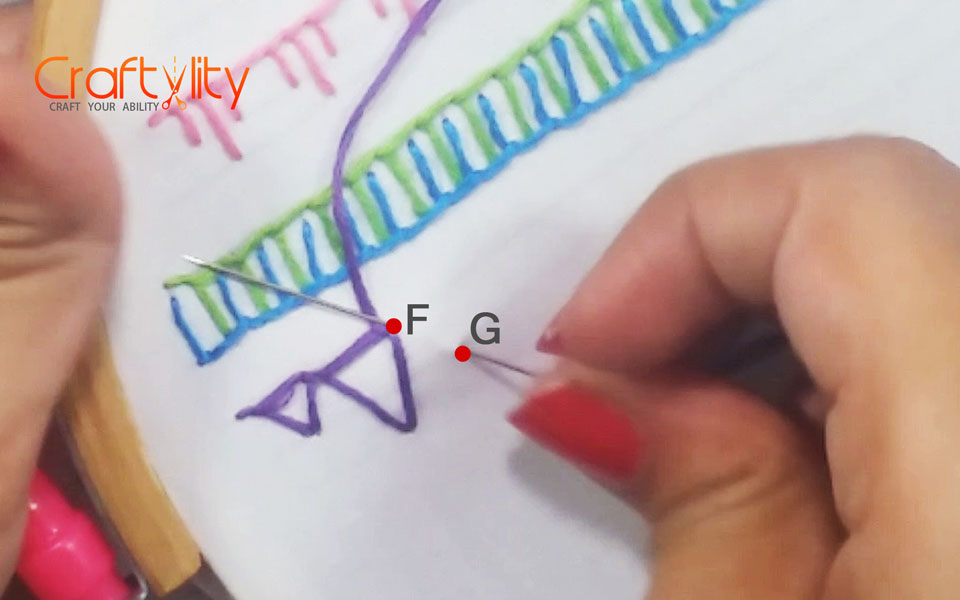
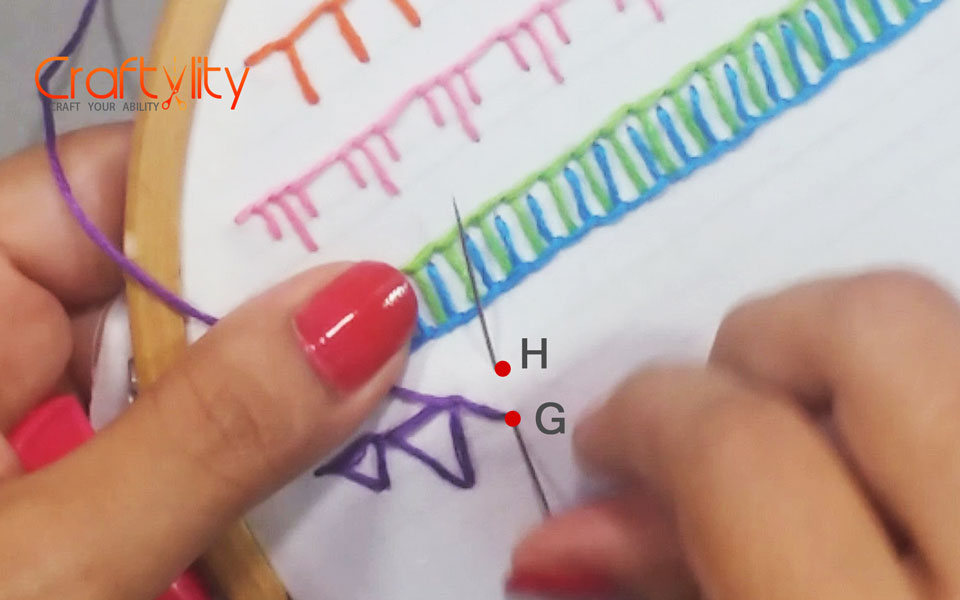
For the second triangle which is larger in size, take the needle through the fabric at point “E” which lies on the third line, and take the needle out through point “D”.
Step 6:
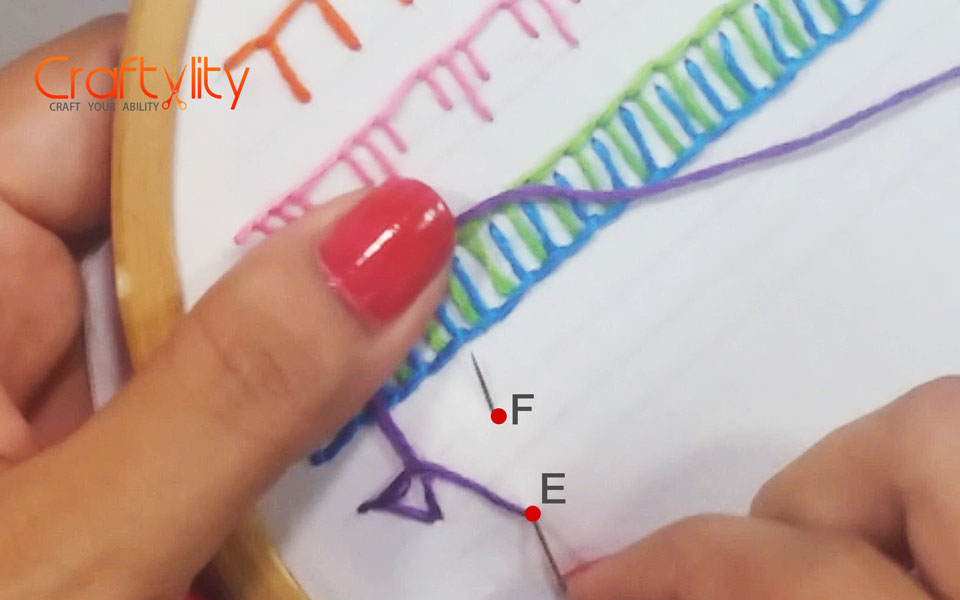
As shown in the above image take the needle in and out through point “E” and “F” respectively.
Step 7:
This is the second triangle.
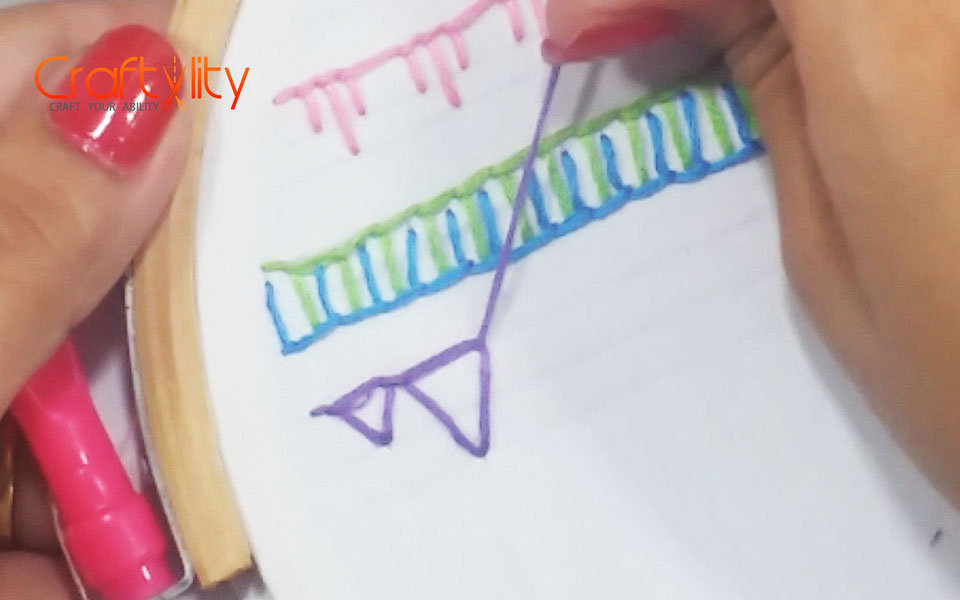
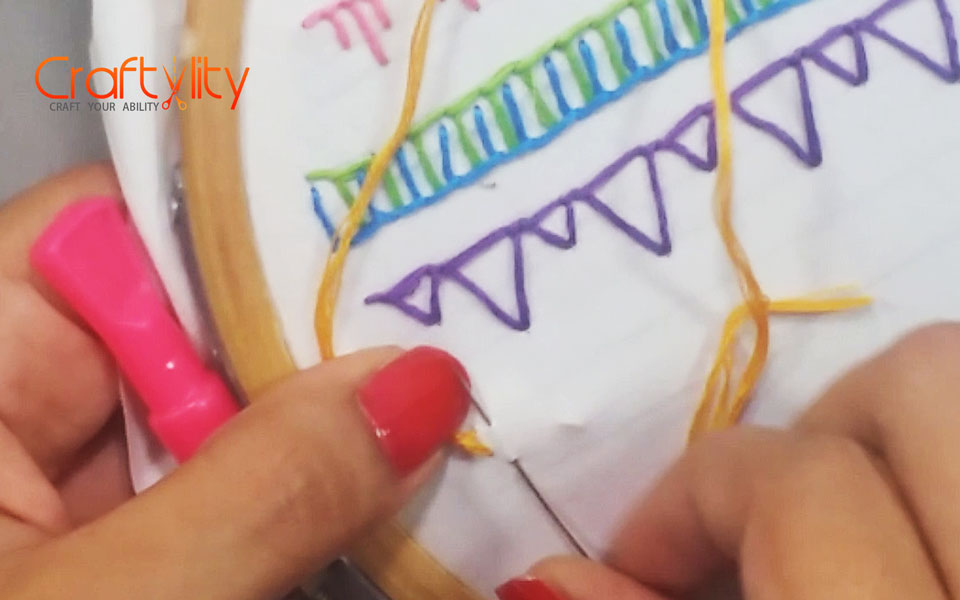
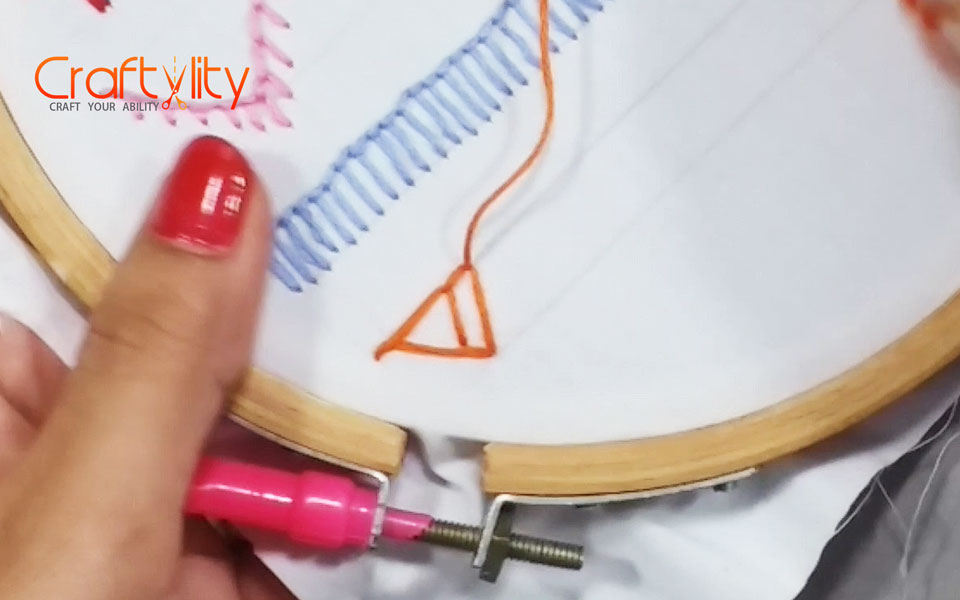
Step 8:
Repeat the same steps until the end of the row.
Blanket Stitch Variation 5:
For this stitch, draw 2 parallel lines We will construct a set of 3 blanket stitches which are in ascending order.
Step 1:
Construct the first blanket stitch which is the smallest in size among three blanket stitches.
Step 2:
The second blanket stitch will be a little larger in size as compared to the first stitch.
Step 3:
The final stitch would be the largest stitch among all three stitches. This we have completed our first set.
Step 4:
Leave some space between two sets.
Repeat the same procedure until the end of the row.
Blanket Stitch Variation 6:
For this stitch, draw 2 parallel lines.
Step 1:
Take the needle out from the fabric through point “A” which lies on the tip of the upper line. As shown in the above image take the needle through the fabric from point “B” and “C”. Thus you we get first simple blanket a stitch.
Step 2:
Hold the gloss and again insert the needle at point “D” and take the needle out from point “E”. Note: do not pull the entire floss.
Step 3:

Pass the needle through the loop, as shown in the above image.
Step 4:
This would be the first stitch.
Repeat the same procedure until the end of the row.
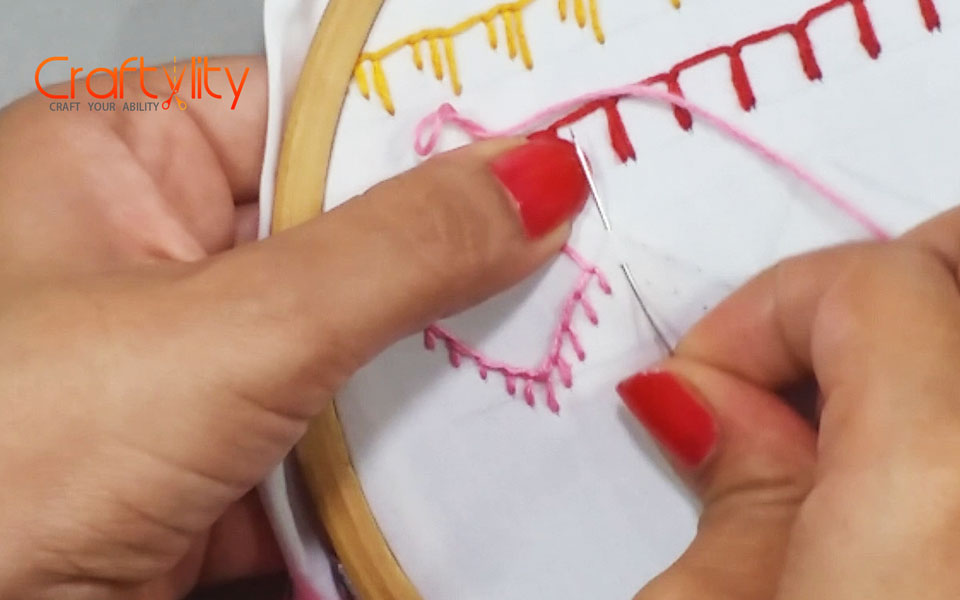
Blanket Stitch Variation 7:
In this stitch, we will construct small blanket stitches on the zig-zag line. Hence draw a zig-zag line as shown in the below image and Start building the regular stitches.
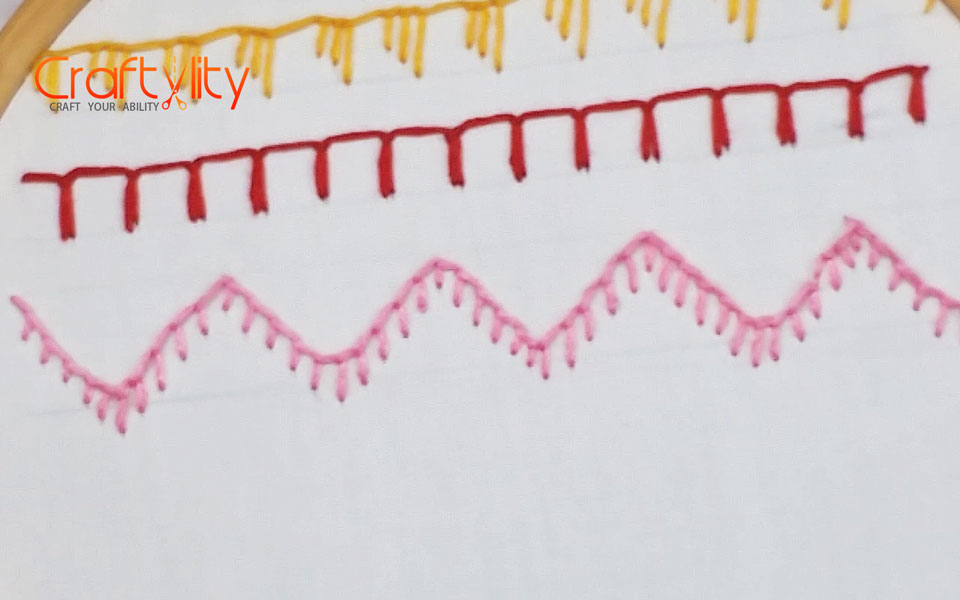
Blanket Stitch Variation 8:
In this stitch, we will construct regular blanket stitches but the distance between each stand of stitch would be narrow.

Blanket Stitch Variation 9:
For this stitch draw 2 parallel lines.
Take the needle out through the fabric from point “A”.
Step 2:

Take the needle through the fabric from point B and take it out from point A, as shown in the above image.
Step 3:
Take the needle through the fabric from point “C” which lies a little above from point “B” and take it out from point ”D”.
Step 4: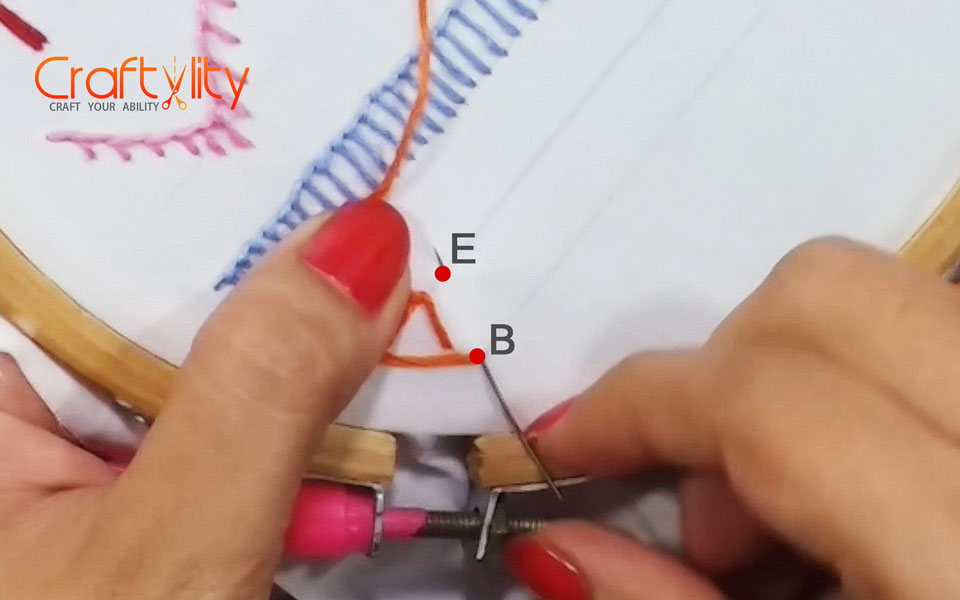
As shown in the above image, Construct another stand by inserting the needle through the fabric from the point “B” and take it out from point “E”.
Step 5:
This would be the first stitch of the row.
Repeat the same procedure until the end of the row.
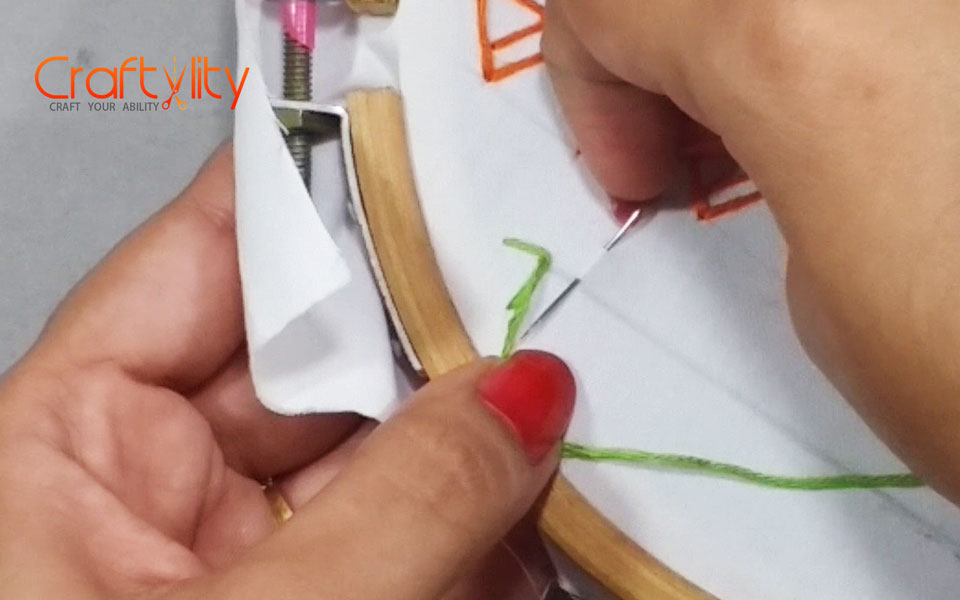
Blanket Stitch Variation 10:
In this stitch, we will construct the Blanket stitch in opposite directions i.e. up and down direction.
To get started first build the regular blanket stitch.
Step 2:
For the second stitch, take the needle from top to bottom direction as shown in the above image.
Step 3:

Again the third stitch would be from bottom to top direction.
Step 4:

Repeat the same procedure of building stitches in alternate directions till the end of the row.