

This post covers different type of paper quilling flower which look complex but are really simple to create, even beginners can create these flower easily. The color combination is inspired by small flower which just blossomed on my small plant and i love it, so thought of creating something similar to it.
To create this paper quilling card you will need following materials:
- Quilling strip
- Bull dog paper clip
- Scissors
- Glue
- Curved tweezers
- Circle guide
- Slotted tool
- Cardstock
- Geometry compass
Creating Flower Petals:
Step 1:
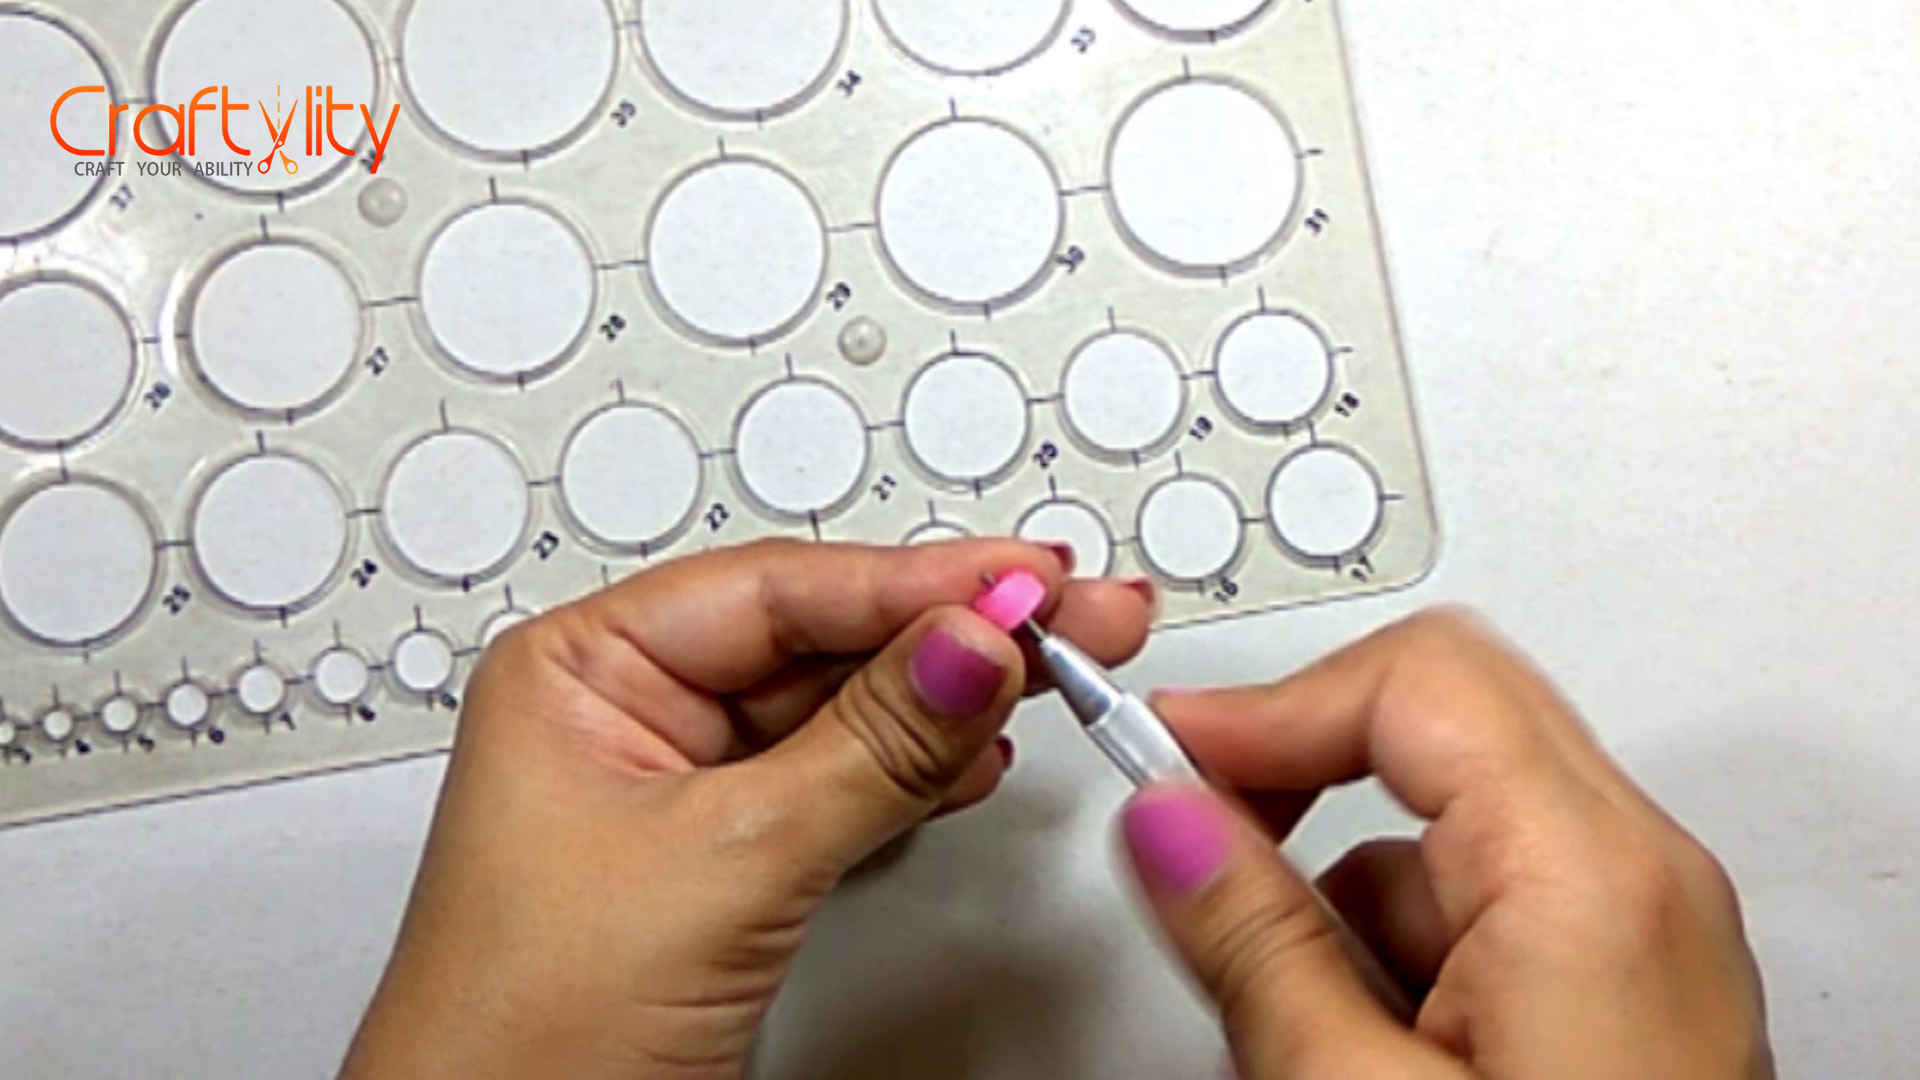
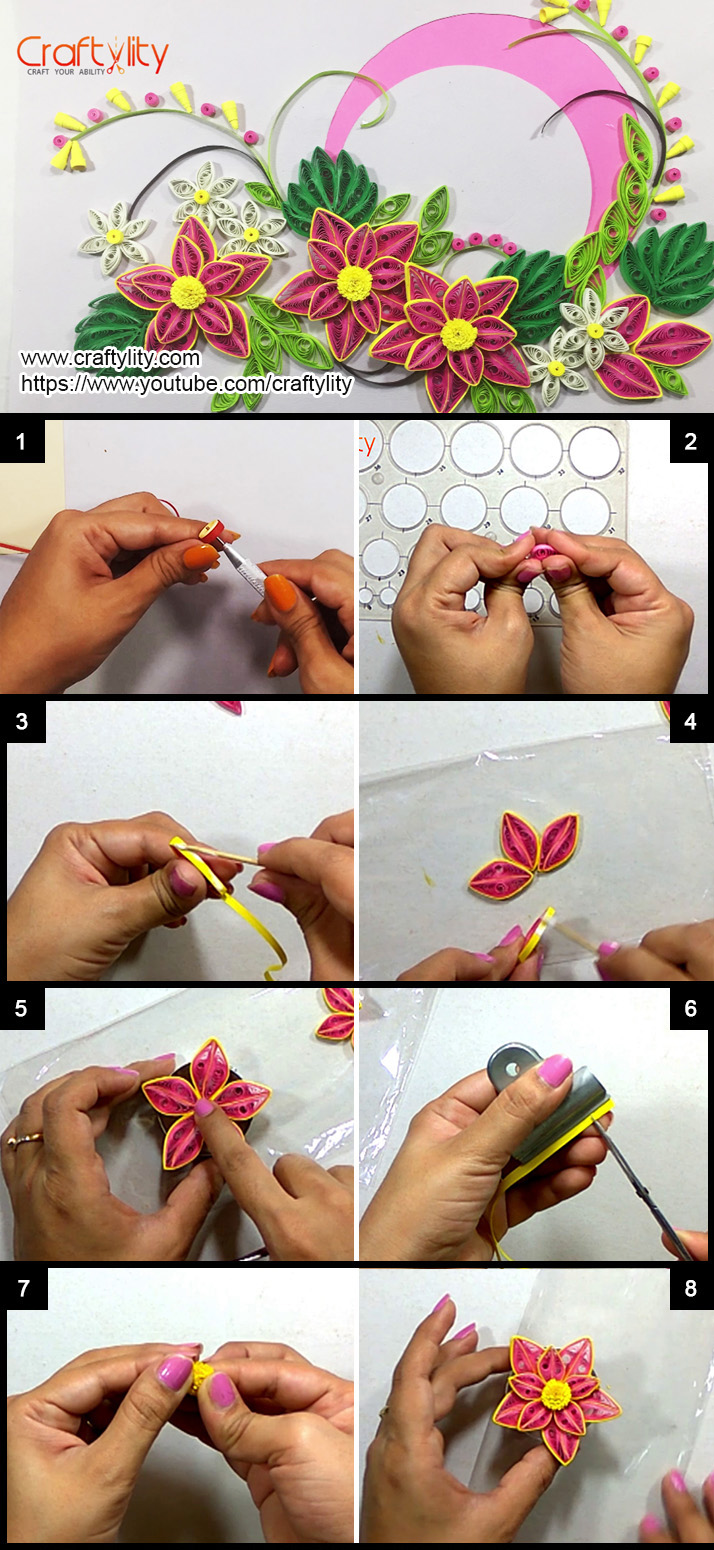
First of all we will start by making large pink flower, for this we will take 3mm Pink paper quilling strip of 17 inches long length and roll it with the slotted tool. Take the coil from the tool without applying glue. Place the coil in 20mm diameter of circle guide to unroll. Take the unrolled coil out from circle guide and apply the glue at the edge of the strip.
Step 2:
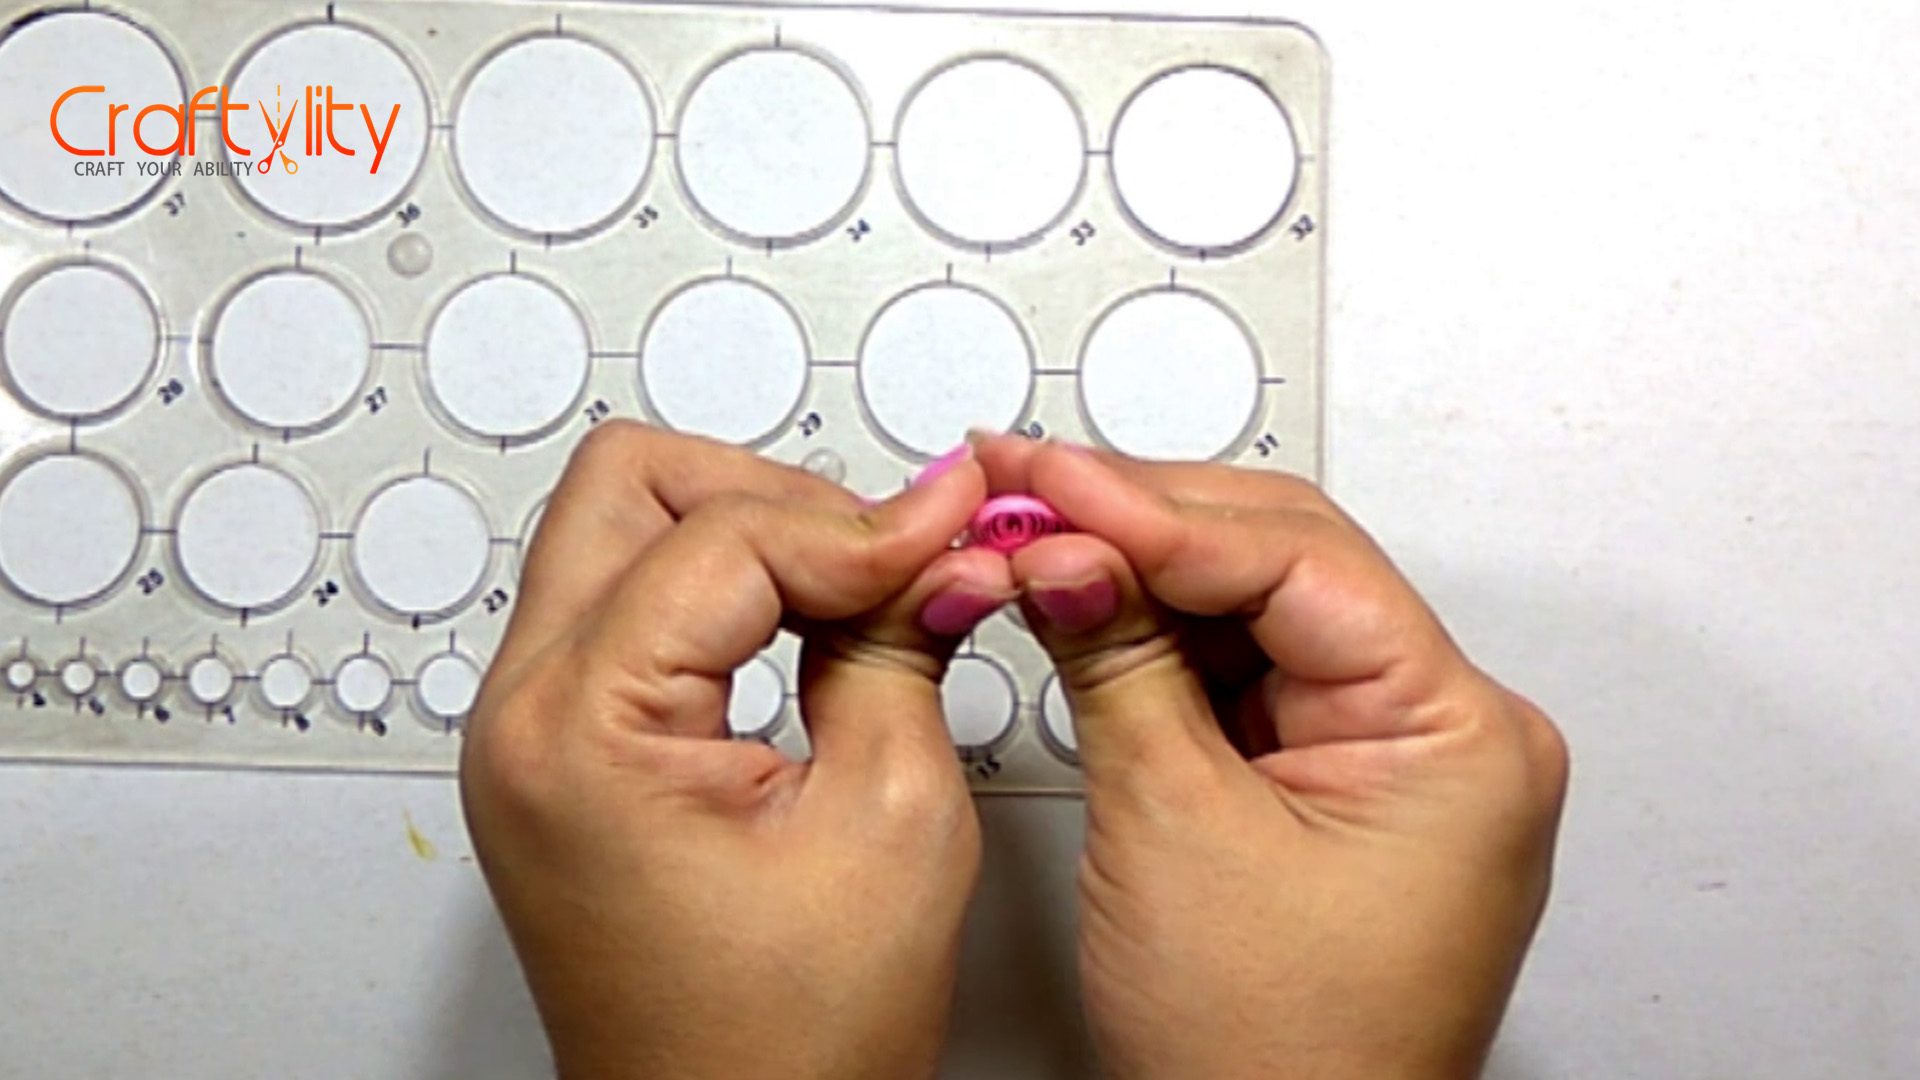
Hold the coil with both the hands and pinch it from both sides forming gumdrop shape. This shape is flat from one side and curved from another side like “D” alphabet. Create one more such shape. We need two shapes to create on a petal.
Step 3:
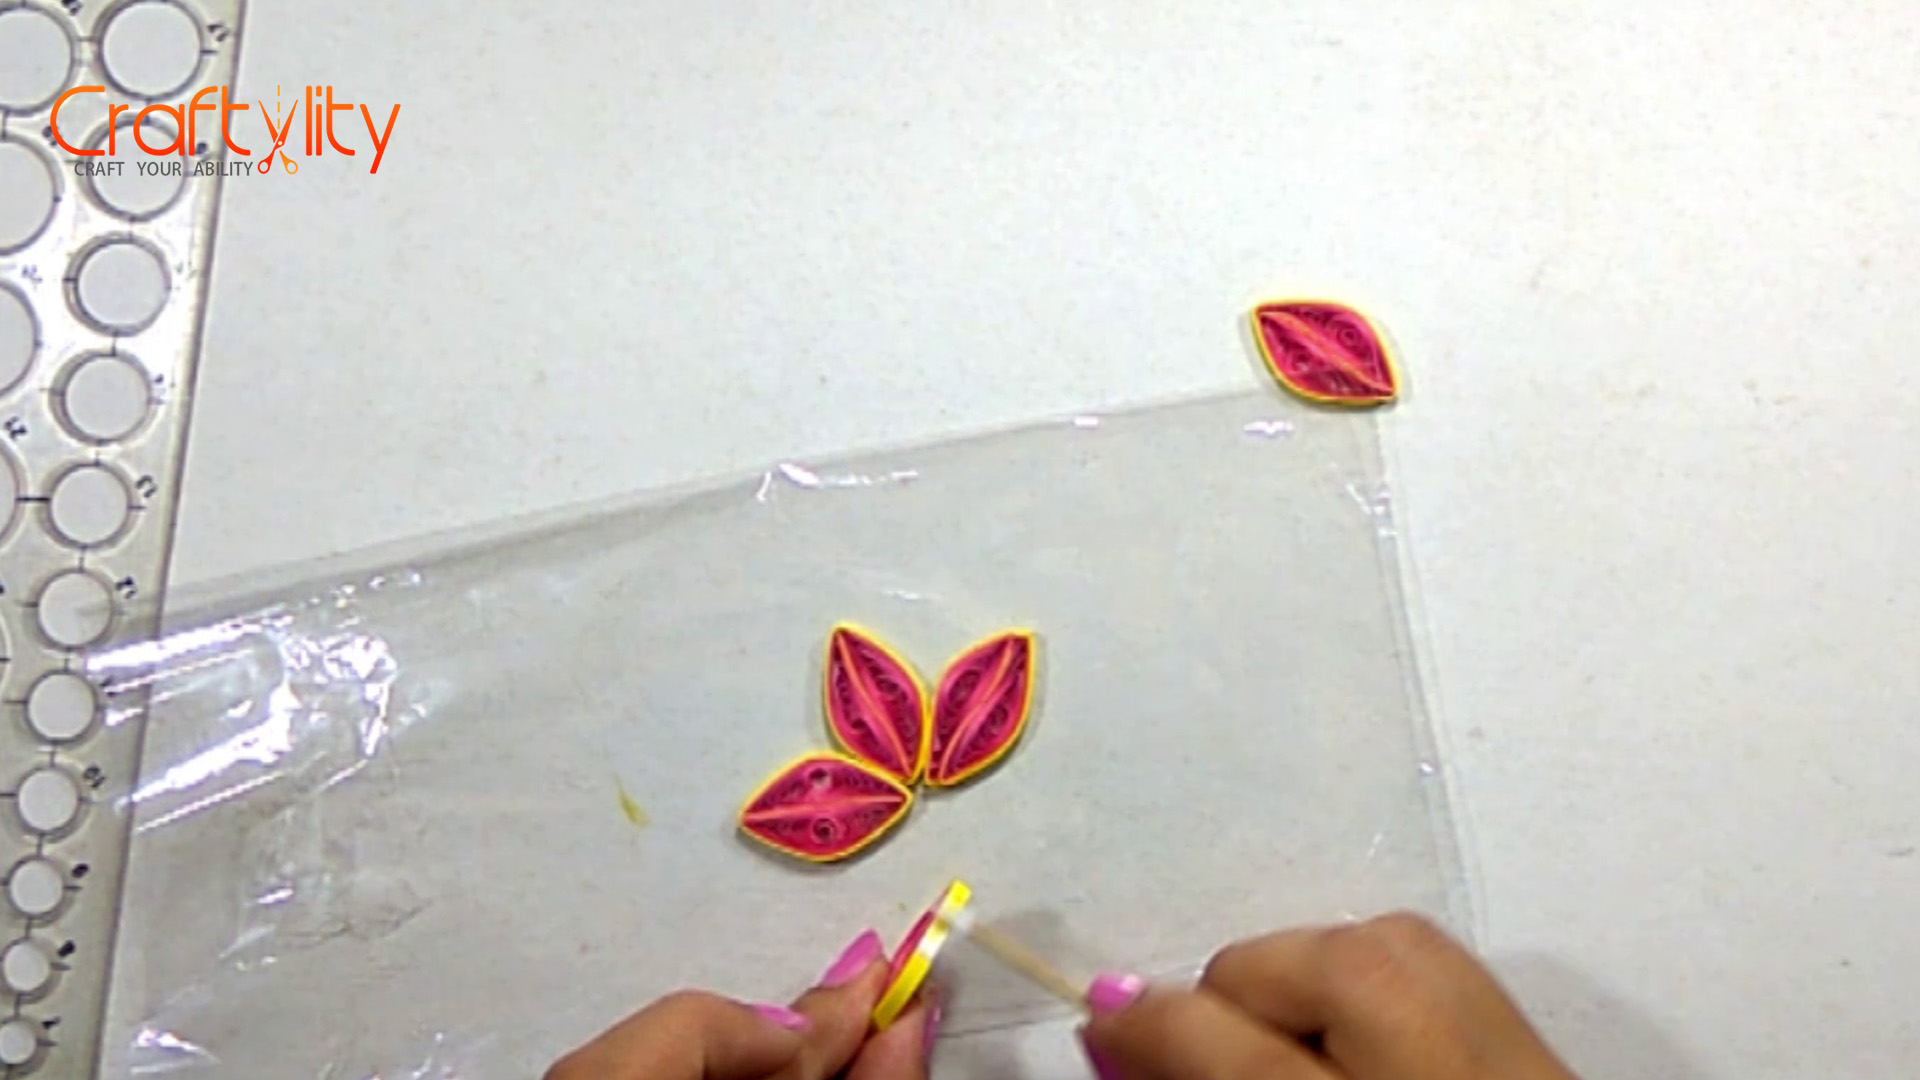
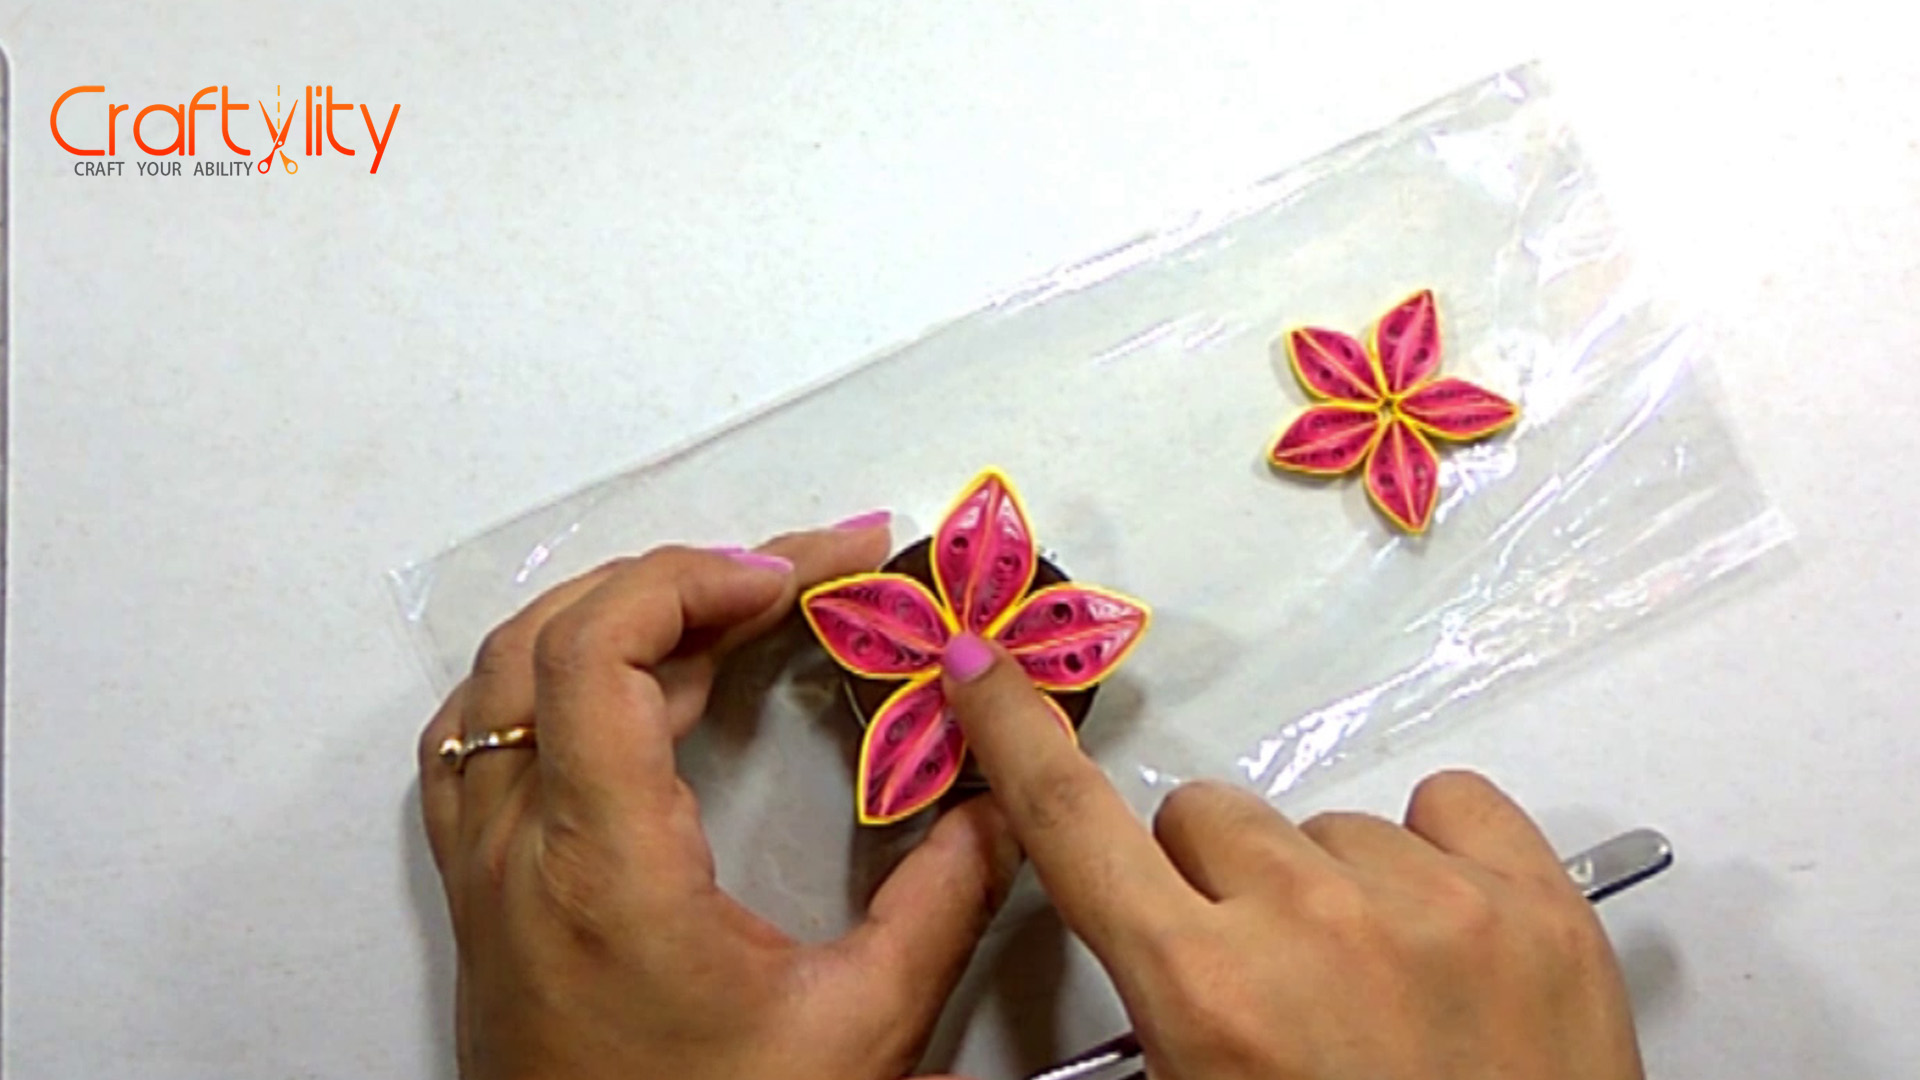
Now take 3mm yellow quilling strip of 17 inches long length and apply glue on the flat side of pink shape and wrap the yellow strip around the shape for 2-3 rounds. Now again apply glue and place another take another pink shape on it and now wrap both the shapes together. Apply glue at the end of the yellow strip to secure it. Finally we have finished with our first petal. Repeat the same steps for creating more petals. We need more 4 such large petals.
Step 4:
It’s time to glue all 5 petals together as shown in above image.
Step 5:

For creating smaller petals, you need 3mm pink strip of 8 inches long length and diameter of the circle would be 14mm. Create a pair of small gumdrop as earlier. The procedure is same as mentioned in previous steps. Create total 5 small petals. Glue all small petals together.
Step 6:
This step is optional, take the small ring or any cap of the bottle and place large flower over it and press the flower from center to form a slight dome.
Creating Center of Flower:
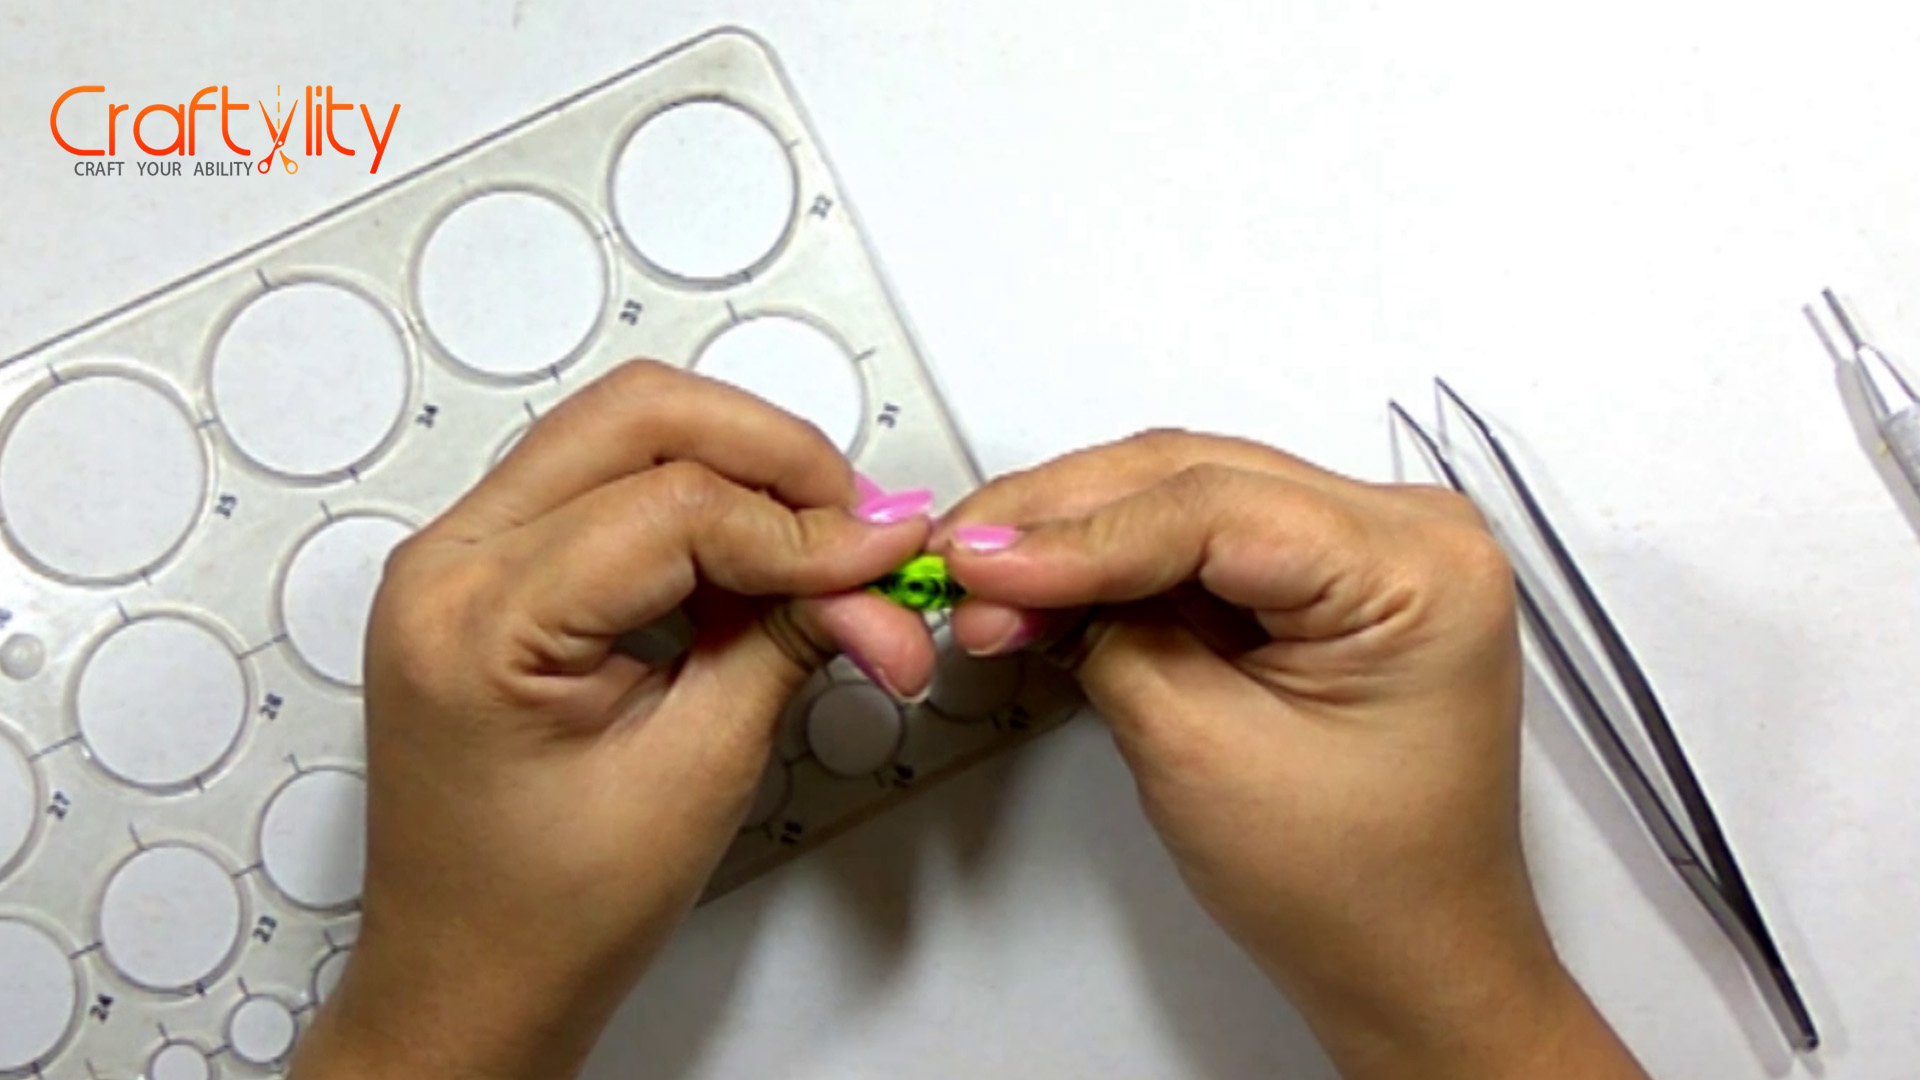
Step 7:
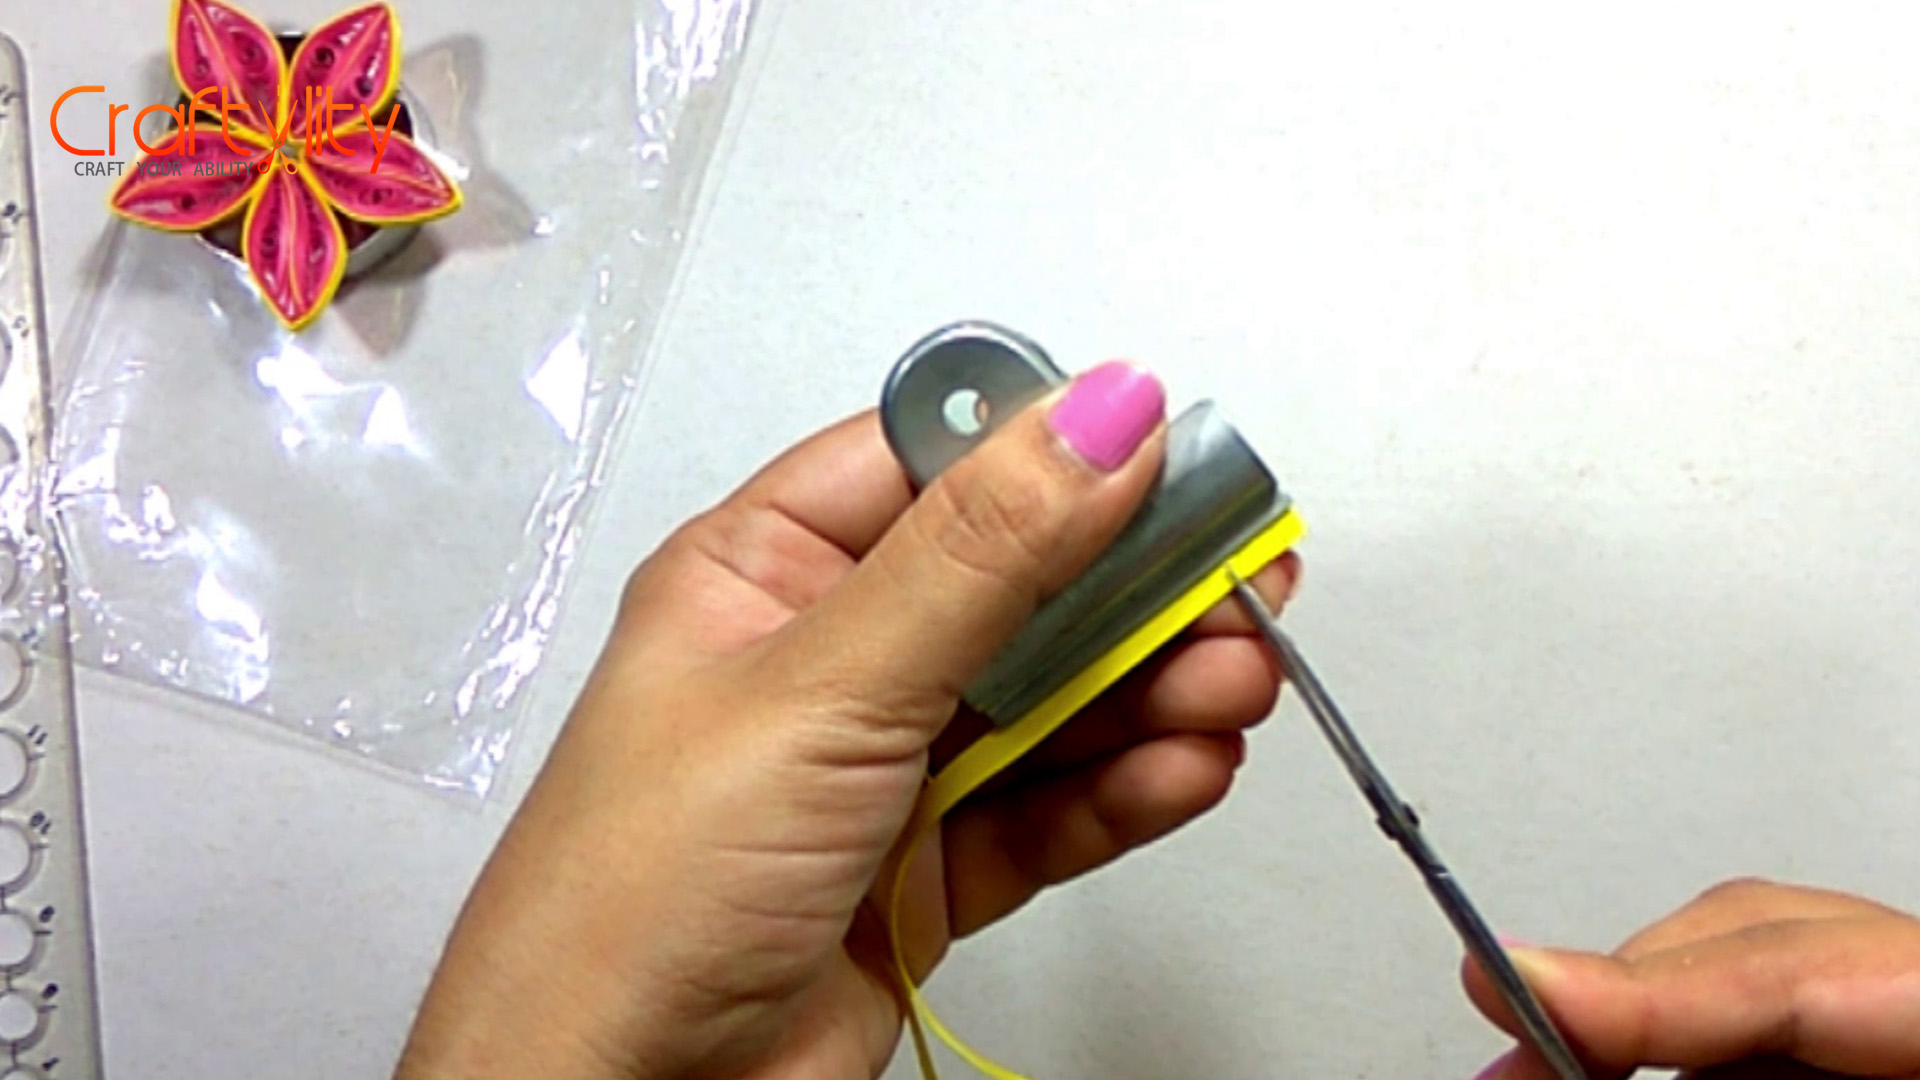
Lets create center of flower, for this take 5 mm yellow strip of 17 inches long length and fold it from the center. Hold the strip with bulldog clip (clip should hold 2 mm of the width of the strip) by doing this you can secure your strip by getting it cut entirely. If you are not the beginner and have hands on cutting the strip then you can cut the strip directly without using bulldog clip. But it advisable to use bulldog clip. Open the strip and roll it with the slotted tool. Apply glue on the end of the coil before removing it from the tool.
Step 8:
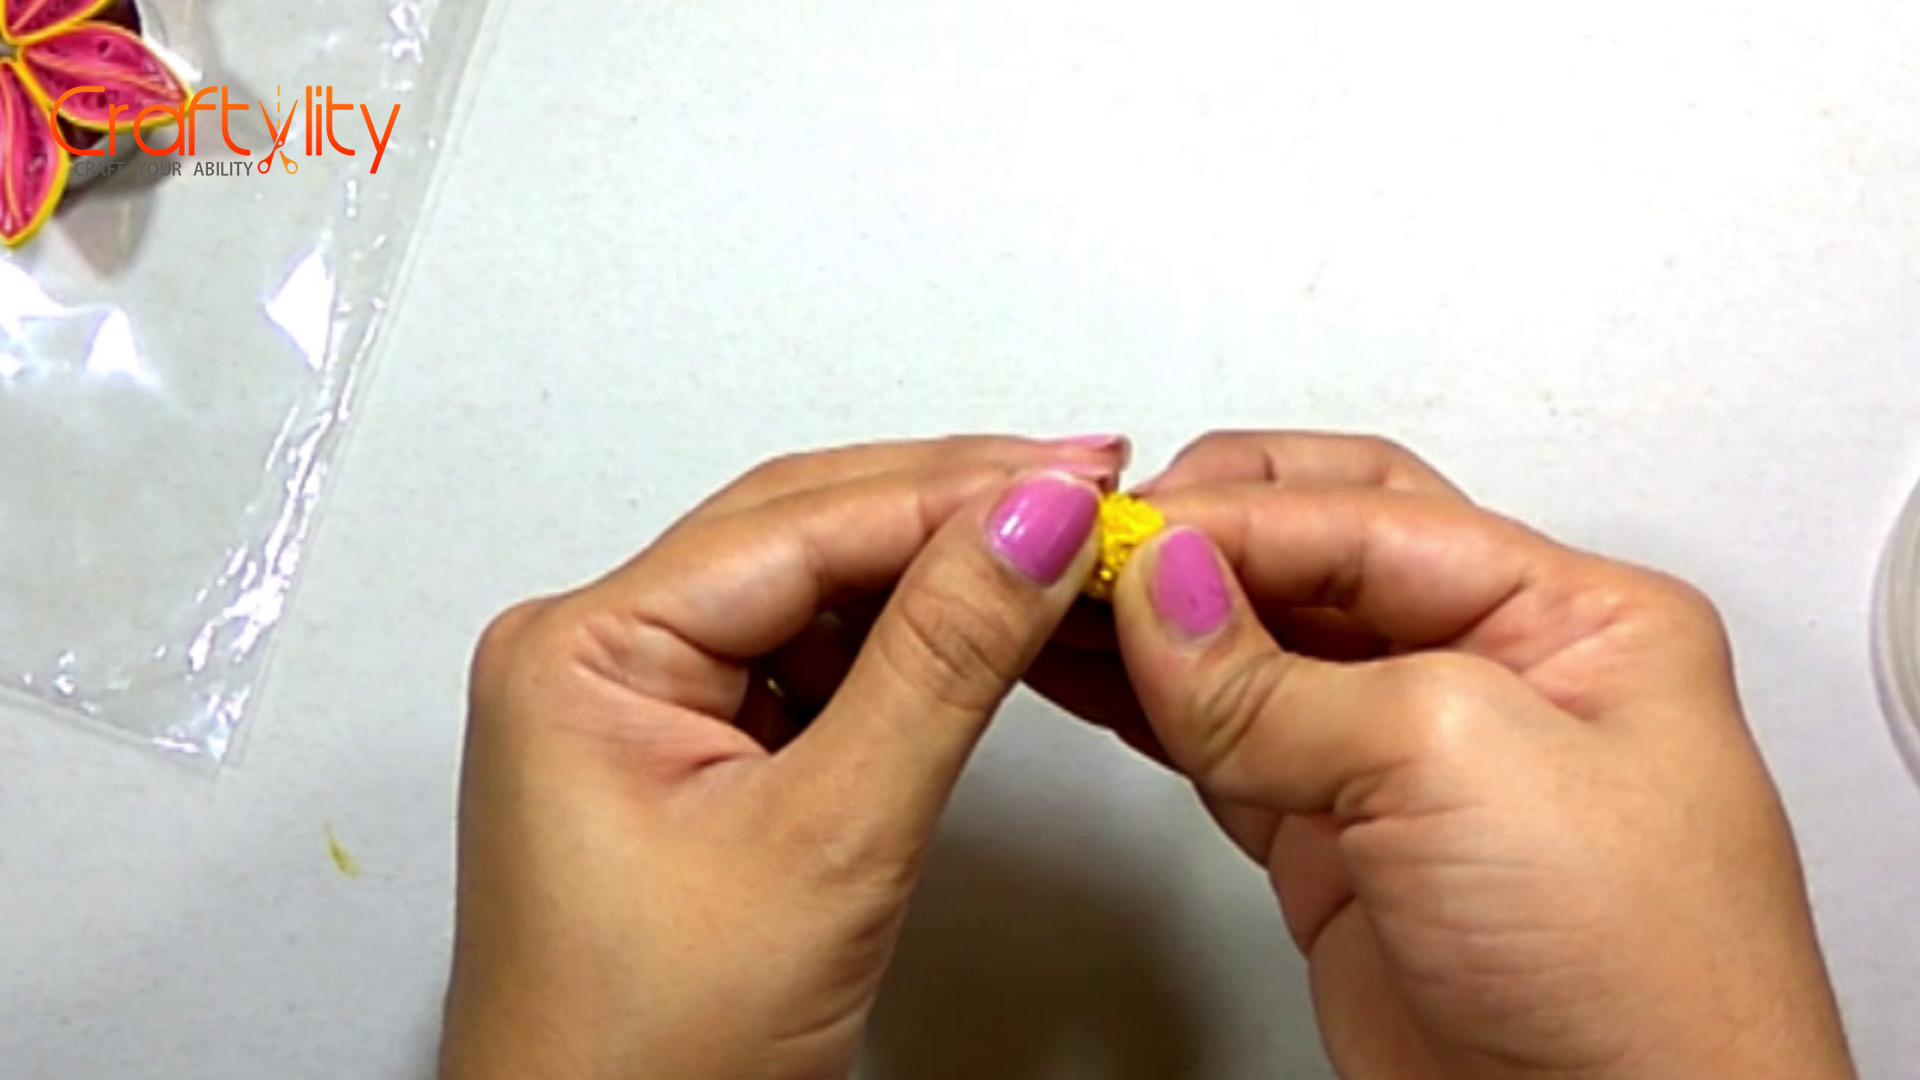
Remove the coil out of the tool and open the petals of the flowers with your hands as shown in above image.
Step 9:
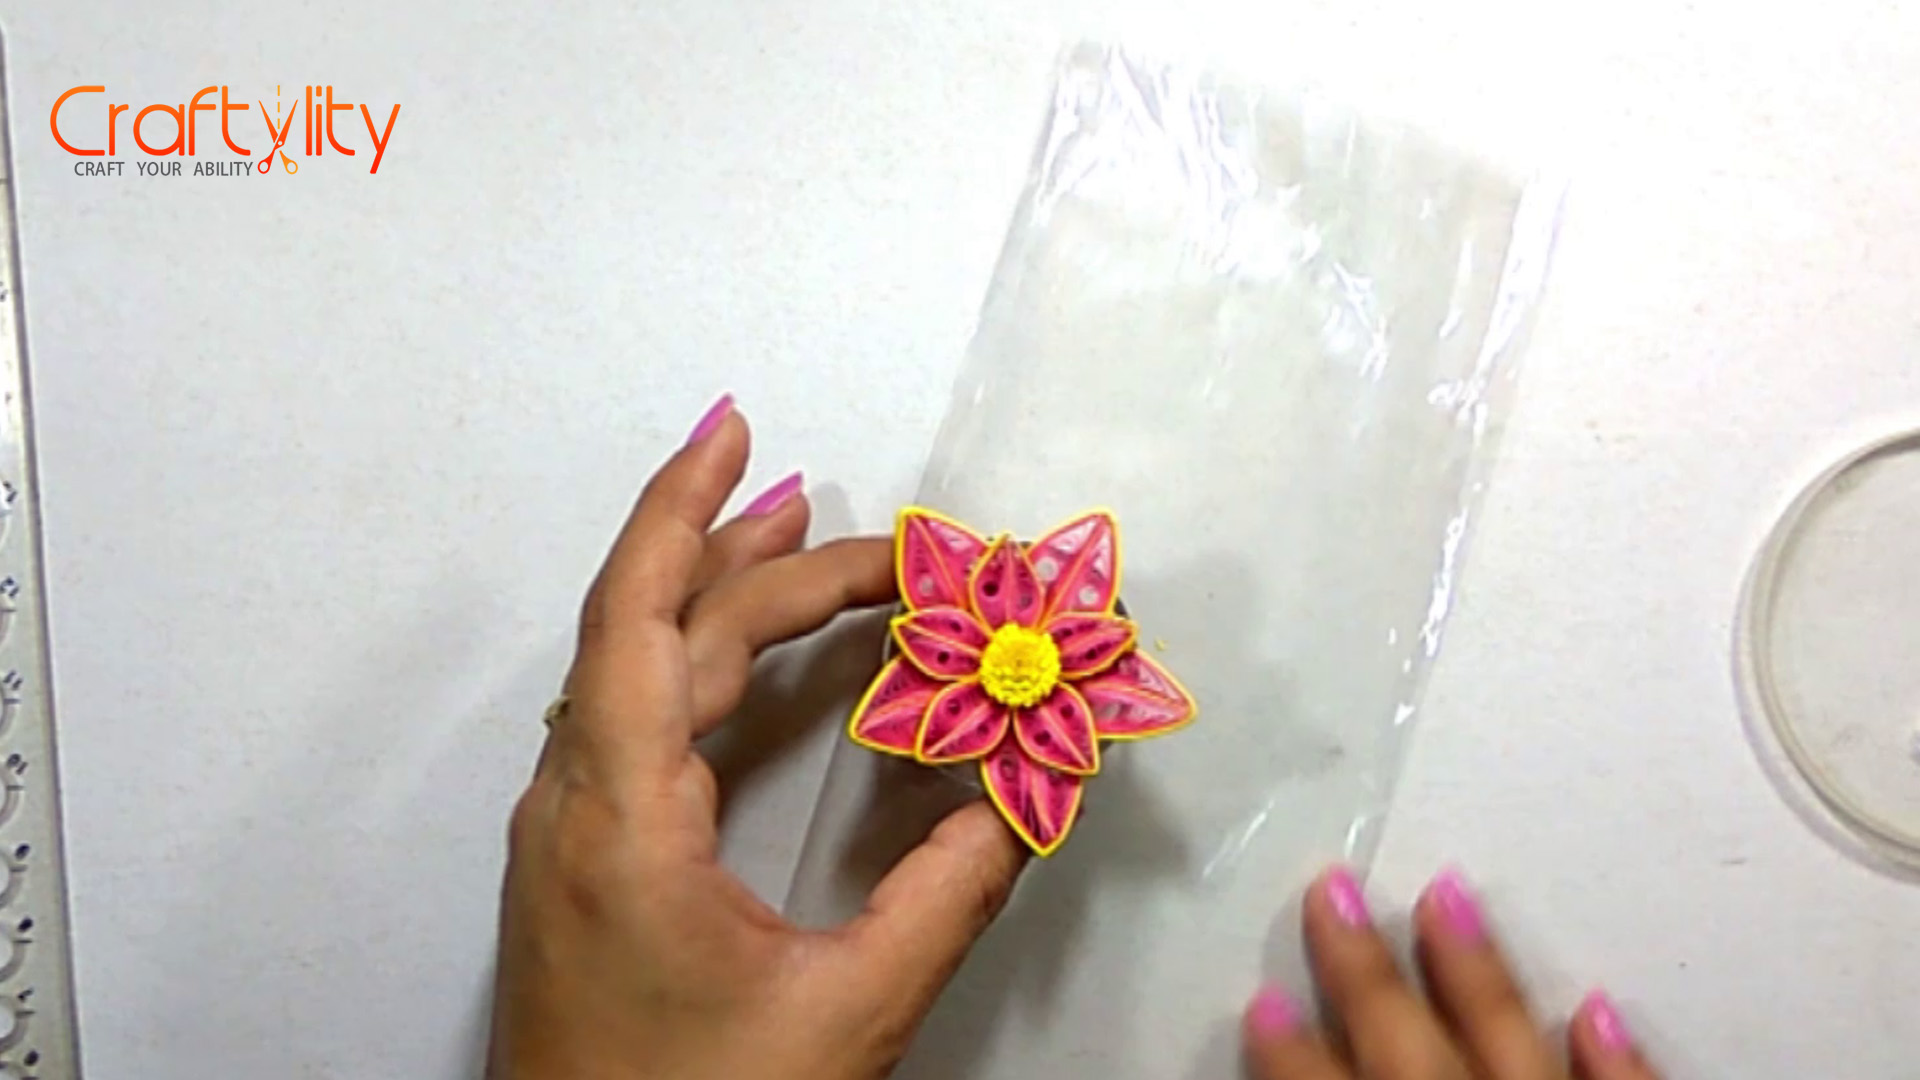
Glue smaller flower over bigger and also glue this small yellow flower in the center of the flower. Thus we have finished with our first flowers. Create few more such flowers.
Creating Leaves:
Step 10:

Create a coil of 3mm green strip of 17 inches long by rolling it with the slotted tool. Take the coil out of the tool and place in 18mm diameter circle to unroll. Take the coil out from the circle guide and glue the edge of the coil. Hold the coil with both hands and pinch it from sides to form gum drop shape. Similarly, create one marquise shape. Create few more gumdrop shapes as we need 6 gumdrop and 1 marquise shapes for creating the single leaf.
Step 11:
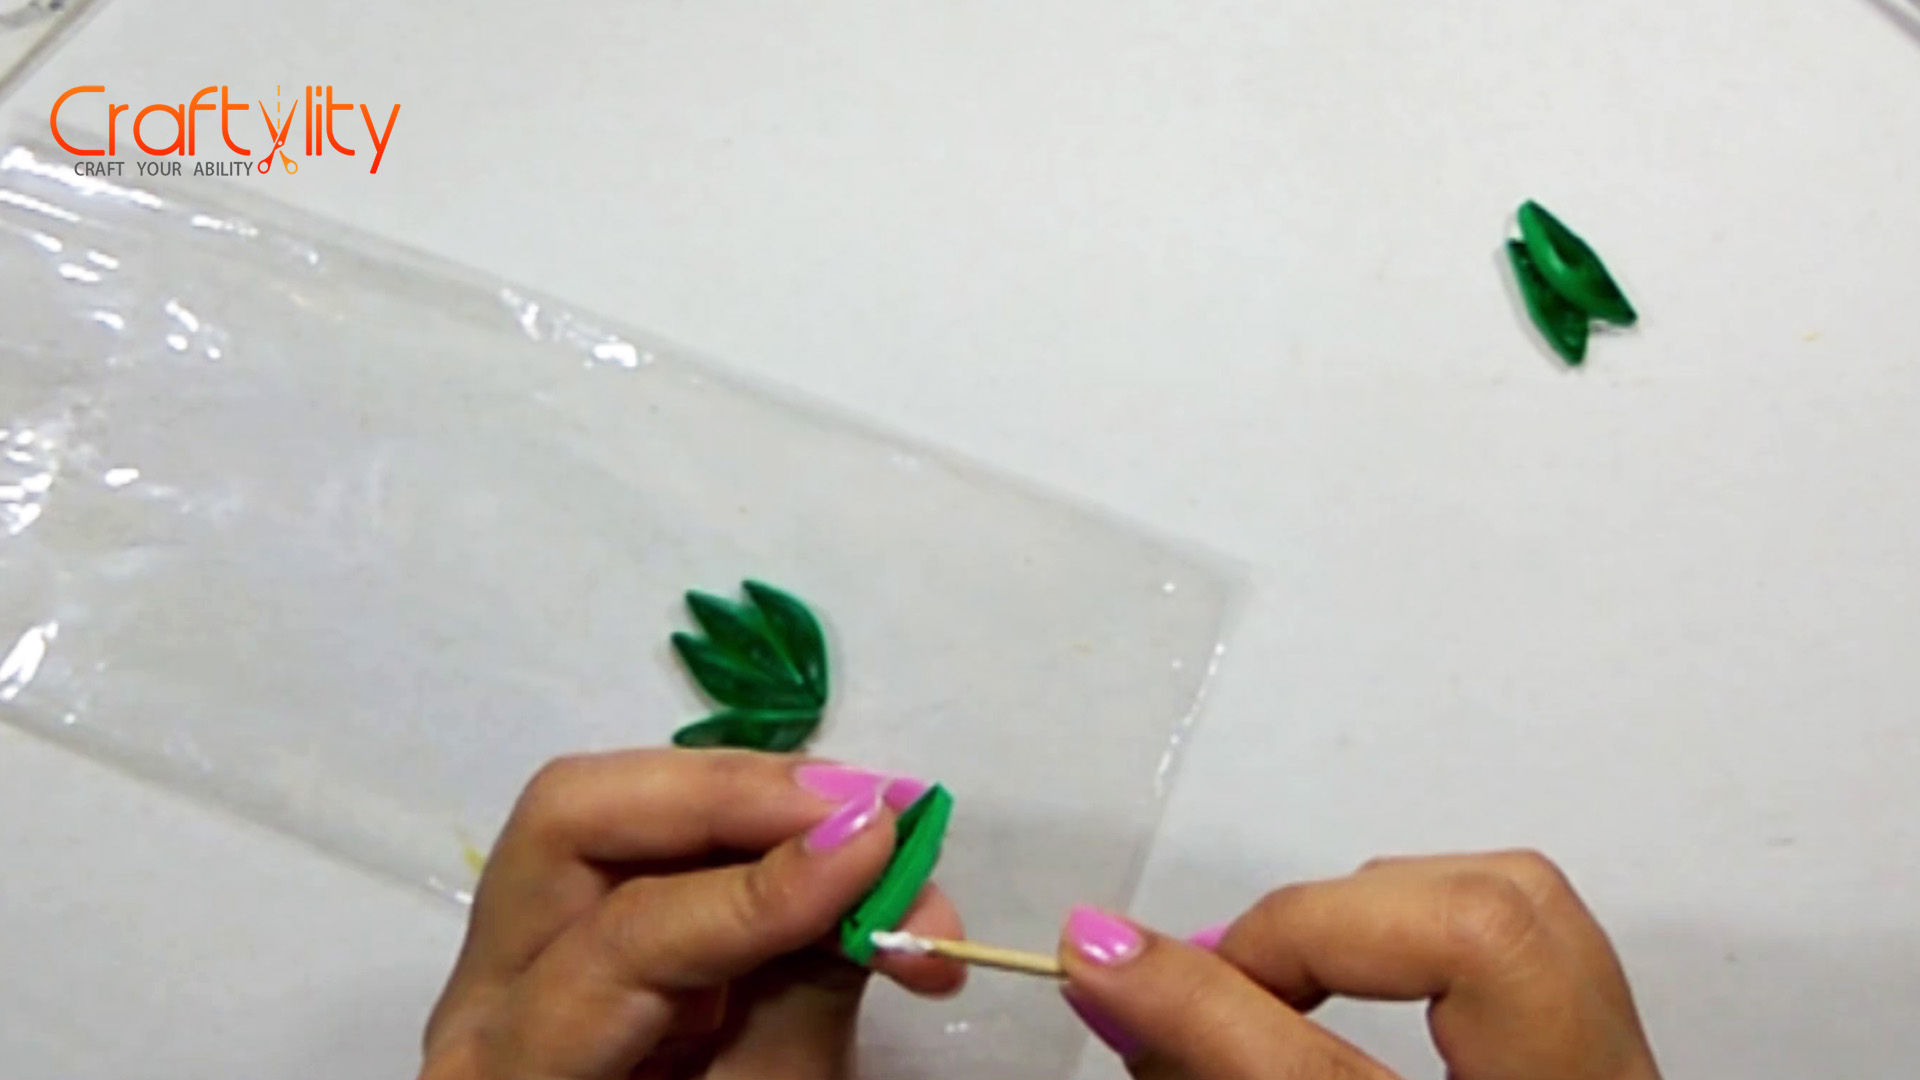
Apply glue on both sides of marquise shape and stick gumdrop shapes. Similarly glue all shapes together as shown in above image. Create few more such leaf.
Creating small white Flower:
Step 12:
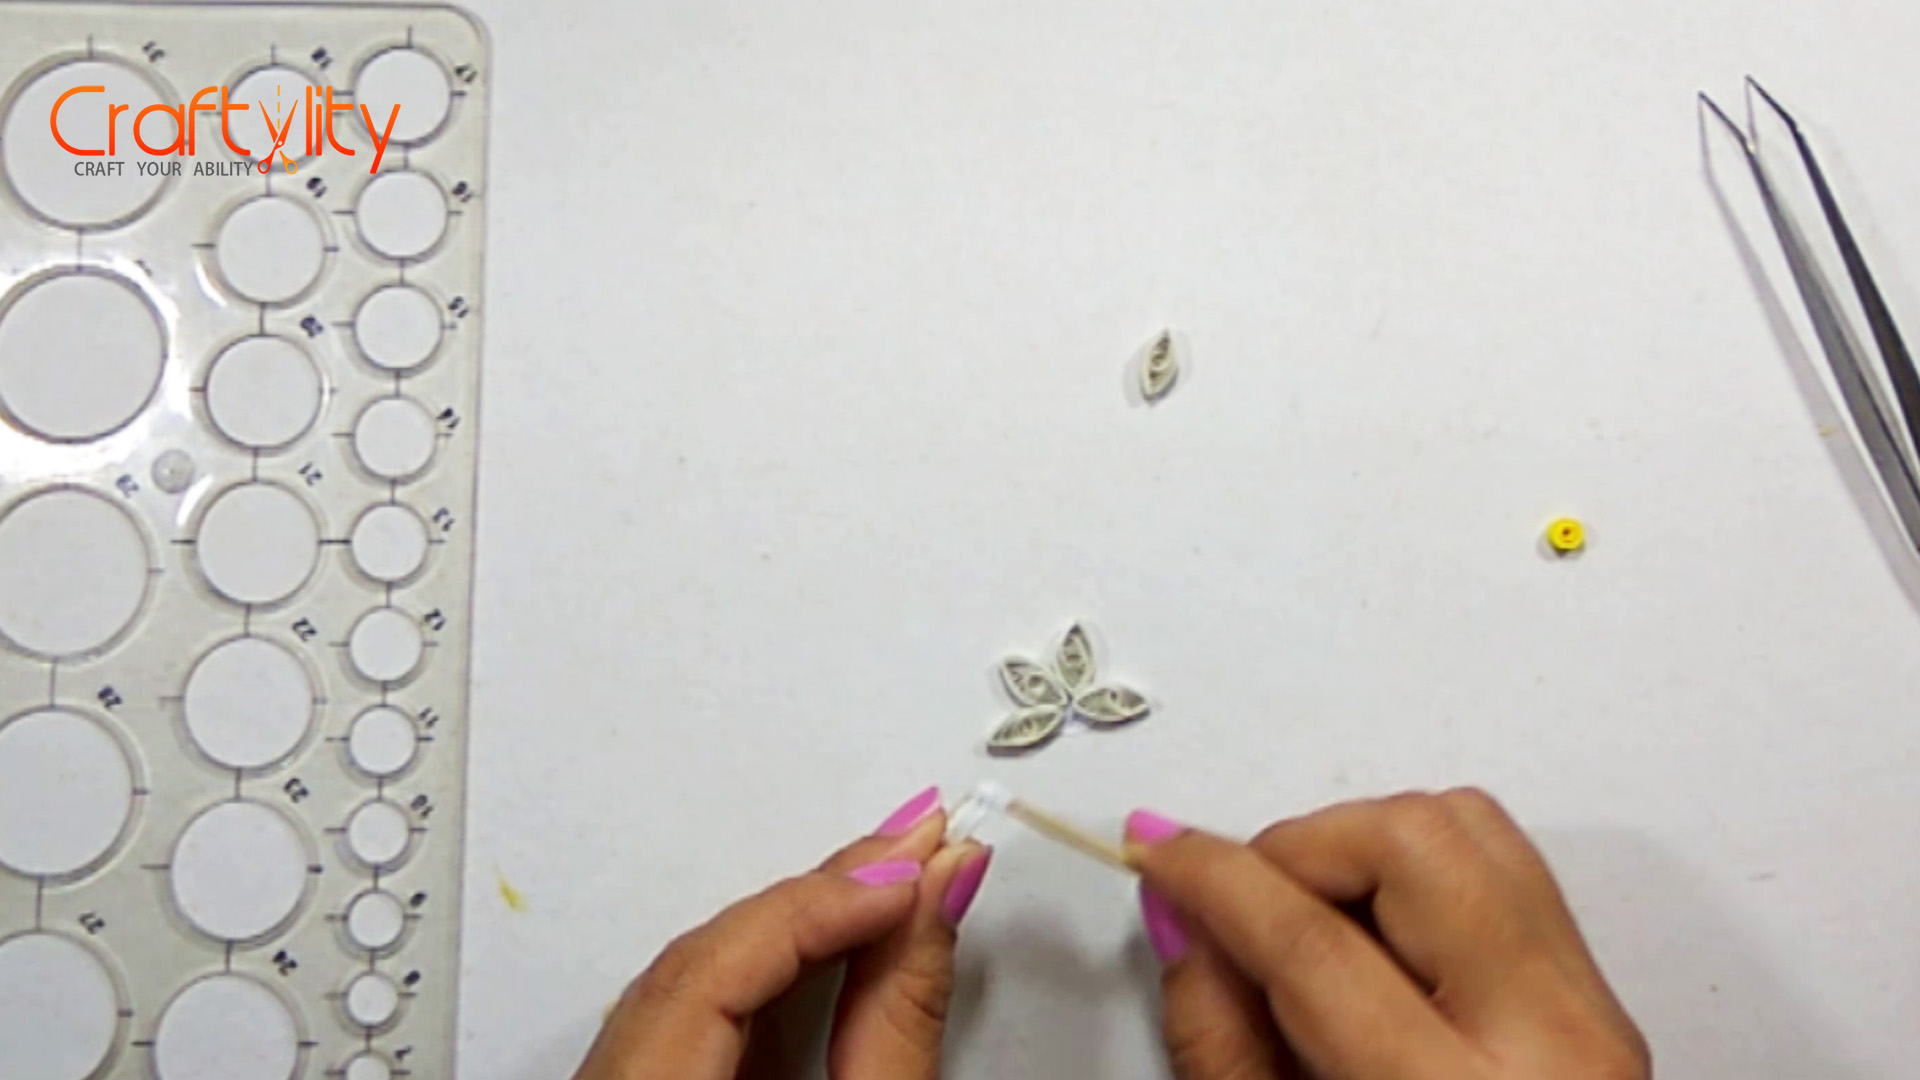
Roll 3mm white strip of 17 inches long. Take it out of the tool and place it in 10 mm diameter circle to unroll. Create marquise shape with this coil. Take 3mm yellow strips of 8 inches long and roll it. Apply glue at the end of the coil before removing it from the tool. Cut small circle and apply glue on it. Stick 6 white marquise shapes and one yellow coil on the center of the flower. Thus create few more such flowers.
Creating yellow cone:
Step 13:
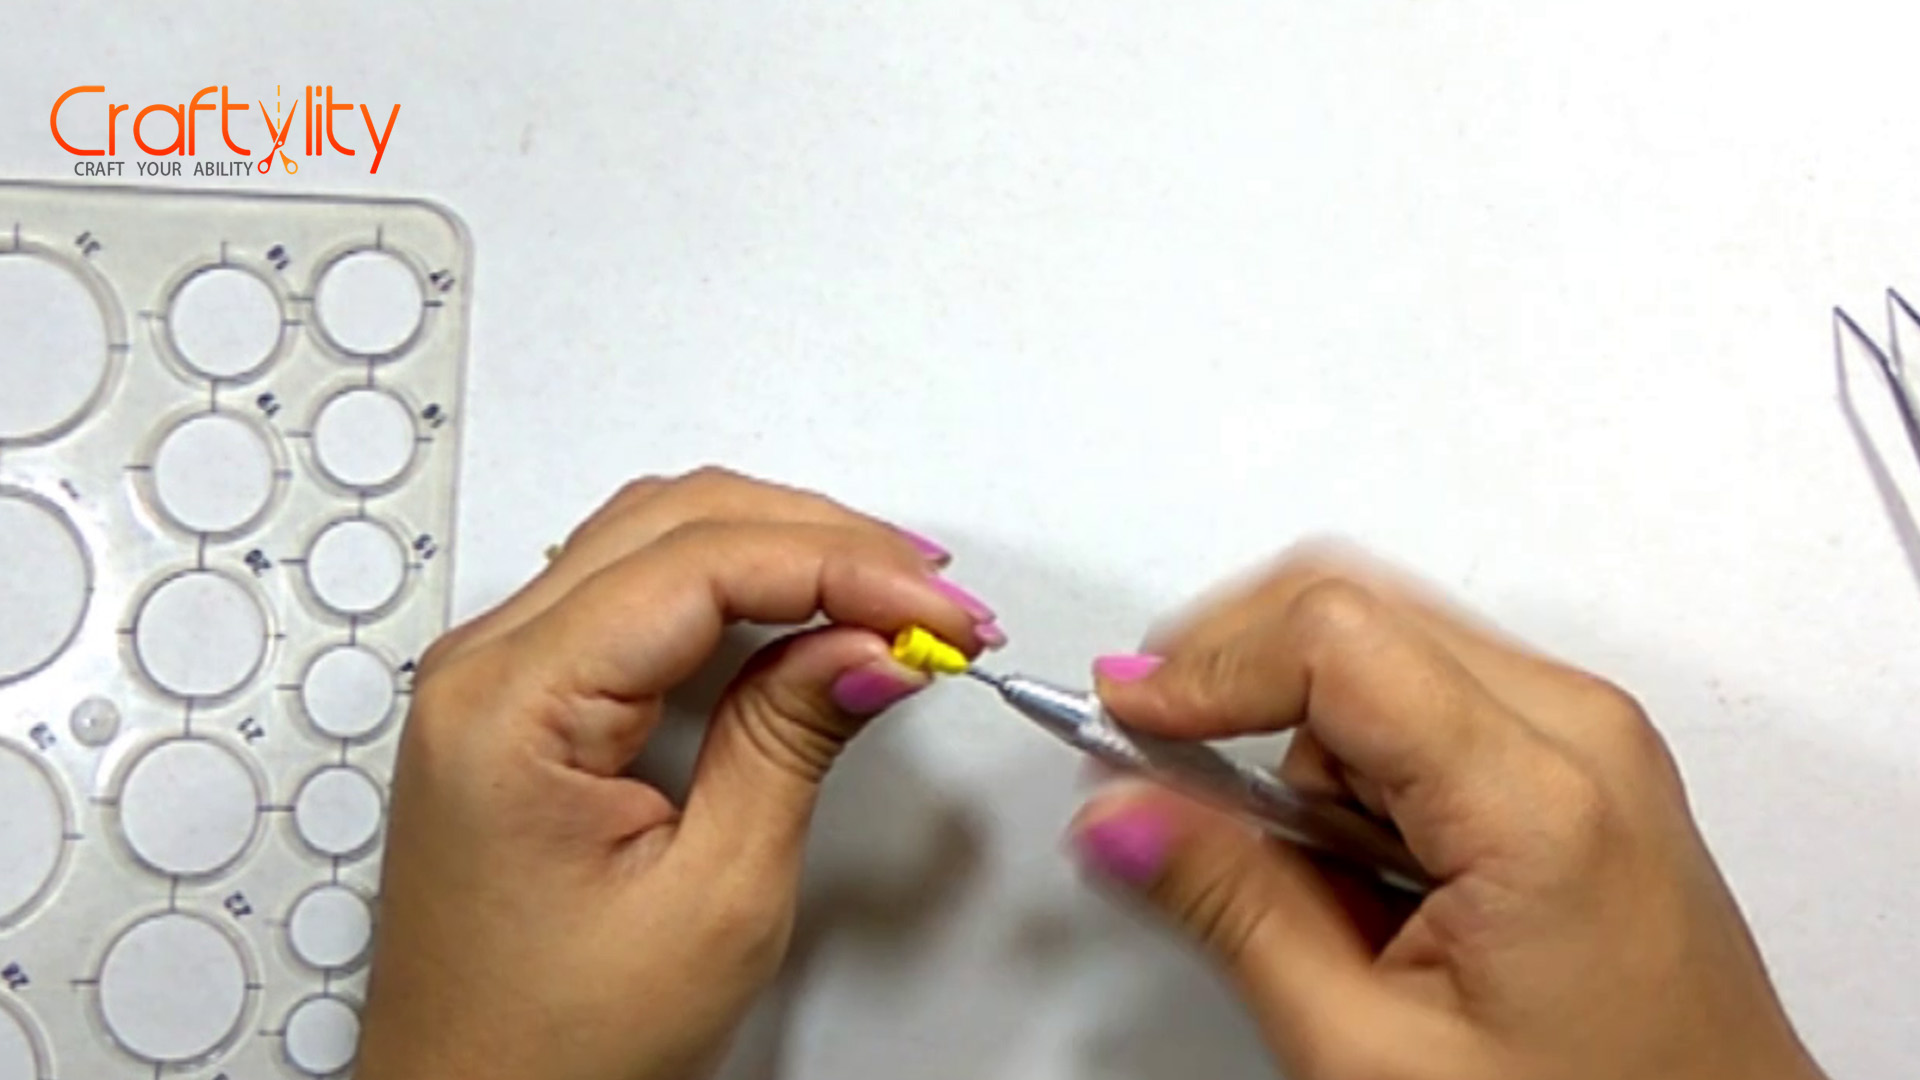
For creating conical shape, take 3mm yellow strip of 8 inches long length and roll it as shown in above image. Apply glue before removing it from the tool. Create more such shapes.
Step 14:
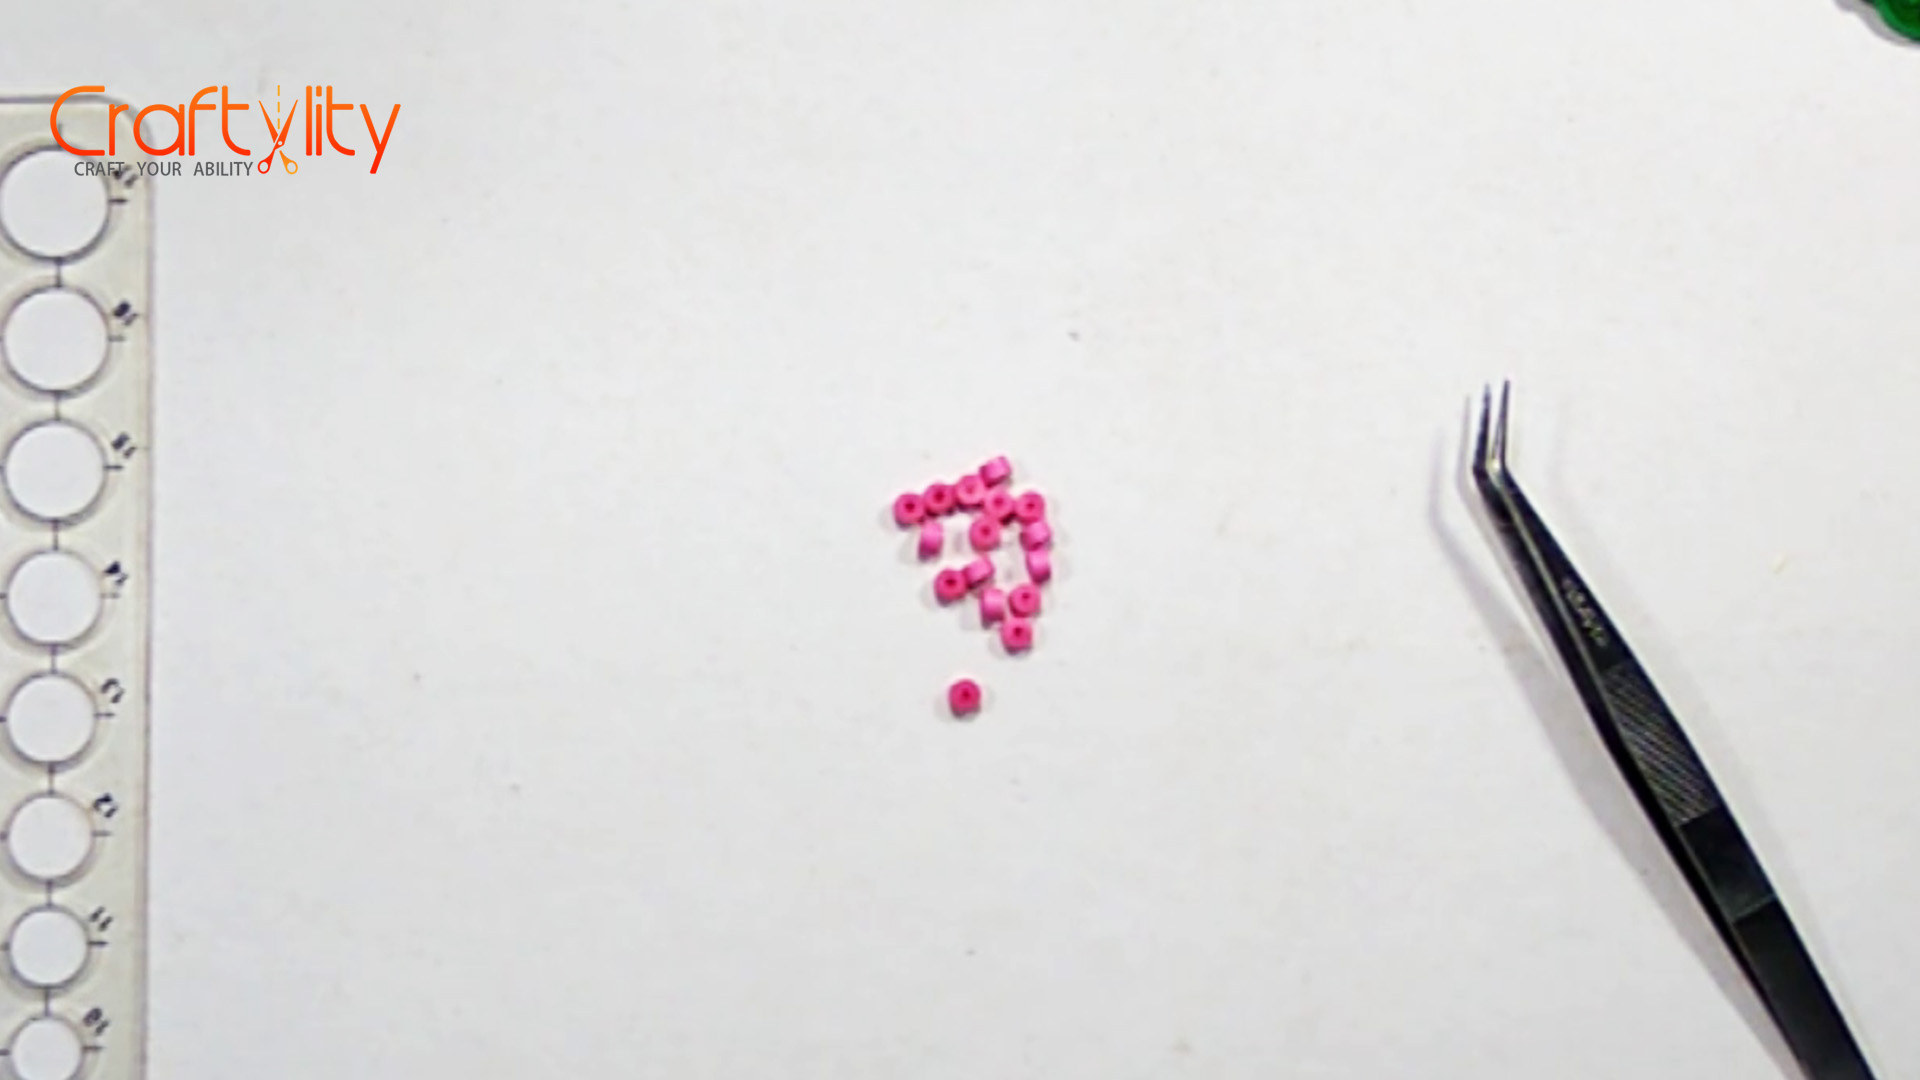
Create few tight coils to decorate card and for that take 3mm pink strip of 4 inches long and roll it. Stick the edge of the coil before removing it from the tool. Create more such shapes.
Step 15:
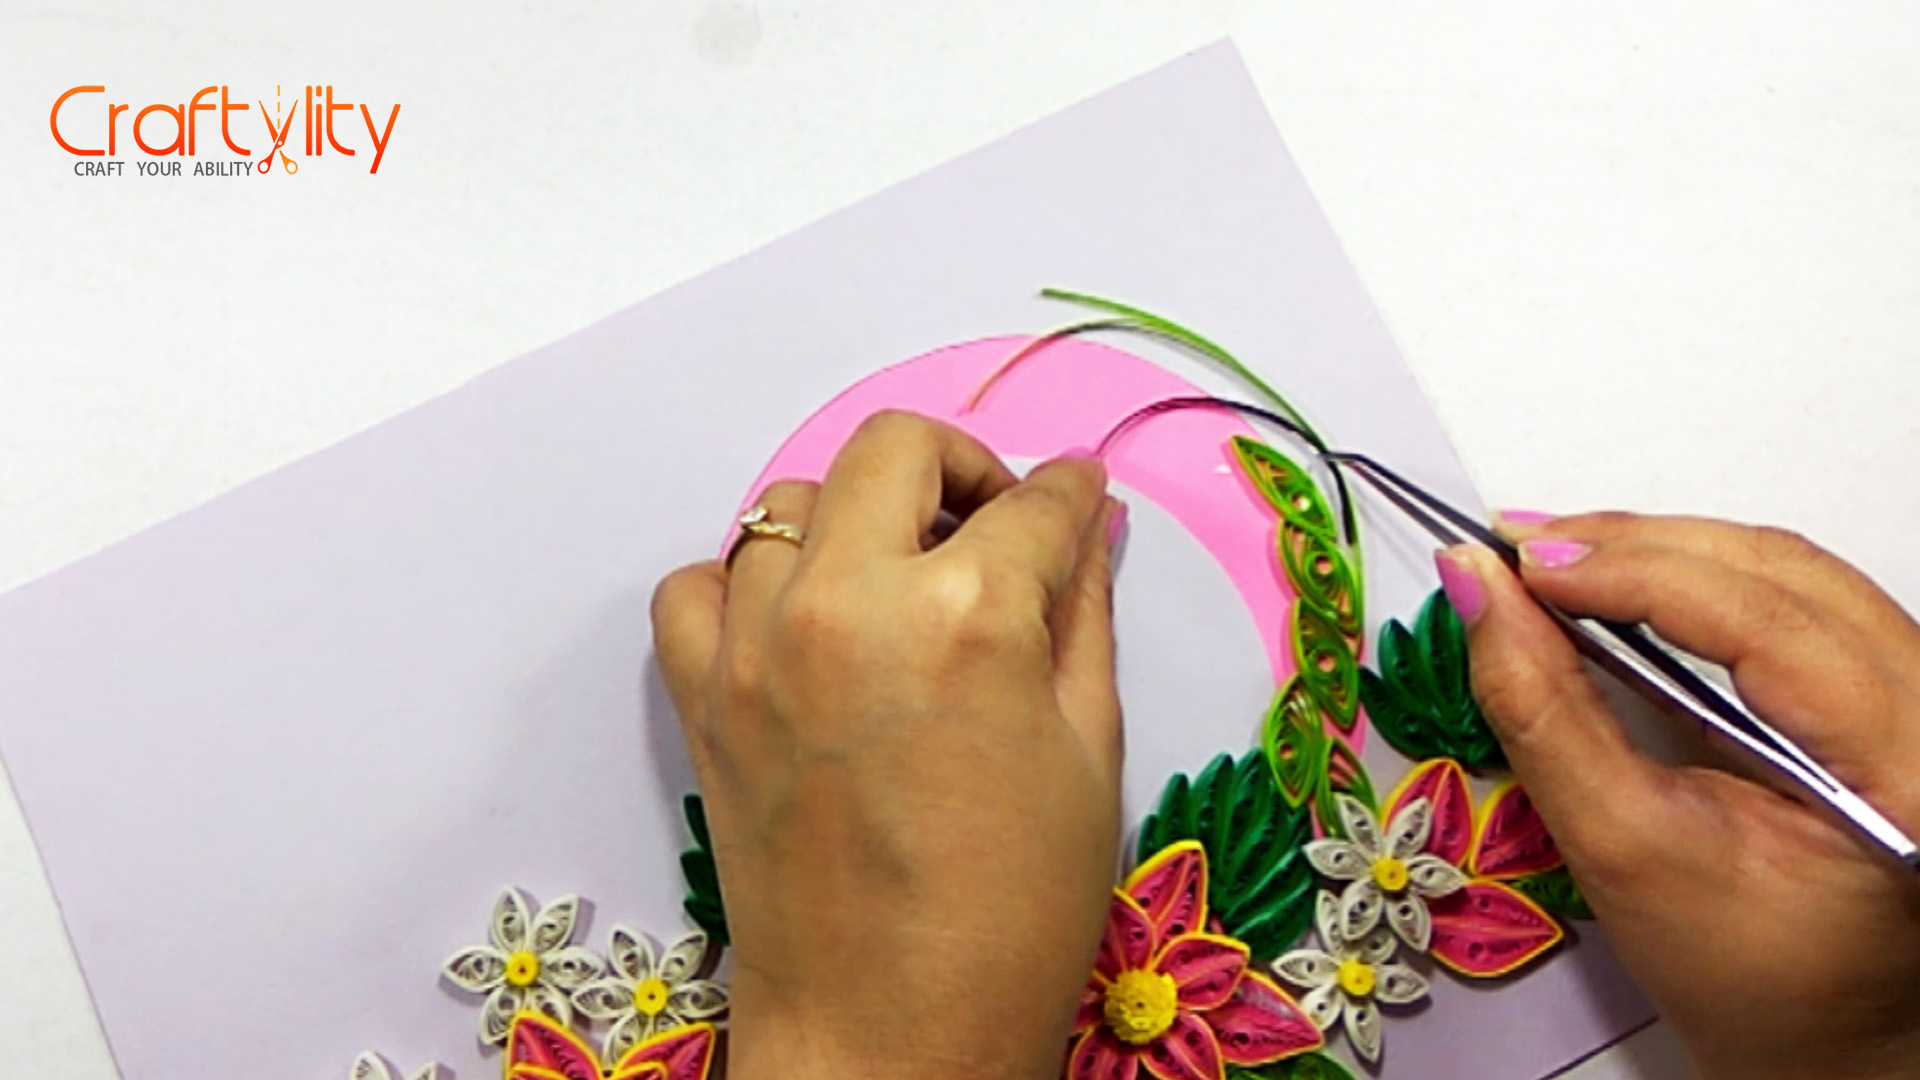
Now take 3mm green strip of 8 inches long and roll it. Place it in 18mm diameter circle to unroll. Take the coil out from the circle and glue the end of the coil. Hold the coil with both hands and pinch it from both sides to create marquise shape. This is the single leaf, create more such leaves of different sizes and colors.
Creating Card base:
Step 16:
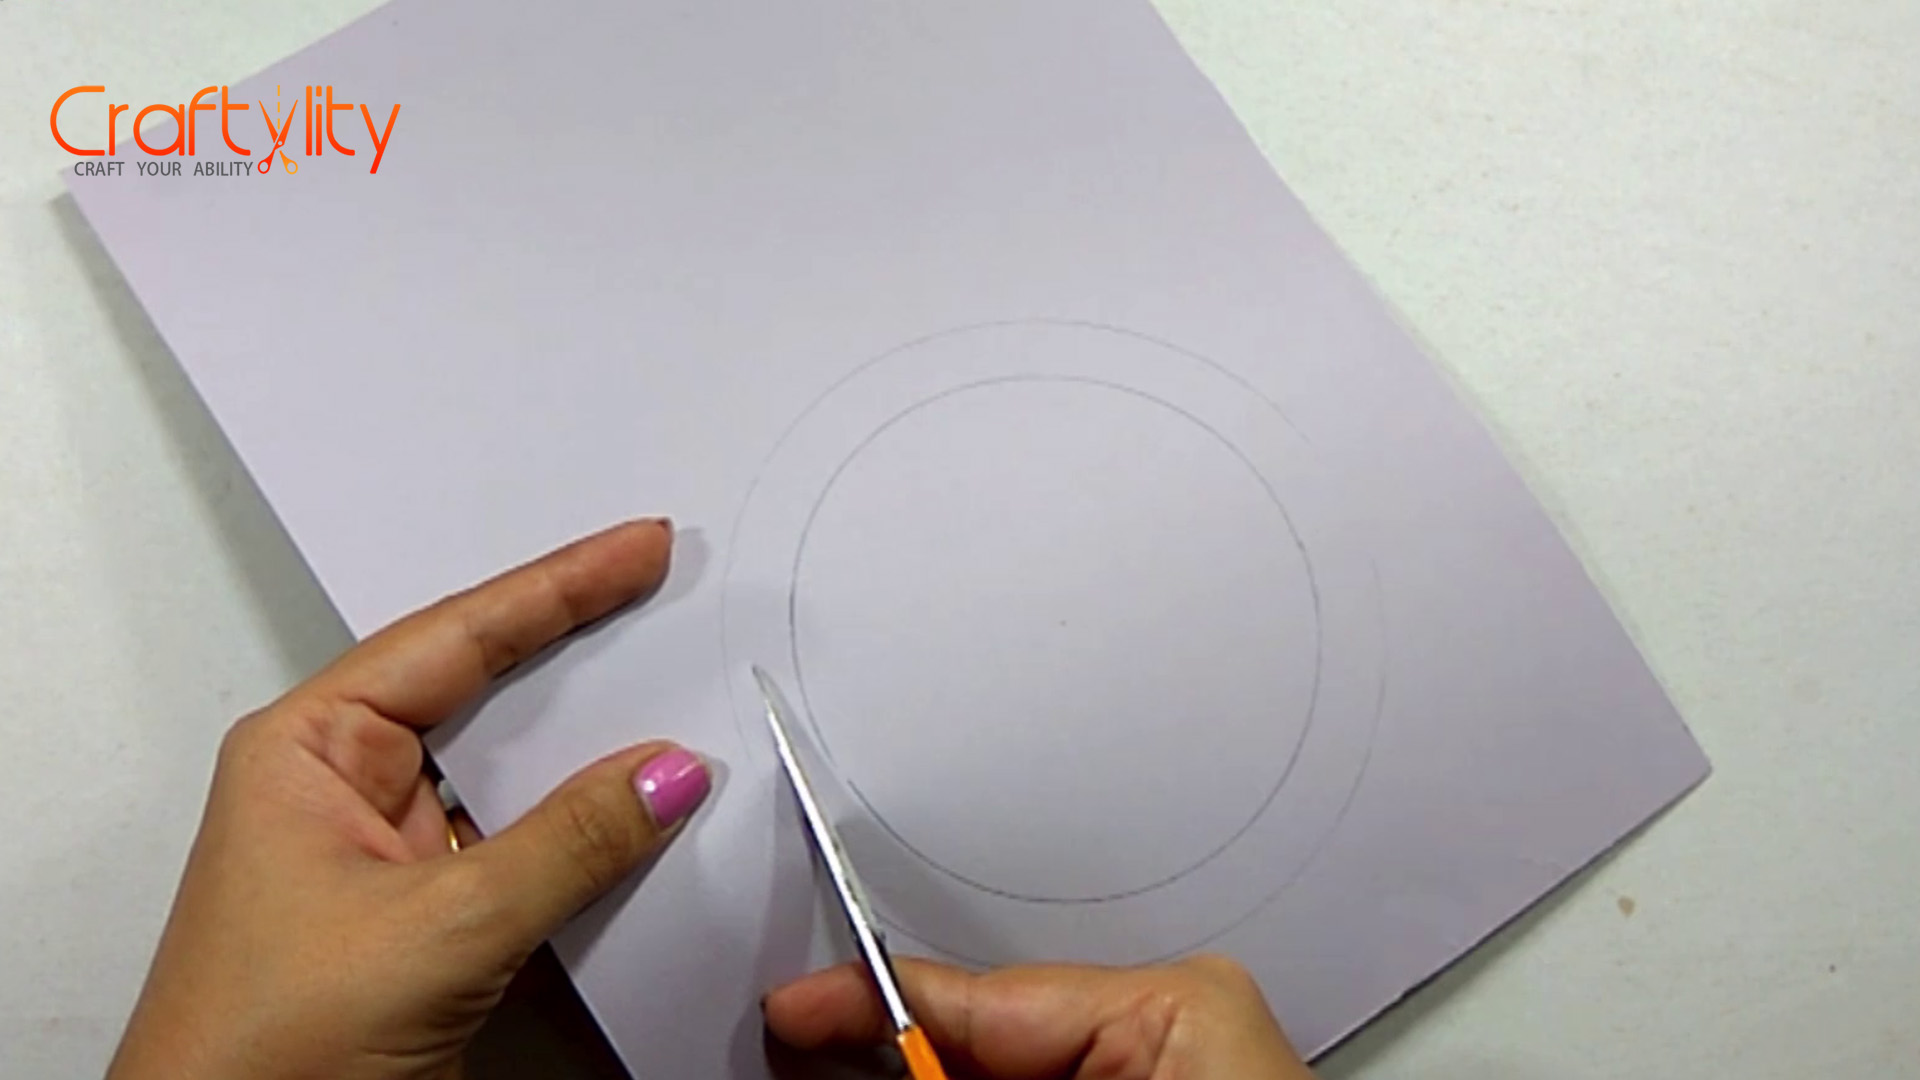
Take purple card paper of the desired size and draw the circle on its right side as shown above.
Step 17:

Cut the circle and place pink paper below purple paper.
Step 18:
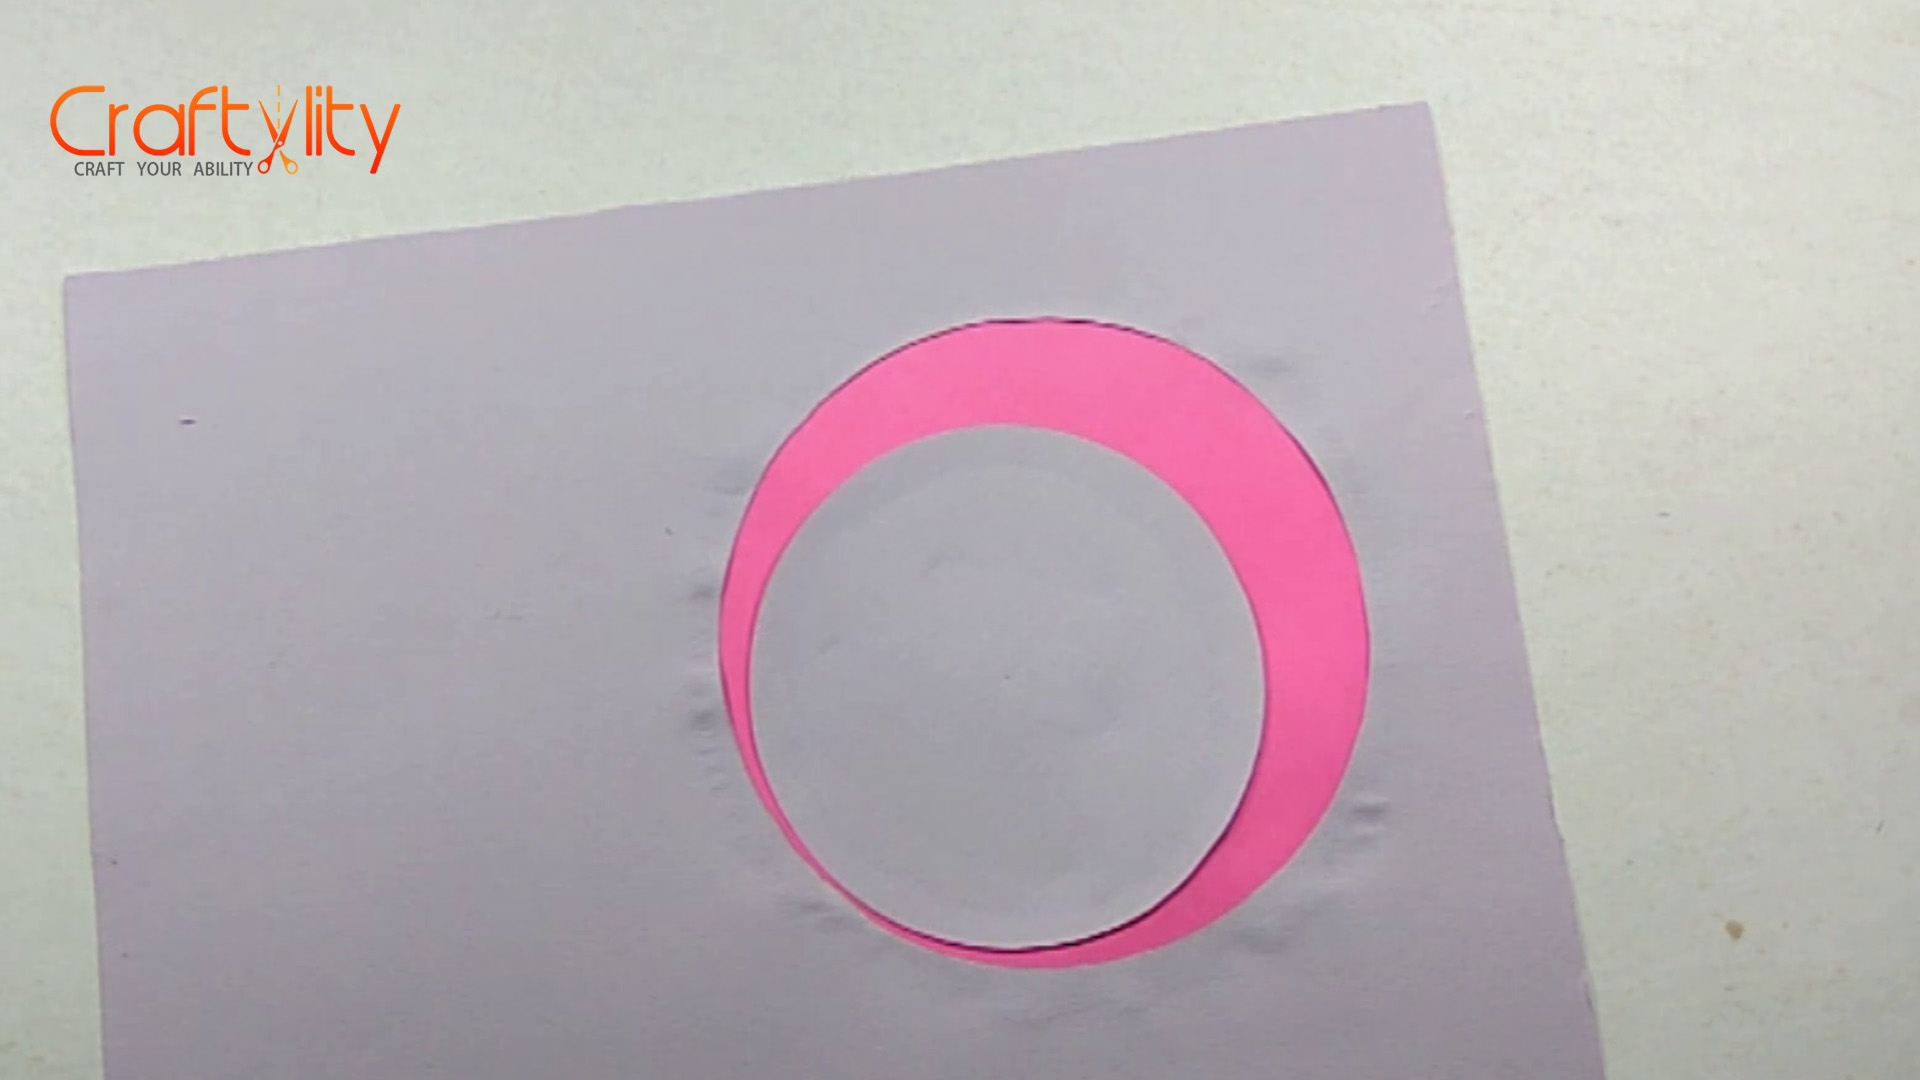
Glue the purple circle on pink paper but on bottom left side.
Step 19:
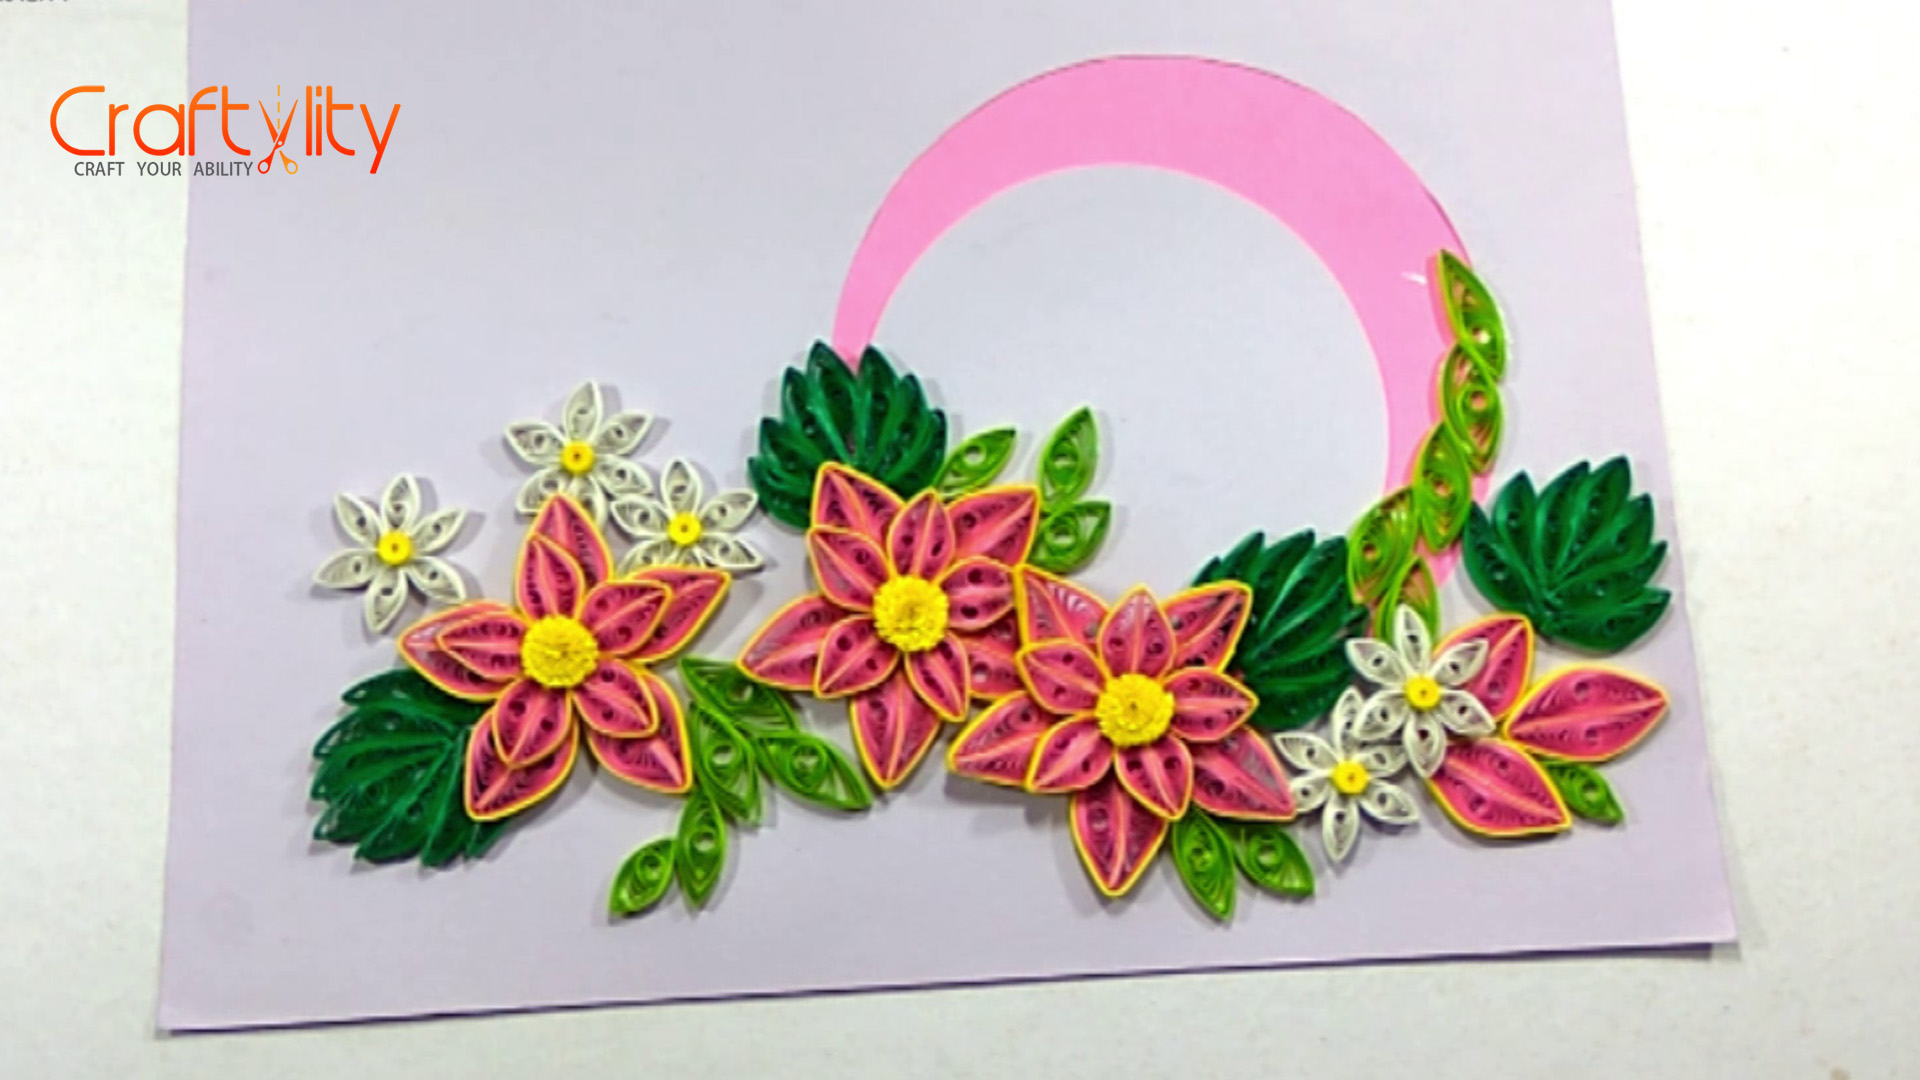
Arrange all the flowers and leaves and start sticking it on a card.
Step 20:
Now take 3mm green strip and stick it on the card as shown above.
Step 21:
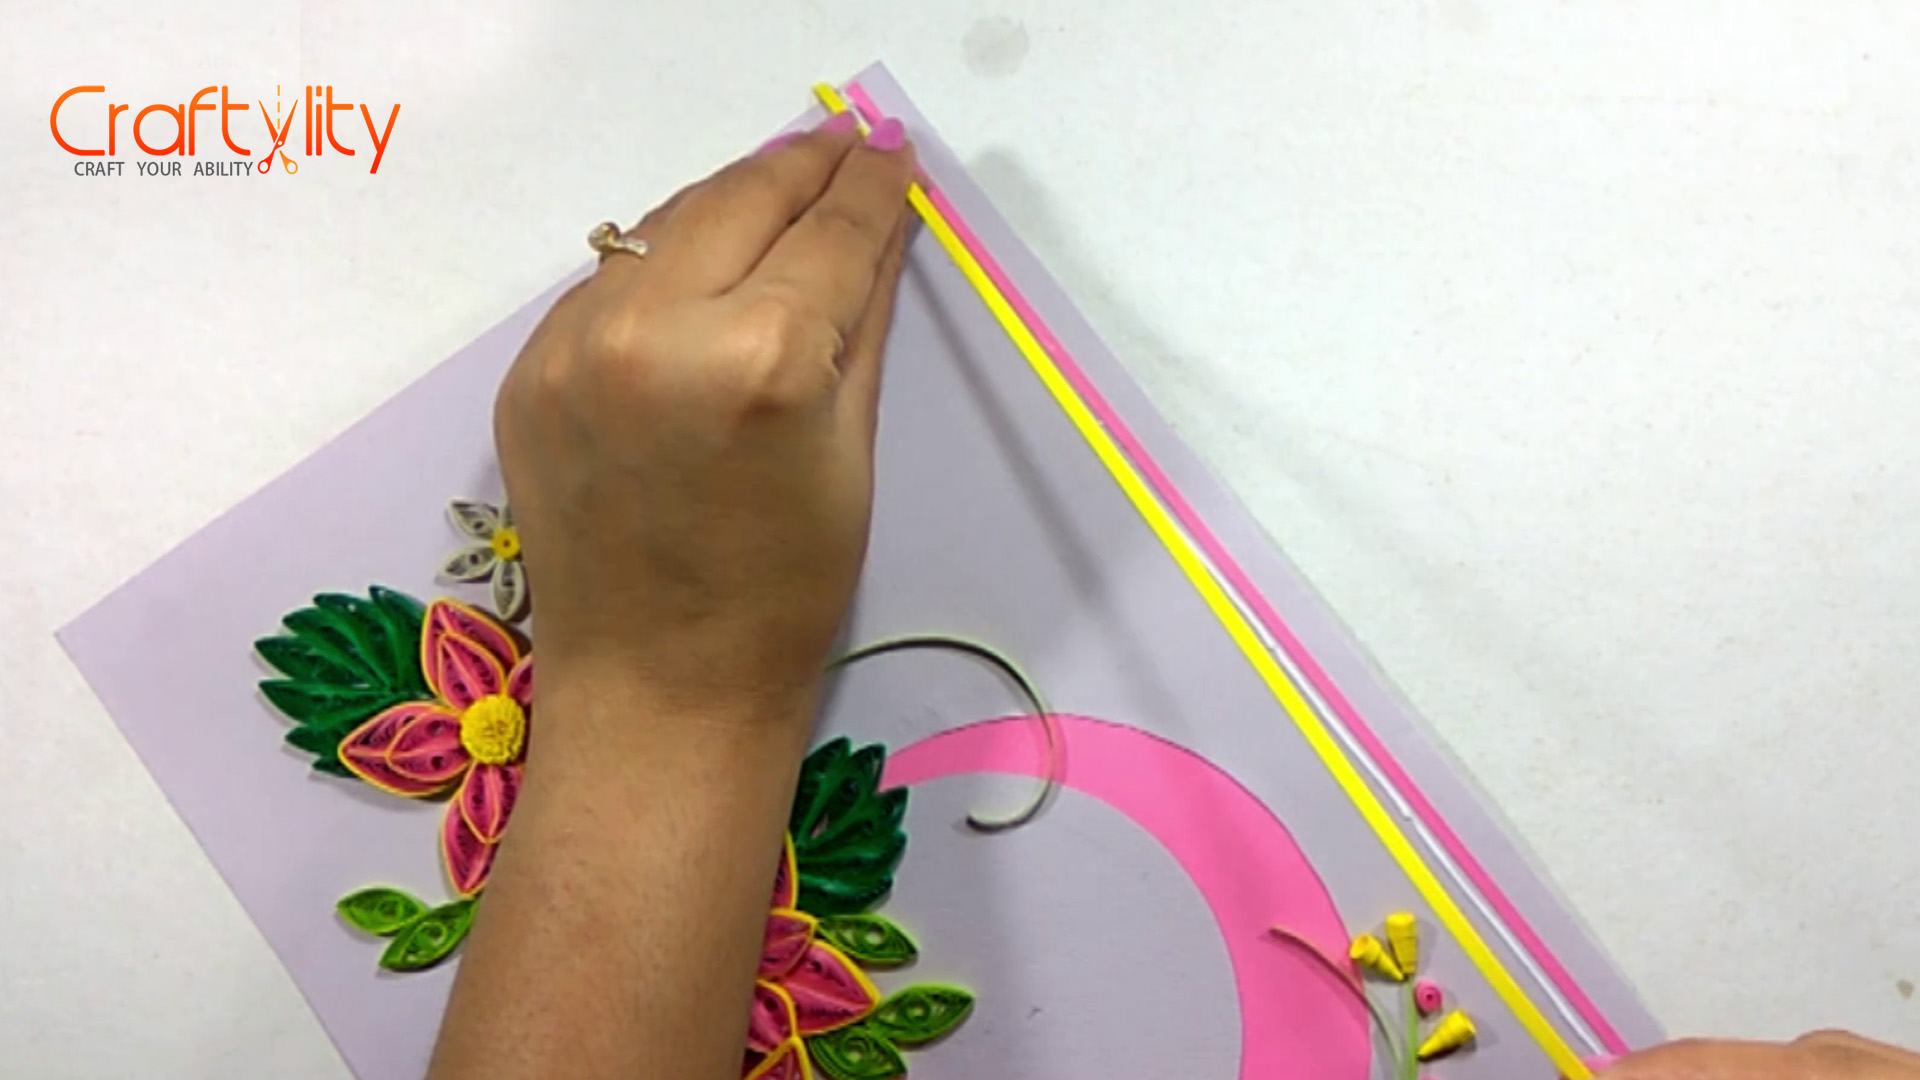
At the end Stick two quilling strip of pink color on the top of the card.
This is the final look of the paper quilling card. Hope you like the post, please leave your comment below.

Happy Crafting!!!