

In this post, you will find how to make this decorative paper quilling hats by following few steps. These vibrant colored quilling hats are really easy to make. I wanted to create this project from the last couple of days and finally, I have created these hats to gift to my friends. You can use any size of paper for creating these hats, I am using 10mm, 3mm and 1.5mm width of paper as these are really very narrow and thin and the output is beautiful as hats and its flowers are tiny and cute. So let get started with this project.
For creating paper Quilling Hat Keychain you need following materials:
- 10mm, 3mm and 1.5mm Quilling Strips
- Quilling tools
- Scissors
- Glue
- Circle Guide
- Curved Tweezer (Optional)
- Jump Rings
- Keychain ring
- Jewelry Pliers
- Small Semi bead stickers
- Card Stock / Color paper
Creating Base
Step 1:
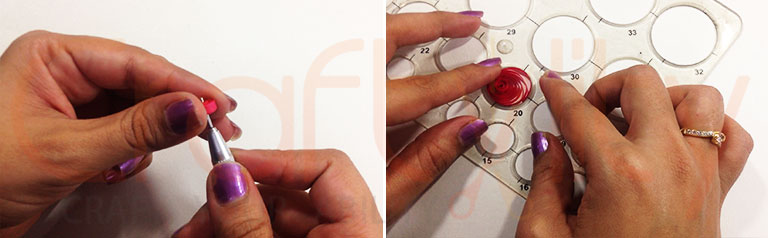
Take 3mm red quilling strip of 17inches long and create a loose coil with the help of quilling tool. For creating the loose coil, roll the strip of paper with a tool and take the coil out from the tool without applying glue. Now take circle guide and keep the coil in 20th circle of the guide to unroll it. Once the coil is unrolled, pick the coil carefully and apply glue on the end of the strip.
Step 2:
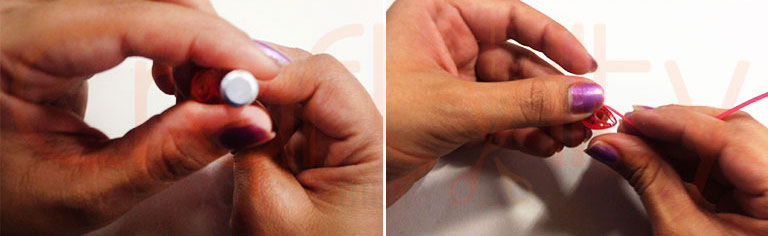
Now hold this loose coil in one hand and press the center of the coil with handle of quilling tool to create “C” shape (refer above image). Once we get this “C” shape, take 8 inches of a red strip and wrap it around the shape. Start by applying glue and then wrap it around the shape, secure the end. Create Total 12 such shapes.
Step 3:
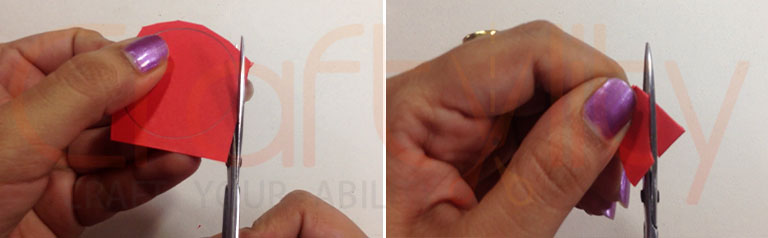
Now take same color card stock or thick paper and draw a 37th circle from circle guide. Cut the circle and fold it. Now cut the inner part as shown in above image. This you will get Donut like shape.
Step 4:
Apply glue on cardstock and start gluing the shapes.
Step 5:
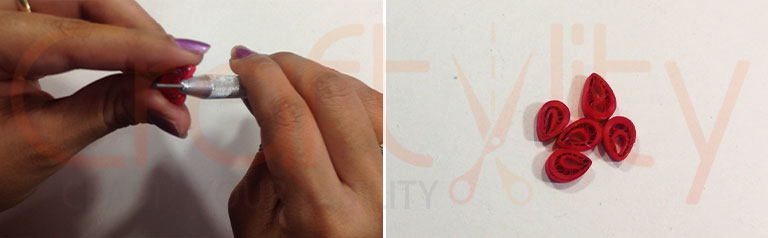
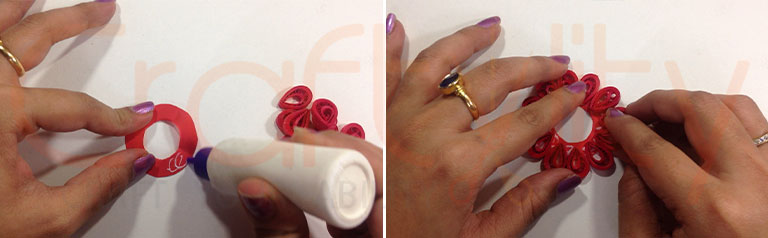
Now take 3mm red quilling strip of 8 inches create the similar shape. For this use 14th circle to unroll the coil and pinch the loose coil with Quilling tool as shown above and for wrapping use 4 inches of red strip. Create 5 such shapes.
Step 6:
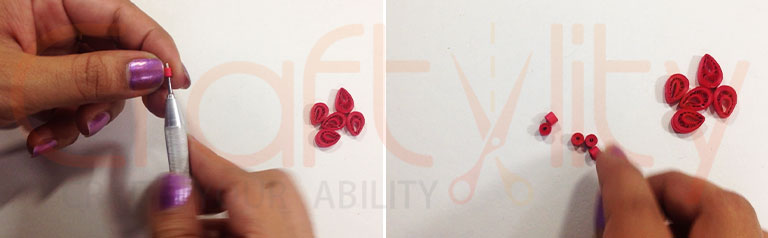
Take 3mm red strip of 4 inches and create tight coils. Create 6 such tight coils.
Step 7:
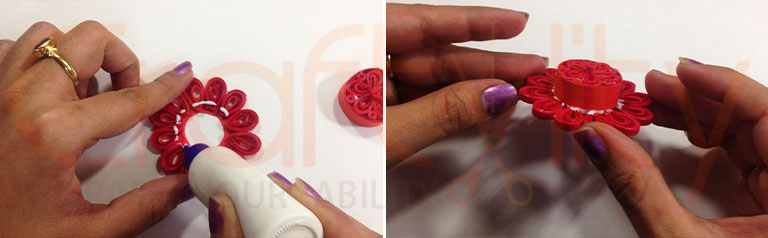
Glue all small shapes and tight coils together to form a flower. Later Glue this flower on card same size card stock.
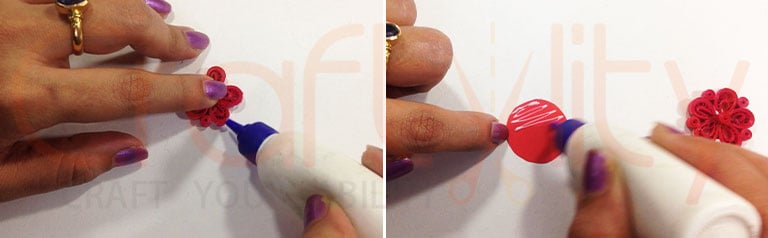
Step 8:
Take 10mm Red strip of 12 inches and wrap it around that flower base in such a way that flower should be above facing.
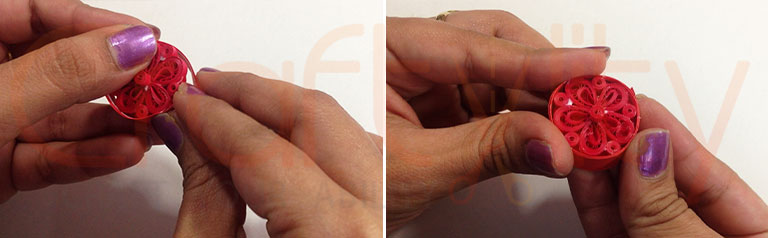
Step 9:
Glue this ring in the center of the base (Created in 3rd step).
Step 10:
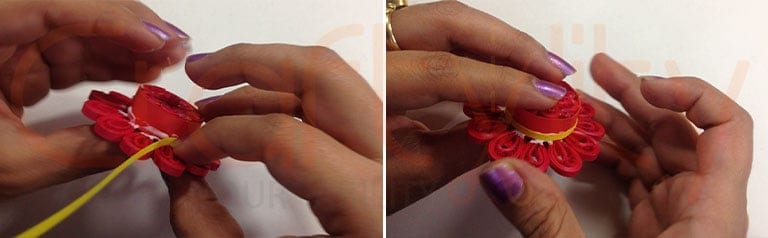
Now take 3mm yellow strip of 5 inches and glue it around bottom of the ring.
Step 11:
Now take 5 inches of 1.5mm yellow strip and create small tight coil. Create a tiny flower by glueing 5 such yellow tight coils together. Also glue on red tight coil inside the flower. Create 2 such flowers.
Step 12:
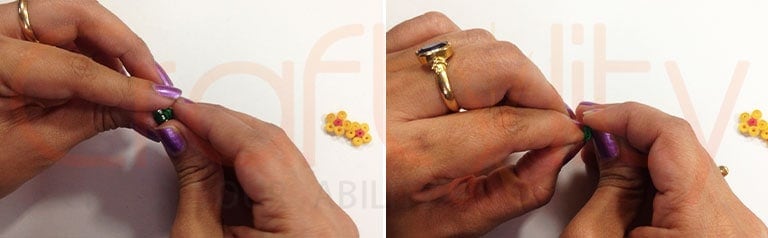
Take 1.5mm green strip of 4 inches and create small shaped marquise leaves. For creating this leaves, create loose coil and pinch it from both the sides and twist it to form “S” like shape. Create 4 such tiny leaves.
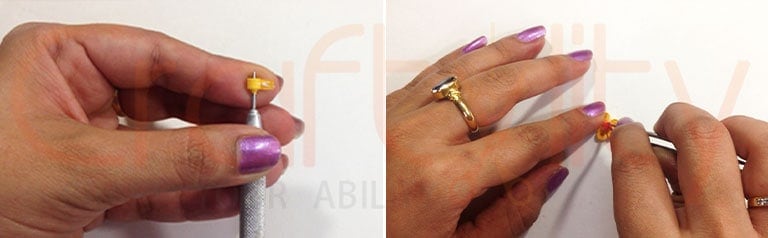
Step 13:
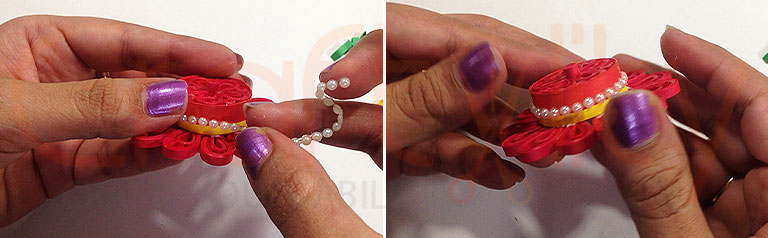
Take the string of semi bead sticker and glue it over the yellow strip as shown in above image.
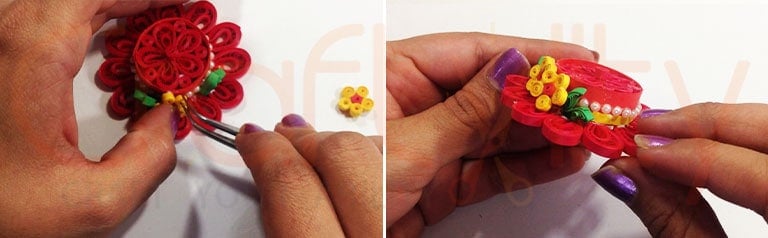
Step 14:
Glue 2 flowers and 4 leaves on hat as shown in above image.
Step 15:
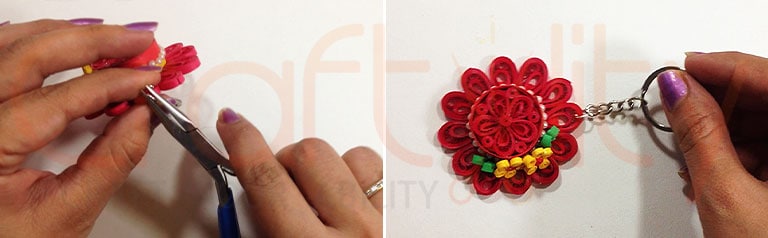
In the end, take one jump ring and open it. Insert the key chain and connect it with hat and close the jump ring with the help of pliers.
With this our Paper Quilling Hat Key chain is completed, hope you like this project. Don’t forget to visit my youtube channel for more such quilling tutorials and subscribe to my channel if you like my projects. Also, leave your valuable comments below which keeps us motivated.
Happy Quilling!!!