

Can embroidery be removed? Yes, but it’s not easy. You’ll need to use a seam ripper or scissors to cut the stitches that are holding the fabric together and then remove all of them. This can take hours and is not recommended for large areas like dress shirts or skirts. It is best to first try using a prewash treatment before removing any stitching.
The best way to remove embroidery is by using a pair of scissors. The method will slow you down, but the speed isn’t an issue when working with such delicate threads and fabric as this one!
You can also use shears if needed; they’re slower than cutting through individual stitches on your own machine or hands-free foot pedal sets – though some people do prefer that style since it helps them concentrate better while sewing without having any distractions around their work area
Table of Contents
So, Can embroidery be removed?
Yes, you can remove and redo embroidery works, but the process varies depending on if you’re doing it with a seam ripper or needle. For hand-embroidery work like satin stitch (which looks like an “X”), there are specific steps that need to happen in order for your fabric to stay intact; otherwise, pieces may break off when removing this type of design.
An example would be taking away threads one at a time while keeping everything else attached – then pulling until all strings come out completely before moving on to the next step!
What do you need to remove embroidery?
If you are looking to remove your embroidery, there is nothing to fear. Embroidery can be removed in a number of ways depending on the type of fabric and method used for the application. There are also different types of stitches that can affect how easy it is to remove the design. Here’s what you need to know about removing embroidery from various fabrics and stitching techniques before getting started with your project!
If you’re planning on removing your old embroidered pieces, here’s everything you need to know about how easy it will be! The type of fabric will determine which removal method works best while some stitches may make this process easier or harder than others. I’ll go over all these factors.
1. A Seam Ripper:
A seam ripper is an essential tool for any embroidery artist. The pointed head can be used to remove unwanted stitches and pinch seams in hard-to-reach areas with ease while the rubber tip pokes out beneath these pesky threads! They are available in many sizes so you don’t need a large handpiece when small jobs come up that require one – like removing decorative stitching from clothing items before they’re sewn together without damaging fabric fibers at all (not even by little).
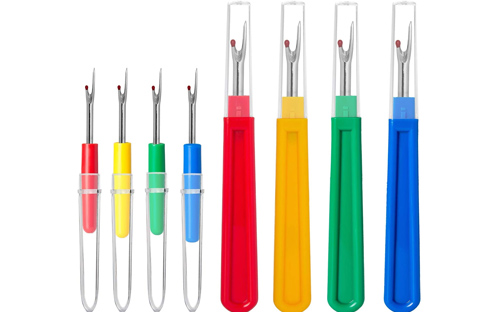 |
This is one of the helpful tool while working with threads. This tools helps to undoing fine stitching. This tools comes with sharp tip to cut thread and it comes with safety ball to protect the fabric. |
This nifty device has been around since ages ago & will always have its place within every sewing box imaginable because it does way more than just cut pieces of material off: pick them apart completely if necessary too!.
2. A tweezer:
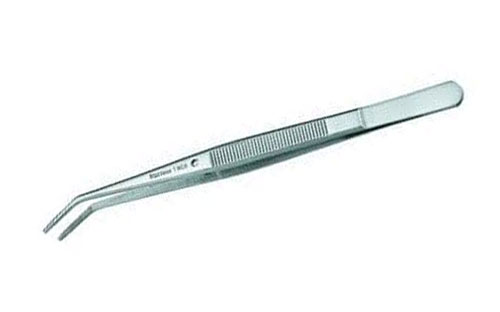 |
Tweezer helps as Sewing Machine Tweezers, Pulls thread through needles, Untangle threads from bobbin and bobbin case, Maintains a smooth running sewing machine and also can pick up pins, needles, etc.
We recommend this product: |
This small tool is really useful to remove embroidery works. These metal pinchers are useful for picking out stray fibers and threads, but be careful not to cut any loose ends! Once your done removing stitches with the seam ripper make sure that all pieces have been picked clean by using these small prongs in between ridges before cutting them off at their base so they don’t get caught on anything else while being disposed off safely later on when disposing of cloth upon which such decorations may still persist undiminished perchance indefinitely.
3. An Embroidery Eraser:
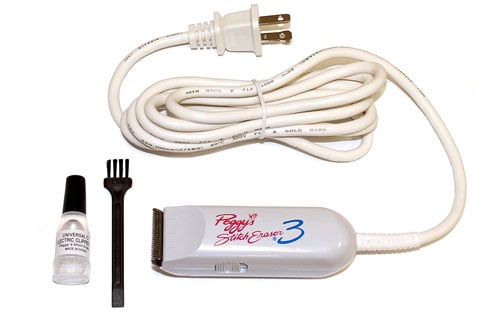 |
Portable stitch removal of embroidery is Lightweight and has powerful motor Specially engineered Blades to get under stitches, grab, and clip them. It assist in removing embroidery stitches in fabric without damage to material!
We recommend this product: |
The embroidery eraser or stitch eraser is a device that can be used to trim thread. If you’re looking for a quick and easy way to remove thread from your garment, this method is the best one.
It’s also much quicker than all of those other methods we’ve seen so far because it only takes few minutes to remove the sttiches.
Stitch erasers are great for removing stitches from any fabric without damaging the material. The stitch eraser works by cutting away any embroidery stitches with small “teeth.” You can do this on either fabric or paper surfaces; just make sure that when working flat against something like an ironing board — which helps keep everything in place while we work—you don’t move around too much since otherwise wounds could develop!
These Erasers were designed specifically to get under the dense machines as well as hand embroidery stitching and grab onto them! The major difference between these tools is in their blades; they have been engineered differently because getting underneath tough threads should be easy while still being able to remove pesky ones easily too.
All you have to do is turn your garment inside out, locate the backing and embroidery with care so as not to damage them. Run over each stitch multiple times using an eraser gently but thoroughly removing any loose threads that may be tangled up in it before turning back around right side out without snagging anything else on either end of course! Follow this same procedure for all seams stitches running along edges where they meet fabric.
Stitch erasers are recommended since their easy-to-see functionality makes using this product simple enough even if you’re not an expert stitcher; also because there are other advantages such as having only one minor detail: though perfectly suited towards those who work with larger pieces.
4. Electric Shaver:
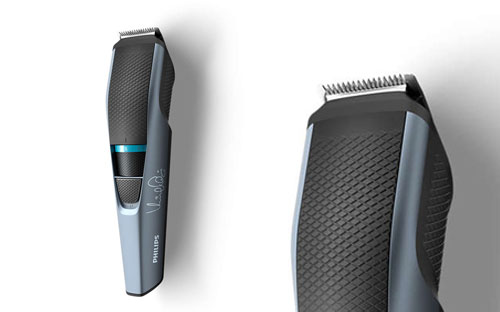
A stitch eraser is similar to an electric shaver in more ways than one. Many people have successfully removed embroidery with the help of this tool, which has metal teeth and looks like a pair of scissors!
To use them on your own garment simply follow these instructions: first, make sure that you are working on a flat surface so there won’t be any bumps or curves while running it along the fabric edge; second grasp both sides tight against each other making certain not let go until all stitching tracks have been smoothed out by moving slowly back-and-forth across the entire area being trimmed off.
Once it’s done, turn the garment and brush the loosened embroidery threads.
5. Manual Razor:
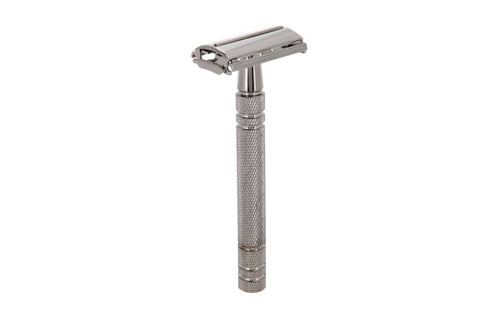
Another method we wanted to tell you about is the use of a manual razor. There are many different kinds, but some good ones include throw-away/one-use razors that can be found in most drug stores for this type of thing and also electric shavers which will work faster than stitch erasers or seam ripping depending on what’s available at your local sewing store.
The best way? Use an old-fashioned single-blade safety razor – these usually come with refill blades! Put one against each side while holding onto both handles tightly so they don’t slip through between fingers; carefully shave away all remaining stitching until there isn’t any left anymore…or else give up because it looks too hard.
If you want to make sure your garment stays securely attached, it’s best that the embroidery is always pulled taut and on a firm, flat surface to ensure that you accidentally do not shave some of the fabric too. The good news? Once all backing has been loosened up-we can start rubbing away at its remaining stitches from within!
6. Lint Brush:
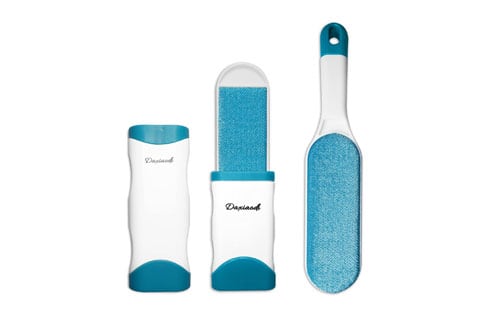 |
Lint Brushes shows excellent results in cleaning loose threads from clothes. Having a clean and neat garment has never been so easier! A double-sided lint brush removes the lint twice as fast as a one-sided lint brush. Reusable lint remover will serve for years. |
Another important tool you need is the lint brush. Once a thread has been cut, it left behind these fibers that stick to fabric and can be difficult for removing when trying to make an embroidery stitch on top of them! The problem becomes even worse if there are other threads stuck in between those pesky fibers from beforehand; but thanks to this amazing little gadget called “the Lint Brush,” all problems have been solved by now right?
You’ll want one with very soft bristles because anything else might scrub away at someone’s nice dress or shirt sleeve, which would not exactly endear our old friend here either way.
7. Magnifying Glass:
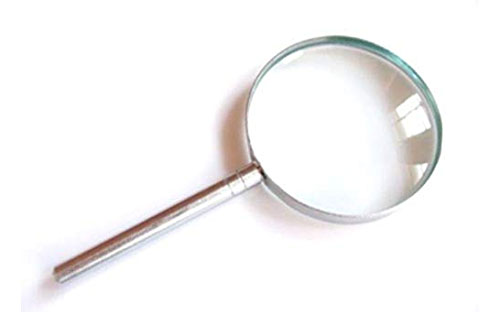
If you’re looking for a way to keep your stitches perfectly centered and straight, then this is it! The magnifying glass will make all the difference in seeing what’s underneath. It also comes with an LED light that illuminates dark areas so there are no surprises when cutting or sewing anything larger than our standard 1/4″ seam allowance (or whatever widths work based on project needs).
A great tool that can help both beginners as well professionals alike – don’t forget about how useful these little gems really are before purchasing one yourself!
Wikipedia: A magnifying glass is a convex lens that is used to produce a magnified image of an object. The lens is usually mounted in a frame with a handle. A magnifying glass can be used to focus light, such as to concentrate the sun’s radiation to create a hot spot at the focus for fire starting. Read More…
Some tips on removing the embroidery stitches:
You have been working on that embroidery for a while now, and it’s time to stop. Follow these 4 steps below so you can get rid of your unwanted stitching without any hassle!
-Gather all necessary equipment – Embroidery floss cutters in various sizes will be helpful here:
It’s important to be careful when using any sharp tools on your fabric because if you pull the threads too hard even unintentionally it might leave holes. In fact, there may already be some and by pulling harder with embroidery thread we could make them bigger!
Whatever tool or sewing machine that will help us is best used from behind so as not damage what shows the front of the garment.”
Use the tools with less pressure. If you are using a blade and exerting too much force on it, then there is likely to be puckering or tearing at worst.
When removing the embroidery, stop sewing when you meet a stabilizer or fixture that will become visible. Beyond this point just fabric should remain and use an embroidery hoop to keep your work tight so it is clear and easily removed.
I recommend practicing your embroidery and cutting skills on a garment that you don’t mind losing.
How to remove embroidery from clothes?
Removing embroidery from clothing works on a lot of different fabrics. Some are soft and stretchy, so you have to be careful when removing them because they can cause damage if handled incorrectly or over-stressed with forceps/clothes hangers etc.. To start off- here’s what materials I used:
All the above materials or tools can be used to remove the embroidery from clothes.
Process of removal embroidery from cloth:
Turn the cloth inside out. You need to cut away stitches from their opposite side, so hold it near yourself and place the embroidered part on the palm of the other hand while ensuring good view towards specific locations where removal is desired; for this process use Magnifying Glass.
You can cut at least 5 to 6 stitches a time. Use tweezers if needed and pull the loose threads gently until you feel one give without resistance, then stop pulling because this means your cut was through all sections of thread.
In order to avoid ruining your fabric, be sure not to get frustrated when removing embroidery.
Use a magnifying glass and check which part needs more trimming before cutting! Once you have cut all of the necessary stitches on one side for removal then flip it over so that there is no longer an obstruction between blade and fabric- if there still seems like some left after completing this step just repeat until done with the whole garment.
Once you have completed the cutting and pulling of threads, get a lint brush or roller. Then use this tool to wipe out any thread fiber remnants from your fabric!
The most important thing to remember when removing embroidery is that it should be done carefully. You’ll want the fabric looking pristine, so avoid getting any of those pesky threads caught up in fabric!
Be careful not to damage delicate surfaces because time-consuming extraction can take hours instead of minutes.
Read on the post “What Is The Best Fabric For Hand Embroidery? 6 Best Options To Choose“. This article covers the Characteristics and different types of fabric, including natural fibers like cotton or silk.
Will Removing Embroidery Leave Holes?
Removing embroidery can leave holes in the fabric. The threading through those stitches creates spaces on top of one another that are normal for woven materials, but they’re not meant to hold up long-term wear; as time goes on these gaps will widen more and become visible against your outfit (or even worse – show thru).
Removing Embroidery may cause holes where those small bits have been pulled apart as well- depending on what kind of materials they were made out off! In many cases though small hole with no exposed threads only needs some light tugging/pulling and by using water works just fine.
How to Remove Embroidery Marks?
Embroidery marks are not always easy to remove, but there are some solutions. To remove embroidery marks, you can use the iron to straighten out your fabric’s fibers or gently scratch at it with a spoon. For best results, avoid any type of rubbing motion when doing so in order not damage them permanently!
How to Remove Embroidery with Backing?
It is possible to remove embroidery with backing without any hassle. Follow the steps listed above, but first, you must peel off and discard of the backing from your fabric.
Conclusion:
Conclusion paragraph: Whether you are interested in adding embroidery to your clothing or not, the question of whether it can be removed is something worth considering. If you decide that an item with embroidery does not suit your style anymore and want to remove it, there are a few different methods for doing so depending on what type of fabric the garment is made from.
For example, if you have silk blouse that has been embellished with sequins by hand then this may require more effort than simply removing stitching from cotton fabrics like denim jeans. The good news is that regardless of which material the article of clothing is sewn together with, all types will react well when exposed to hot water and soap! Have any questions about removal? Let us know in the comments below.